
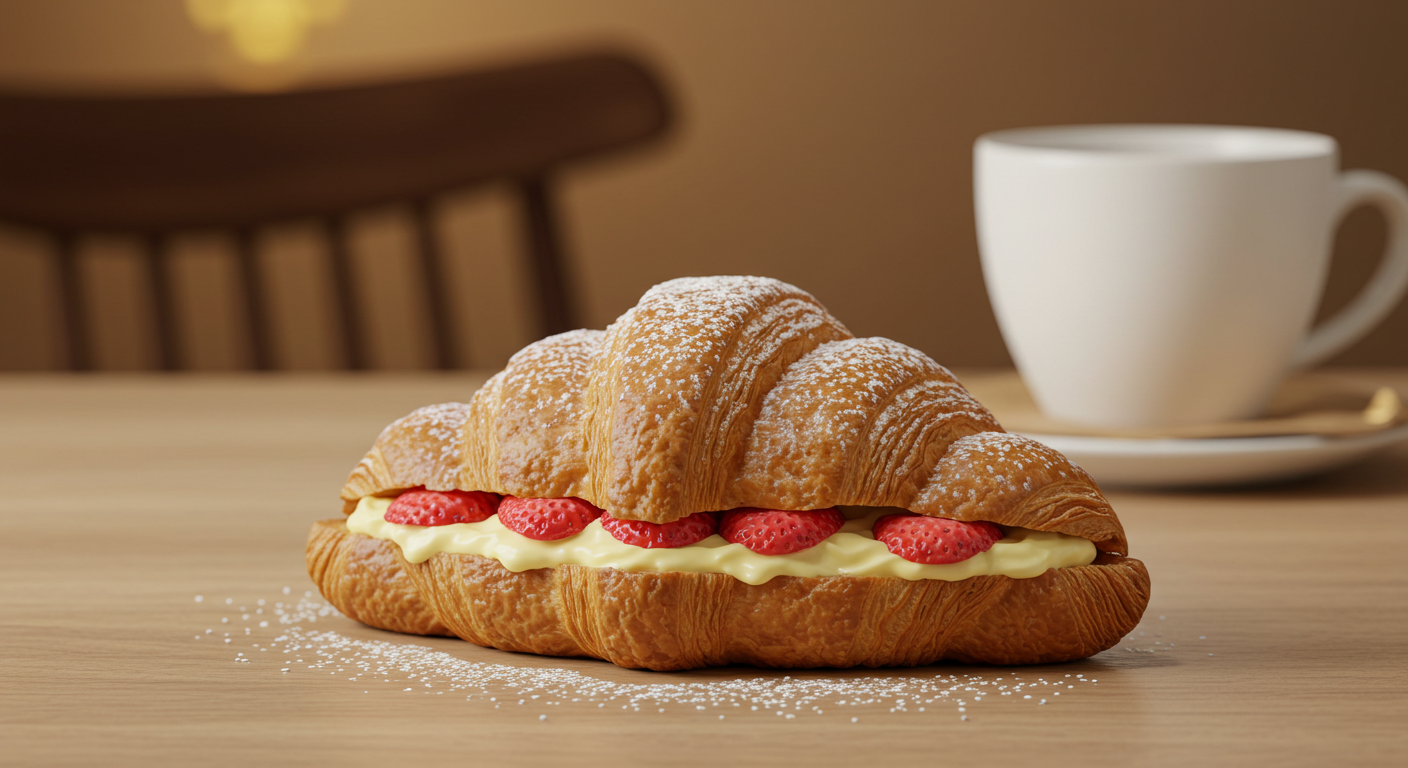
Welcome to a world where decadence meets simplicity in every bite—the pastry we’re discussing today is a culinary experience that combines unique flavors in an unexpected way.
Strawberry Cream Cheese Croissants: Selecting and Preparing the Star Ingredient

Choosing the Best Strawberries: The key to the perfect strawberry cream cheese croissant is starting with the best strawberries. Look for ripe, bright red berries that are firm, plump, and free of bruises. The size of the strawberries can affect the texture and distribution of your filling, so opt for medium-sized berries that will blend smoothly and distribute evenly throughout the cream cheese mixture.
Preparation Techniques: Once you’ve selected your strawberries, proper preparation is crucial. Wash the berries gently under cold water and pat them dry with a paper towel to prevent sogginess. Hull the strawberries by removing the green cap and the white core, which can be bitter. This step ensures that your croissant filling will have the sweet, pure flavor of strawberries without any fibrous interruptions.
Enhancing Flavor with Maceration: To intensify the flavor and draw out the natural juices, consider macerating your strawberries before adding them to the cream cheese. Simply slice the strawberries and toss them with a spoonful of sugar. Let them sit for about 30 minutes. This process not only enhances their natural sweetness but also creates a syrup that can be incorporated into the filling for added flavor and moisture.
Consistency is Key: For a smooth filling, puree the macerated strawberries or chop them finely before mixing them with the cream cheese. If you prefer a bit of texture in your filling, coarsely chopping the strawberries will add small, succulent bursts of flavor in every bite.
Croissants Cream Cheese: Achieving the Perfect Consistency and Flavor

Selecting the Right Cream Cheese: The cream cheese you choose is as crucial as the strawberries themselves. For the smoothest, richest filling, opt for full-fat cream cheese, which provides a creamy texture and a stable base for incorporating flavors. Avoid low-fat or whipped varieties as they tend to contain more moisture and can result in a runny filling that could make your croissants soggy.
Preparing the Cream Cheese: To ensure your cream cheese blends seamlessly with the strawberries and other ingredients, it should be at room temperature before mixing. Cold cream cheese can be lumpy and difficult to combine, so set it out on the counter for at least an hour before you begin your preparation.
Enhancing the Flavor: Plain cream cheese can be a blank canvas for flavor. Consider enhancing it with a pinch of salt, a splash of vanilla extract, or even a zest of lemon or orange to complement the sweetness of the strawberries. These additions can subtly elevate the overall flavor profile of your filling without overpowering the delicate taste of the fresh strawberries.
Mixing for Uniform Texture: When combining the cream cheese with the prepared strawberries, use a hand mixer or a sturdy whisk to ensure the mixture is smooth and homogeneous. This is key to distributing the flavor evenly and achieving a silky texture in every bite. If you’re using macerated strawberries, gently fold in the syrup to maintain the airy quality of the cream cheese while infusing it with strawberry flavor.
Testing Consistency: Before filling your croissants, do a quick consistency check. The mixture should be thick enough to hold its shape when piped but not so stiff that it doesn’t blend easily with the strawberries. If it’s too thick, a splash of cream can loosen it up; if too runny, a little more cream cheese can be added to thicken it.
Croissant Dough: The Foundation of Flaky Perfection

Choosing Your Approach: When it comes to croissant dough, you have two main options—making it from scratch or using a high-quality store-bought dough. For those new to baking, pre-made dough can be a great way to simplify the process and still achieve excellent results. However, for the full artisanal experience, crafting your dough from scratch allows for complete control over the texture and flavor.
Making Dough from Scratch: Creating your own croissant dough involves a process known as laminating, which is the technique of folding butter into the dough multiple times to create thin layers. Start with a basic dough made from flour, water, a little sugar, yeast, and salt. The key to perfect lamination is maintaining the butter’s firmness without letting it harden. If the butter is too soft, it will merge into the dough and lose the layering effect; if too hard, it will tear through the dough layers.
Rolling and Folding Techniques: Roll out your dough into a rectangle, then place a slab of chilled but pliable butter over two-thirds of the dough. Fold the unbuttered third over the middle third, and then fold the buttered third over the top, like folding a letter. This is your first turn. Rotate the dough 90 degrees and repeat this process for a total of 3 to 4 turns, chilling the dough for about 30 minutes between each to keep the butter from melting.
Resting the Dough: Proper resting is crucial. Rest the dough in the refrigerator after each set of folds to relax the gluten and maintain the butter’s consistency. This resting period helps ensure that the dough doesn’t shrink back when you cut and shape it into croissants.
Cutting and Shaping: Once your layers are complete and the dough has rested, cut it into long triangles. Roll each triangle from the base to the tip to shape it into the classic croissant silhouette. Ensure the tip of the triangle is tucked under the rolled dough to prevent it from unrolling during baking.
Proofing: Before baking, croissants need to be proofed. This final rise is crucial as it allows the shaped dough to puff up, ensuring that the layers separate beautifully in the oven. The dough should appear noticeably puffed and feel soft to the touch.
Mixing the Dough: The Art of Creating the Perfect Base
Gathering Ingredients: The quality of your croissant begins with the ingredients. For the dough, you’ll need strong bread flour, which has a higher protein content to support the layers you’ll create through lamination. You’ll also need water, milk, sugar, salt, yeast, and butter. The sugar and salt not only flavor the dough but also control yeast activity, ensuring that the dough rises predictably.
Activating the Yeast: Start by activating the yeast to ensure it’s alive and ready to help your dough rise. Dissolve a small amount of sugar into warm milk (around 105°F to 115°F; too hot will kill the yeast, too cold won’t activate it). Sprinkle the yeast over the milk and let it sit until it becomes foamy, about 5 to 10 minutes.
Combining the Dry Ingredients: In a large mixing bowl, whisk together the flour, the remaining sugar, and salt. This disperses the ingredients evenly before they interact with the wet ingredients, which helps achieve a uniform texture in the dough.
Mixing Wet and Dry Ingredients: Make a well in the center of your dry ingredients and pour in the activated yeast mixture. Start mixing slowly, gradually incorporating the flour from the sides of the bowl. As the dough begins to form, add small pieces of softened butter. The butter should be at room temperature to blend seamlessly into the dough without needing to be melted, which can affect the texture of your dough.
Kneading the Dough: Once all ingredients are roughly combined, turn the dough out onto a lightly floured surface. Knead it by hand or with a dough hook in a stand mixer on a low setting. Proper kneading is crucial as it develops the gluten in the flour, giving the dough its elastic and stretchy texture, which is essential for creating thin layers of dough and butter. Knead until the dough is smooth, elastic, and slightly tacky, but not sticky, about 10 to 15 minutes.
First Rest: After kneading, shape the dough into a ball and place it in a lightly oiled bowl. Cover it with plastic wrap and let it rest in a cool place for at least an hour, or until it doubles in size. This first rise is called bulk fermentation, and it develops the dough’s flavor and structure before you begin the laminating process.
Resting and Laminating: Key Steps for Layered Perfection
Resting the Dough: After the initial mixing and kneading, the dough needs to rest. This resting period allows the gluten strands in the dough to relax, making it easier to roll out without shrinking back. Cover the dough and place it in the refrigerator for at least 2 hours, or ideally overnight. This slows the yeast activity but does not stop it, allowing the flavors to develop more complexity while the dough becomes more manageable.
Preparing for Lamination: Before you begin laminating, it’s crucial to prepare your butter block. The butter should be cold yet pliable—similar in texture to the dough itself to ensure it folds smoothly without tearing the layers. You can achieve this by beating cold butter between two sheets of parchment paper into a flat rectangle about 1/4-inch thick. The size of the butter block should be roughly two-thirds the size of the rolled-out dough.
The Laminating Process: Remove the rested dough from the refrigerator and roll it into a rectangle on a lightly floured surface. Place the butter block on the lower two-thirds of the dough rectangle, leaving a margin at the edges. Fold the top third down over the middle third and then the bottom third (with the butter) over the top, like folding a letter. This completes the first fold or “turn.”
Completing the Turns: After the first turn, rotate the dough 90 degrees. Roll it out into a rectangle again, and perform another letter fold. This process of rolling and folding is what creates the hundreds of thin layers of butter and dough that are characteristic of croissants. After each turn, wrap the dough in plastic and chill it for at least 30 minutes to keep the butter from melting and to relax the gluten. Typically, croissant dough requires three to four turns, but some recipes may call for more to create even more layers.
Maintaining Temperature and Handling: It’s essential to maintain the right dough temperature during lamination. If the dough becomes too warm, the butter may begin to melt, causing it to absorb into the dough and ruining the distinct layers. If at any point the dough or butter feels too soft, return it to the refrigerator to firm up. Handle the dough gently and quickly to minimize warming from your hands.
Final Rest Before Shaping: After completing all the turns, let the dough rest again in the refrigerator for at least an hour or up to overnight. This final rest firms up the butter and sets the layers, ensuring that when you cut and shape your croissants, they retain their structure and rise beautifully in the oven.
Cutting and Shaping: Sculpting Your Pastries to Perfection
Preparing the Dough: After the final rest, your laminated dough is ready to be transformed into croissants. Begin by lightly flouring your work surface and gently rolling out the dough into a large rectangle. The thickness should be about 1/4 inch; this ensures that your croissants are not too thick to bake properly or too thin to hold the filling.
Cutting the Triangles: Use a sharp knife or a pizza cutter to trim any uneven edges from your dough rectangle, ensuring that the layers are exposed only at the cut sides. Cut the dough into long, even triangles. Each triangle will form one croissant, so the base should be about 3 to 5 inches wide, and the opposite, the pointed tip, should be sharp and intact. This shape helps create the classic crescent form once rolled.
Stretching and Shaping: Before rolling, gently stretch the base of the triangle to widen it slightly. This helps increase the length of the dough, which makes for a more pronounced spiral and a fluffier texture. Carefully roll the triangle from the base towards the point, ensuring that the tip is tucked underneath the body of the rolled dough to secure it. Apply gentle pressure with each roll to keep the layers intact but not so much as to compress them completely.
Curving Into Crescents: Once rolled, bend the ends of each croissant toward each other to form a crescent shape. This not only gives croissants their characteristic look but also helps them maintain their shape during baking.
Proofing the Shaped Croissants: Arrange the shaped croissants on a baking sheet lined with parchment paper, leaving enough space between each for them to expand. Cover them lightly with a clean kitchen towel and set them aside in a warm, draft-free area to proof. During this final rise, the croissants should nearly double in size and feel noticeably softer to the touch. This stage is crucial as it develops the final texture and volume of the pastries.
Final Touches Before Baking: Once proofed, brush the croissants with an egg wash (a beaten egg with a little water or milk). This gives them a beautiful golden finish and helps achieve a crispy outer crust. Be gentle with the brush to avoid deflating the dough.
Preheat and Bake: Preheat your oven to the temperature specified by your recipe—typically between 375°F to 400°F (190°C to 205°C). Bake the croissants until they are puffed up and golden brown, which usually takes about 15 to 20 minutes depending on their size and your oven.
Mixing Technique: Crafting the Perfect Strawberry Cream Cheese Filling
Achieving a Smooth Blend: The key to a perfect strawberry cream cheese filling lies in achieving a smooth and uniform texture. Begin by ensuring that your cream cheese is at room temperature. This makes it easier to mix and less likely to clump. Use a stand mixer fitted with a paddle attachment or a hand mixer set on a medium speed to beat the cream cheese until it is creamy and smooth, with no lumps.
Incorporating the Strawberries: Once your cream cheese is prepared, gently fold in the prepared strawberries. If you’re using fresh strawberries that have been finely chopped or pureed, ensure they are well-drained to prevent excess moisture from making the filling too runny. If you’ve macerated your strawberries, fold them in along with a bit of the syrup for added flavor. Mix gently to maintain some of the strawberries’ texture, or blend thoroughly for a smoother filling.
Adding Flavor Enhancers: At this stage, consider enhancing the filling with additional flavors. A teaspoon of vanilla extract or a splash of lemon juice can complement the sweetness of the strawberries and the richness of the cream cheese. For a hint of citrus, add the zest of one lemon or orange, which will provide a fresh, bright note to the filling.
Testing Consistency: After all ingredients are combined, test the consistency of the filling. It should be creamy but thick enough to hold its shape when spooned onto the croissants. If the filling is too thin, you can add more cream cheese or a small amount of a thickening agent like cornstarch dissolved in water. If it’s too thick, a little heavy cream or milk can be mixed in to achieve the desired texture.
Chilling Before Use: Chill the filling in the refrigerator for at least 30 minutes before using it. This helps the flavors meld together and firm up the filling, making it easier to handle and distribute when filling the croissants.
Filling the Croissants: When ready to use, transfer the filling to a piping bag fitted with a wide nozzle. Pipe the filling along the center of the unrolled croissant dough before rolling, or inject it into already baked croissants using a small tip. The goal is even distribution so that each bite has a harmonious blend of flavors.
Flavor Enhancements: Elevating Your Filling
Introduction to Flavor Enhancements: While the combination of strawberries and cream cheese already provides a delicious taste, adding a few simple enhancements can elevate the filling to a new level of flavor. These additions help to balance the sweetness and bring out the richness of the cream cheese, making each bite more dynamic and enjoyable.
Vanilla Extract: A splash of vanilla extract is a classic choice that complements both the strawberries and the cream cheese. It adds a subtle depth and warmth to the filling. Use pure vanilla extract rather than imitation for the best flavor, adding it to the cream cheese before you mix in the strawberries to ensure it’s evenly distributed.
Citrus Zest: The zest from lemons or oranges can add a fresh, tangy kick to the filling, which cuts through the richness of the cream cheese and highlights the sweetness of the strawberries. Grate the zest finely to avoid any bitterness and fold it into the mixture last to preserve its aromatic oils.
Spices: Incorporating spices like cinnamon, nutmeg, or cardamom can introduce a warm, spicy element that pairs wonderfully with the fruit and dairy components. These spices should be used sparingly to prevent overpowering the primary flavors—just a pinch will suffice.
Almond Extract: For a nutty undertone that complements the buttery layers of the croissant, a small amount of almond extract can be very effective. This works particularly well if you’re using almond flour in your dough or topping the croissants with sliced almonds before baking.
Liqueurs or Flavored Syrups: For an adult twist, consider adding a small amount of a fruit-flavored liqueur or syrup, such as Chambord (raspberry liqueur) or Grand Marnier (orange-flavored). These should be added in small quantities to the strawberries before they are mixed with the cream cheese to integrate the flavor without making the filling too liquid.
Herbs: Fresh herbs like basil or mint finely chopped can offer a surprising contrast to the sweetness of the strawberries and the tanginess of the cream cheese. These are best added fresh and not too early in the mixing process to maintain their vibrant color and flavor.
Testing and Adjusting: After adding any flavor enhancements, it’s crucial to taste the filling and adjust according to your preferences. Add more sweetness, spice, or acidity as needed, keeping in mind that the flavors will meld and develop further as the filling chills.
Chilling for Flavor Development: Allow the filling to chill in the refrigerator after mixing in your enhancements. This not only helps the texture but also lets the flavors meld together, resulting in a more cohesive and rich taste in your final product.
Filling the Croissants: Techniques for a Perfectly Stuffed Pastry
Preparing the Filling: Before you begin filling your croissants, ensure your strawberry cream cheese filling is well chilled and has the correct consistency. It should be firm enough to hold its shape but soft enough to be piped easily. Transfer the filling to a piping bag fitted with a wide nozzle to facilitate easy and even distribution.
Filling Unbaked Croissants: If you are filling the croissants before baking (ideal for ensuring the flavors meld beautifully during the baking process), begin by laying out your cut and shaped croissant dough on the work surface. Pipe a generous stripe of filling along the center of each dough triangle just before you roll them up. Start from the wide end of the triangle and carefully roll towards the point, ensuring the filling remains neatly contained. Once rolled, curve the ends to form the traditional crescent shape.
Sealing to Prevent Leakage: Pinch the dough lightly at the ends to seal in the filling. This step helps prevent the filling from leaking out during the baking process, ensuring that each croissant maintains its shape and fullness.
Filling Baked Croissants: For already baked croissants, use a small, sharp knife to make a small incision along the side of each croissant. Be careful not to cut all the way through. Insert the nozzle of your piping bag into the slit and gently squeeze the filling into the hollow interior of the croissant. Fill just until the croissant begins to expand slightly, indicating that the cavity is full.
Visual and Tactile Cues: When filling baked croissants, you can often feel the pastry puff out slightly under your fingers. This is a good indicator that the croissant is adequately filled. Be mindful not to overfill, as this can cause the filling to burst out and make the croissant soggy.
Finishing Touches: After filling, you can dust the croissants with powdered sugar or drizzle them with a glaze to enhance their appearance and add an extra layer of sweetness. This step is especially appealing if serving the croissants as part of a brunch or dessert.
Serving Suggestions: Serve the filled croissants fresh for the best texture and flavor. If you need to prepare them in advance, store them in an airtight container at room temperature for up to one day, or refrigerate them if keeping for longer. Warm them slightly in the oven before serving to rejuvenate the flakiness of the pastry and the richness of the filling.
Oven Temperature and Timing: Ensuring Perfectly Baked Croissants
Setting the Right Temperature: The temperature at which you bake your croissants is critical for achieving the perfect rise and color. Generally, croissants are baked at a relatively high temperature to ensure that the butter in the dough creates steam quickly, which helps to lift and separate the layers, resulting in a flaky texture. A temperature range of 375°F to 400°F (190°C to 205°C) is ideal. The higher heat helps to set the shape quickly and caramelizes the sugars on the surface for a golden and crispy exterior.
Preheating the Oven: Always preheat your oven to the desired temperature before baking your croissants. An adequately heated oven is crucial for immediate lift and texture development. Use an oven thermometer to check the accuracy of your oven’s settings, as some ovens can be off by a significant amount, which might affect baking results.
Positioning in the Oven: Position the baking sheet in the middle rack of the oven. This placement ensures even circulation of heat around the croissants, preventing the bottoms from burning or the tops from browning too quickly. If your oven has hot spots or uneven heating, rotate the baking sheet halfway through the baking process to ensure uniform color and texture.
Baking Time: The exact time will depend on the size of your croissants and your specific oven, but generally, croissants take about 15 to 20 minutes to bake. Start checking them at the 15-minute mark. You are looking for a deep golden brown color, not just a light golden. The croissants should look puffed up with visible, distinct layers, and they should feel light for their size when picked up.
Visual and Aromatic Cues: In addition to color, use the aroma as a cue. The croissants will start to emit a rich, buttery smell when they are nearly done. This is a good indicator that you should watch them closely to avoid overbaking.
Cooling Down: Once baked, remove the croissants from the oven and transfer them to a cooling rack immediately. This stops the baking process and prevents the bottoms from becoming soggy from steam accumulating under the croissants. Allow them to cool for a few minutes before serving, as this short resting period helps the structure to set and makes them easier to handle.
Troubleshooting Common Issues: If your croissants are browning too quickly but aren’t baked through, cover them loosely with aluminum foil to prevent further browning while they finish baking. If they aren’t browning enough, check your oven temperature and consider leaving them in for a few additional minutes or increasing the temperature slightly.
Visual Cues: Mastering the Art of Perfect Baking by Sight
Understanding the Importance of Visual Cues: Visual cues are essential in baking as they often provide the first indication of how well your pastries are progressing. Learning to read these cues can help you achieve consistently excellent results, even when other variables like oven temperature or humidity may vary.
Color Development: The most critical visual cue for croissants is the color. You’re aiming for a rich, golden brown that’s uniform across the surface. The tips and edges might darken a bit faster, which is normal, but they shouldn’t burn. A pale croissant may not have fully developed its flavors and textures, while an overly dark one could taste burnt.
Layer Separation: As the croissants bake, watch for the layers to start separating and puffing up. This is a good sign that the steam created by the butter is effectively pushing the layers apart, which is key for light, airy croissants. The layers should appear distinct and well-defined, not smeared or fused together, which can indicate insufficient lamination or an oven that’s not hot enough.
Volume Expansion: Croissants should nearly double in size from their proofed state once fully baked. This expansion is another crucial visual cue. If the croissants don’t expand much, this could suggest issues with the yeast activity or underproofing before baking.
Surface Texture: The surface of the croissant should look slightly shiny and have a crisp appearance once they are done. This shine often comes from the egg wash applied before baking, which caramelizes and creates a glossy finish. If the croissants look matte, they may not have baked long enough, or the egg wash might have been applied too sparingly.
Posture and Shape: The final posture of a croissant should be slightly uplifted, with the ends curving upwards. This “smiling” shape indicates good lamination and proper heat exposure during baking. A flat or droopy croissant often indicates a lack of oven spring or dough that was too slack due to overproofing or poor gluten development.
Cooling and Handling: After removing them from the oven, observe how the croissants behave on the cooling rack. They should hold their shape and not deflate or collapse, which can sometimes happen if they are moved or handled too soon after baking.
Utilizing All Senses: While visual cues are incredibly helpful, combining them with other senses like smell and touch will give you the most accurate read on your baking progress. The croissants should smell buttery and toasted, and they should feel light and sound hollow when tapped gently.
Cooling and Handling: Preserving Texture and Quality
Cooling Immediately After Baking: The moment your croissants are removed from the oven, the cooling process begins. Place them on a wire cooling rack as soon as possible. This prevents the buildup of steam underneath the croissants, which can make the bottoms soggy. The cooling rack allows air to circulate freely around the pastries, helping them cool evenly and maintain their crisp exterior.
Handling With Care: Croissants are most vulnerable when they first come out of the oven due to their light, airy structure. Handle them gently to avoid crushing or deforming the layers. Use a spatula to transfer them from the baking tray to the cooling rack, and try to avoid squeezing or pinching them, which could collapse the delicate layers you’ve worked so hard to create.
Optimal Cooling Time: Allow the croissants to cool for at least 15 to 20 minutes before serving. This waiting period lets the structure of the croissants set and stabilizes the interior crumb, making them easier to slice or fill, if you haven’t already done so before baking. However, croissants are best enjoyed while still slightly warm, when they are at their flakiest and most flavorful.
Serving Suggestions: If you’re serving the croissants immediately, they can be enjoyed as is or with additional accompaniments like jam, honey, or butter. For filled croissants, ensure they are cool enough that the filling doesn’t melt or become too runny when added, unless the filling is intended to be warm.
Storing for Later Use: If you won’t be serving the croissants right away, wait until they are completely cool before storing them to avoid condensation which can make the pastries soggy. Store them in an airtight container at room temperature for up to 24 hours. For longer storage, wrap each croissant individually in plastic wrap and then place them in a freezer bag or airtight container and freeze for up to 2 months. Reheat in the oven at 350°F (175°C) until they are warm throughout and have regained their crisp exterior.
Reheating Tips: When reheating, avoid using a microwave as it can make the croissants chewy and soft. Instead, reheat them in a conventional oven or toaster oven to restore their original texture. If they have been frozen, there is no need to thaw them before reheating; they can go straight into the oven, which will help preserve their buttery layers.
Garnishing for Extra Appeal: Enhancing Visuals and Flavors
Introduction to Garnishing: The final touches on your strawberry cream cheese croissants can significantly enhance their visual appeal and add layers of flavor. Thoughtful garnishing not only makes your pastries more enticing but can also complement and elevate the existing flavors.
Sugary Finishes: A light dusting of powdered sugar just before serving adds a delicate sweetness and a sophisticated look, making the croissants instantly more appealing. For a crunchier texture and a more pronounced sweetness, you could sprinkle granulated sugar or demerara sugar on the croissants just before their final few minutes in the oven, which caramelizes slightly for a shiny, crisp topping.
Drizzles: A drizzle of glaze can make your croissants look bakery-fresh and irresistible. Consider a simple vanilla glaze made from powdered sugar, milk, and vanilla extract, or a strawberry glaze to reinforce the strawberry theme. For a richer finish, a drizzle of melted chocolate or a light caramel sauce could be very appealing, especially if serving as a dessert.
Fresh Fruit: Adding slices of fresh strawberries on top or around your croissants not only ties in the strawberry theme visually but also provides a burst of fresh flavor and texture contrast. This is particularly effective for croissants that are served open-faced or have a split for filling.
Herbs for Aroma and Color: A small sprig of mint or basil can add a pop of color and a hint of aroma that complements the sweet filling, enhancing the overall sensory experience of eating the croissant.
Nuts for Texture: For a bit of crunch and nutty flavor, sprinkle finely chopped almonds or pistachios over the croissants after glazing. The nuts stick to the glaze, adding both texture and flavor that works well with the fruit and cream cheese.
Edible Flowers: For special occasions, edible flowers such as violets, rose petals, or pansies can add a unique and elegant touch. Choose flowers that are safe to eat and free of pesticides, and use them sparingly to decorate the plate or the croissants themselves.
Serving Style: When presenting your croissants, consider the plate or serving tray as part of the garnish. A colorful plate can enhance the visual appeal of the croissants, and arranging them in an attractive pattern can make them even more inviting.
Pairing Suggestions: Complementing Your Croissants with Thoughtful Accompaniments
Introduction to Pairing: Pairing your strawberry cream cheese croissants with complementary beverages and side dishes can elevate the entire dining experience, whether it’s a casual brunch or a more formal gathering. The right pairings enhance the flavors of the croissants and balance the meal.
Coffee and Tea: Hot beverages are classic companions to pastries. A freshly brewed coffee, whether a deep espresso or a lighter Americano, can complement the sweetness of the croissants with its bitter notes, creating a balanced taste. For tea lovers, a black tea like Earl Grey with its hint of citrus, or a herbal berry tea can harmonize beautifully with the strawberry and cream cheese flavors.
Fruit Juices and Smoothies: For a refreshing complement, offer a glass of cold fruit juice such as orange or apple, which provides a tart contrast to the rich pastry. A berry smoothie made with strawberries, blueberries, and a hint of yogurt can also be a delightful match, echoing the berry notes in the croissants.
Sparkling Beverages: A glass of sparkling wine or champagne adds a touch of elegance to any brunch setting and pairs wonderfully with the light, airy texture of croissants. For a non-alcoholic option, sparkling water with a twist of lemon or a splash of cranberry juice offers a refreshing alternative.
Light Salads: Pairing a sweet and rich pastry with a light, acidic salad can provide a pleasant contrast. Consider salads with fresh greens, vinaigrette dressing, and elements like goat cheese, nuts, and fresh fruits. A simple arugula salad with a lemon dressing, almonds, and berries would complement the croissants nicely.
Savory Sides: If the croissants are part of a broader meal, consider savory sides such as a plate of mixed charcuterie, cheese, or smoked salmon. These protein-rich components balance the sweetness of the croissants and add a savory touch that is particularly satisfying.
Yogurt or Quiche: For those who enjoy a balance of sweet and savory in the same meal, serving your croissants with a side of Greek yogurt topped with honey and nuts, or a slice of quiche with a flaky crust, can round out the brunch menu beautifully.
Dessert Wines: If serving the croissants as part of a dessert, a sweet dessert wine like a Riesling or a Moscato can be a wonderful accompaniment. These wines are sweet enough to complement the dessert without overpowering it.
Customizing Your Pairings: Encourage your readers to experiment with these pairings to find what best suits their taste and the specific occasion. Reminding them that the best pairing is one that delights their palate and enhances their enjoyment of the meal.
Serving Tips: Maximizing Enjoyment of Your Croissants
Timing is Everything: Croissants are best served warm, when they are at their flakiest and the cream cheese is slightly melted, enhancing its creamy texture. Time your baking so that you can serve the croissants shortly after they come out of the oven, or if you’ve prepared them ahead of time, reheat them gently before serving.
Reheating: If you need to reheat croissants, place them in a preheated oven at 350°F (175°C) for about 5 to 10 minutes. This helps to restore their original texture without overcooking them. Avoid using a microwave as it can make the pastry soggy and chewy.
Presentation: Serve your croissants on a decorative platter or individual plates. If you’ve applied garnishes, ensure they are visually appealing and strategically placed. A light dusting of powdered sugar or drizzles of sauce should look intentional and neat.
Cutting for Service: If your croissants are filled, consider cutting one in half to show off the delicious filling inside. This not only makes them more enticing but also makes it easier for guests to eat, especially if you are serving them as part of a larger brunch or buffet.
Accompaniments: Provide a variety of spreads and toppings even if the croissants are already filled. Offer small bowls of jam, honey, or even softened butter. For a savory twist, consider including creamy dips or a soft cheese spread. These options allow guests to customize their croissants to their liking.
Beverage Pairings: As mentioned in the pairing suggestions, consider serving your croissants with coffee, tea, fruit juices, or even champagne, depending on the occasion. Ensure that the beverages are ready to be served as soon as the croissants are ready to maximize the enjoyment of the warm pastries.
Portion Control: Croissants are rich and filling, so consider the size of the portions. If they are part of a larger meal, you might want to serve smaller or half-portions to leave room for other dishes.
Informing Your Guests: Let your guests know about the specific fillings and any unique ingredients you used in the croissants. This not only helps with dietary restrictions but also enhances the guests’ appreciation for the specialty items they are enjoying.
Ambiance: Finally, consider the dining environment. Soft background music, fresh flowers, or elegant table settings can enhance the meal experience, making the simple act of eating croissants feel like a special event.