

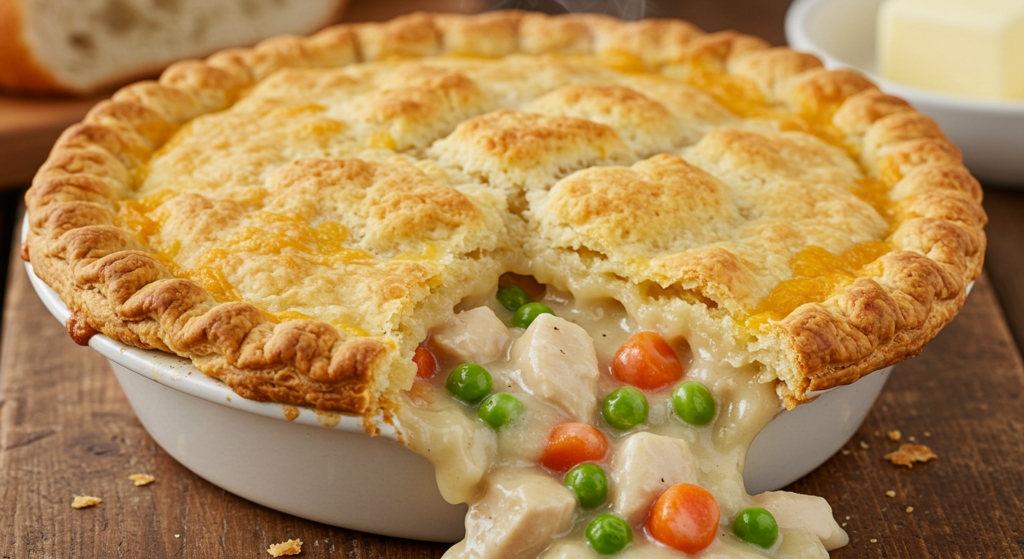
If you’re a fan of rich, creamy comfort food and crave the buttery, cheesy goodness of Cheddar Bay Biscuits, then this Heavenly Cheddar Bay Biscuit Chicken Pot Pie is about to become your new favorite dish! Imagine tender, juicy chicken and savory vegetables smothered in a silky, herb-infused sauce, all topped with fluffy, golden-brown Cheddar Bay Biscuits that are crisp on the outside and melt-in-your-mouth soft on the inside.
This recipe takes the classic chicken pot pie and gives it an irresistible upgrade by replacing the traditional crust with garlic-infused, cheesy biscuits inspired by the famous Red Lobster Cheddar Bay Biscuits. The result? A dish that’s comforting, indulgent, and packed with flavor in every bite.
Whether you’re looking for a cozy weeknight dinner, a special meal to impress guests, or a satisfying make-ahead dish, this recipe checks all the boxes. Plus, it’s easy to make, customizable with your favorite ingredients, and can be prepared ahead of time for a stress-free meal.
So grab your skillet, whip up this decadent, cheesy masterpiece, and get ready to enjoy the ultimate comfort food experience—because once you try this Heavenly Cheddar Bay Biscuit Chicken Pot Pie, you’ll never want plain pot pie again! 🍽️✨
A Comfort Food Classic with a Twist
When you think of chicken pot pie, you probably picture the classic version with a flaky, buttery pie crust enveloping a rich and creamy filling made with chicken, vegetables, and a luscious sauce. While that traditional version is undeniably delicious, sometimes it’s fun to put a modern spin on comfort food—and that’s exactly what this Cheddar Bay Biscuit Chicken Pot Pie does!
Instead of the usual pastry crust, this recipe features a golden, cheesy, and buttery Cheddar Bay Biscuit topping. These garlic-infused biscuits add an extra depth of flavor, transforming the dish into something even more decadent and satisfying.
Why This Version Stands Out
- The Best of Both Worlds – You get the warm, creamy goodness of a chicken pot pie combined with the cheesy, garlicky, and buttery delight of Cheddar Bay Biscuits. It’s a match made in comfort food heaven!
- More Flavor in Every Bite – Traditional pot pie crusts can sometimes be bland, but with sharp cheddar cheese and a hint of garlic in the biscuits, each bite is packed with rich, savory flavor.
- A Nostalgic Yet Unique Dish – If you love Red Lobster’s famous Cheddar Bay Biscuits, this recipe gives you a way to enjoy them in a totally new, unexpected form.
The Biscuit Topping: A Game-Changer
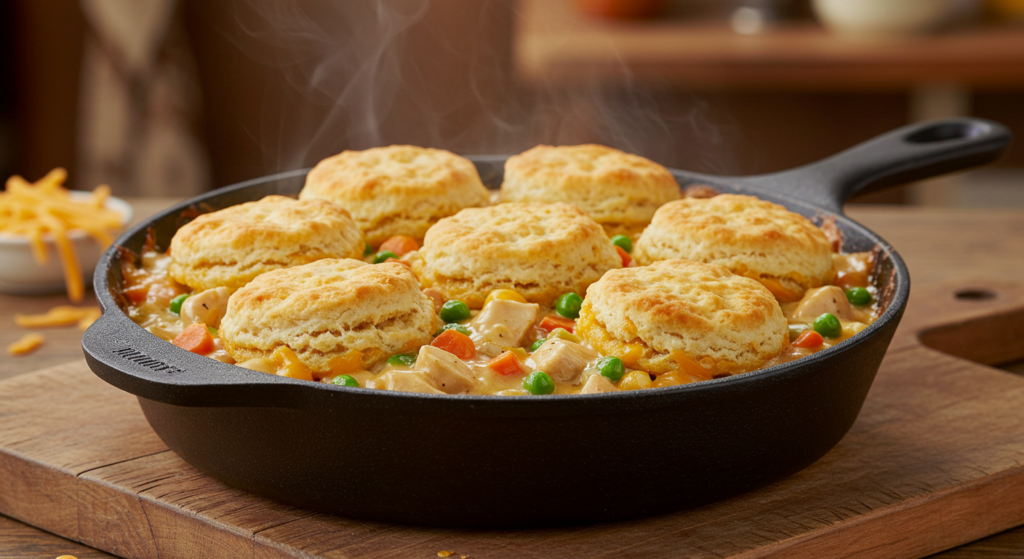
Unlike pie crust, which requires careful rolling and can sometimes turn soggy, biscuit toppings are much more forgiving and effortless. The Cheddar Bay Biscuits are simply dropped onto the filling, forming a deliciously crisp-on-the-outside, soft-on-the-inside crust as they bake. Plus, when you brush the finished biscuits with a buttery garlic topping, they turn into little pillows of savory heaven!
Perfect for Any Occasion
- Cozy family dinners – This dish brings the warmth and nostalgia of homemade meals.
- Potlucks & gatherings – It’s unique enough to impress but familiar enough to be a crowd-pleaser.
- Meal prepping – You can prepare the filling ahead of time and just add the biscuits before baking.
By combining two all-time favorite comfort foods into one irresistible dish, this Heavenly Cheddar Bay Biscuit Chicken Pot Pie takes your taste buds on a delicious adventure that’s both comforting and exciting!
Would you like me to add a section on nutrition facts or pairing suggestions for this dish?
Easy and Quick to Make
One of the best things about this Cheddar Bay Biscuit Chicken Pot Pie is how simple and hassle-free it is to prepare. While traditional chicken pot pie recipes often involve making a pie crust from scratch, which requires chilling, rolling, and blind baking, this recipe cuts down the prep time while still delivering incredible flavor.
Why This Recipe is So Quick & Simple
- Uses Rotisserie Chicken or Leftovers
- Instead of cooking chicken from scratch, you can use pre-cooked rotisserie chicken, which is already tender, juicy, and full of flavor.
- Leftover roasted or grilled chicken also works perfectly, making this a great way to repurpose leftovers.
- Relies on Frozen or Pre-Chopped Vegetables
- No need to spend time peeling and chopping vegetables—just grab a bag of frozen mixed veggies (peas, carrots, corn, and green beans) for an easy shortcut.
- If you prefer fresh vegetables, you can still save time by using pre-chopped mirepoix mix (a blend of onions, carrots, and celery available in most grocery stores).
- Cheddar Bay Biscuit Mix for Convenience
- Instead of making biscuits from scratch, you can use Red Lobster’s Cheddar Bay Biscuit mix, which comes with pre-measured dry ingredients and seasoning packets.
- Just mix it with buttermilk, cheddar cheese, and a little butter, and you have fluffy, flavorful biscuits in minutes.
- One-Pan Simplicity
- The filling is made in one skillet, which means fewer dishes to clean!
- Everything bakes together in one casserole dish, so you don’t have to worry about multiple steps or extra equipment.
Step-by-Step Breakdown of the Quick Cooking Process
- Sauté the Aromatics (5 minutes)
- Heat butter in a skillet and sauté onions, garlic, and herbs until fragrant.
- This simple step builds a deep, savory flavor without much effort.
- Make the Creamy Filling (10 minutes)
- Stir in flour, chicken broth, and heavy cream to create a thick, creamy sauce.
- Add the chicken and frozen veggies, then let it simmer for a few minutes to blend the flavors.
- Prepare the Biscuit Dough (5 minutes)
- Mix the Cheddar Bay Biscuit mix with buttermilk and shredded cheddar cheese.
- No kneading or rolling—just stir everything together for a quick, drop-style dough.
- Assemble and Bake (25-30 minutes)
- Pour the creamy chicken filling into a baking dish.
- Drop spoonfuls of biscuit dough over the top.
- Bake until golden brown and bubbly, then brush with garlic butter for an extra boost of flavor.
From Start to Finish in Under an Hour!
- Total Prep Time: ~15 minutes
- Total Cook Time: ~30 minutes
- Total Time: ~45 minutes
Compared to a classic pot pie that can take over an hour (due to crust preparation and long bake times), this recipe saves you a ton of time while keeping all the rich, comforting flavors intact.
This means you can whip up a hearty, homemade meal on a busy weeknight without feeling overwhelmed. It’s a stress-free dinner option that the whole family will love!
Would you like me to add meal prep tips or a make-ahead version to make it even more convenient?
Rich, Creamy, and Buttery Flavor
What makes this Cheddar Bay Biscuit Chicken Pot Pie stand out from the rest? It’s the indulgent combination of rich, creamy, and buttery flavors that melt in your mouth with every bite. From the savory, velvety chicken filling to the fluffy, golden, cheesy biscuits, this dish is the ultimate comfort food experience.
The Secret to the Creamy Chicken Filling
A good chicken pot pie starts with a perfectly thick and luscious filling that coats every ingredient. This recipe achieves that with a silky, homemade sauce made from:
- Butter and Flour Roux – Cooking butter and flour together creates a smooth, thick base that helps the filling hold its creamy texture. This ensures your pot pie doesn’t turn watery or runny.
- Heavy Cream – Unlike recipes that use only milk, this one incorporates heavy cream, which gives the filling its luxuriously thick and creamy consistency.
- Chicken Broth – Adds a deep, savory umami flavor, making the sauce more flavorful rather than just rich.
- Seasonings and Herbs – A perfect blend of garlic, onion, thyme, and black pepper enhances the flavors while keeping the dish balanced.
This silky, buttery sauce coats the tender chunks of chicken and sweet, colorful vegetables, creating the ultimate hearty, satisfying filling.
Cheddar Bay Biscuit Topping: Buttery & Cheesy Perfection
Unlike traditional pie crusts, which can sometimes be dry or bland, this recipe uses a cheddar biscuit topping that’s soft on the inside, crispy on the outside, and bursting with flavor.
- Sharp Cheddar Cheese – Melts into the biscuit dough, creating gooey, cheesy pockets throughout. The sharpness of the cheddar balances the richness of the filling.
- Garlic Butter Glaze – The biscuits are brushed with melted garlic butter right after baking, infusing them with an irresistible, savory kick.
- Fluffy & Buttery Texture – Buttermilk in the biscuit dough makes them light, soft, and fluffy, while melted butter adds a golden, crisp edge.
Each bite of this pot pie delivers the perfect contrast of textures—a creamy, savory base paired with cheesy, buttery biscuits that soak up the rich sauce without becoming soggy.
A Flavor Combination That’s Pure Comfort Food Heaven
- Savory & Rich – The combination of butter, cream, and cheddar cheese creates a deep, indulgent flavor that makes this dish unforgettable.
- Balanced with Garlic & Herbs – A touch of garlic, thyme, and black pepper keeps the richness from being overwhelming, adding aromatic depth.
- Melty Cheese Meets Crispy Biscuit – The contrast of cheesy, golden biscuits with the silky chicken filling is what makes this dish so satisfying.
If you’re looking for a comfort food dish that’s decadent, flavorful, and totally irresistible, this Cheddar Bay Biscuit Chicken Pot Pie is it. Every bite is a warm, buttery hug for your taste buds!
Would you like suggestions for cheese variations or ways to make it even richer?
Perfect for Family Dinners
There’s nothing quite like gathering around the table for a warm, hearty meal that brings comfort and joy to everyone. This Cheddar Bay Biscuit Chicken Pot Pie is the perfect dish for family dinners because it’s filling, crowd-pleasing, and easy to prepare in one dish. Whether you’re serving it on a busy weeknight or as part of a cozy weekend meal, this dish is guaranteed to satisfy kids and adults alike.
1. A One-Dish Meal That Feeds a Crowd
- No need to prepare multiple sides or complicated dishes—this chicken pot pie is a complete meal in itself.
- It’s loaded with protein (chicken), vegetables (peas, carrots, and corn), and carbs (cheddar biscuits), making it a well-balanced dinner.
- The recipe yields generous servings, perfect for large families or meal prep for the week.
Family-friendly tip: If you have picky eaters, this dish is a great way to sneak in extra veggies while keeping everything rich and cheesy so they’ll love every bite!
2. Comforting and Nostalgic for All Ages
- This dish combines two classic comfort foods—chicken pot pie and cheddar biscuits—into one irresistible meal.
- The creamy, savory filling and fluffy, cheesy biscuits evoke a sense of home-cooked nostalgia, reminding many of family meals from childhood.
- Whether your family prefers traditional meals or modern twists, this dish delivers familiar flavors with an exciting upgrade.
Pro tip: Want to involve the kids in cooking? Let them help drop the biscuit dough onto the filling or brush the tops with garlic butter before serving!
3. Easy to Make, Serve, and Store
- Quick Prep & Cooking Time – You don’t need hours in the kitchen! With rotisserie chicken and frozen vegetables, this dish can be ready in under an hour.
- No Fancy Equipment Needed – Everything is made in a skillet and a baking dish, keeping cleanup simple.
- Great for Leftovers – If you have extras, just store and reheat for a quick, delicious meal the next day.
Storage Tips:
- Store leftovers in an airtight container in the refrigerator for up to 3 days.
- Reheat in the oven at 350°F (175°C) for 15 minutes to keep the biscuits crisp.
- Freeze the filling separately and add fresh biscuits before baking for a make-ahead meal!
4. Versatile for Any Family Gathering
Whether you’re making this for a casual dinner, Sunday supper, or holiday gathering, it’s a dish that brings people together.
- Weeknight Dinner: Quick enough to prepare after work or school.
- Potluck Favorite: Easy to transport and always a hit at gatherings.
- Meal Prep for the Week: Make a large batch and enjoy leftovers throughout the week.
- Holiday Comfort Dish: Perfect for a cozy Thanksgiving or Christmas meal alternative.
If you’re looking for a meal that’s warm, filling, and guaranteed to bring smiles to your family’s faces, this Cheddar Bay Biscuit Chicken Pot Pie is the ultimate comfort food to add to your dinner rotation.
Would you like suggestions for kid-friendly modifications or ways to make it even easier for meal prepping?
For the Filling: The Heart of the Pot Pie
The creamy, savory filling is what makes this Cheddar Bay Biscuit Chicken Pot Pie so irresistible. It’s packed with tender chicken, vibrant vegetables, and a rich, velvety sauce that coats every bite in comforting goodness. Unlike some pot pies that can be bland or too thick, this version strikes the perfect balance between flavor, texture, and creaminess.
1. The Star Ingredient: Chicken
What kind of chicken works best?
- Rotisserie Chicken – This is the easiest and most flavorful option since it’s already cooked and seasoned. Simply shred or dice it and toss it into the filling.
- Leftover Chicken – If you have leftover baked, grilled, or roasted chicken, this is a great way to repurpose it.
- Cooked Chicken Breasts or Thighs – If you’re starting from scratch, quickly cook chicken breasts or boneless thighs in a skillet with a little butter and seasoning, then chop or shred them.
- Slow Cooker or Instant Pot Chicken – If you want super tender, pull-apart chicken, you can use a slow cooker or pressure cooker for easy prep.
Pro Tip: Want to add even more flavor? Season the chicken with garlic powder, onion powder, and a pinch of smoked paprika before adding it to the filling.
2. Vegetables: A Colorful, Nutritious Boost
Vegetables add texture, sweetness, and a nutritional boost to the pot pie filling. This recipe keeps things simple and convenient by using frozen mixed vegetables, which save time without sacrificing flavor.
Best Vegetables for Chicken Pot Pie
- Frozen Mixed Vegetables – A blend of peas, carrots, corn, and green beans works perfectly for a classic taste.
- Diced Potatoes – If you want the filling to be extra hearty, add some small diced potatoes (Yukon Gold or Russet) for a comforting bite.
- Fresh Carrots & Celery – If you prefer fresh veggies, dice them small and sauté them before adding to the filling.
- Mushrooms – For an umami-rich addition, sliced mushrooms add an earthy depth of flavor.
- Spinach or Kale – Want to sneak in more greens? Stir in chopped spinach or kale at the end for added nutrition.
Shortcut Tip: Using frozen vegetables means no chopping, peeling, or extra cooking time—just dump them in and let them do their magic!
3. The Velvety, Savory Sauce
The creamy sauce is what ties everything together, creating that luxurious, rich texture that makes every spoonful delicious. Unlike canned soups, this homemade version has a fresh, buttery taste with no artificial flavors.
How to Make the Perfect Creamy Pot Pie Sauce
- Butter & Flour (Roux Base) – Melt butter in a skillet, then whisk in flour to create a smooth roux. This thickens the sauce without making it grainy.
- Chicken Broth – Adds savory depth and keeps the sauce from being too heavy.
- Heavy Cream or Half & Half – Gives the filling a rich, creamy consistency that coats every ingredient.
- Garlic & Onion – These aromatics enhance the flavor and add a subtle sweetness.
- Seasonings – A blend of salt, black pepper, thyme, and a pinch of paprika brings out all the flavors.
Optional Add-Ins for Extra Flavor:
- A splash of white wine – Adds a subtle depth and enhances the overall richness.
- A dash of Worcestershire sauce – Adds a bit of umami and extra savory notes.
- A spoonful of Dijon mustard – Gives a hint of tangy complexity without being overpowering.
4. Bringing It All Together
Once the chicken, vegetables, and sauce are combined, the filling should be thick but still creamy, allowing the biscuits to sit on top without sinking. It should coat the back of a spoon but still be silky and smooth—not too dry and not too soupy.
Quick Tip for the Perfect Filling Consistency:
- If the filling is too thick, add a splash of broth or milk to loosen it.
- If it’s too thin, let it simmer a little longer, stirring frequently to help it thicken up.
Once your hearty, flavorful filling is ready, it’s time to pour it into a baking dish, drop the cheesy Cheddar Bay Biscuit dough on top, and bake until golden brown and bubbling.
This rich, homemade chicken pot pie filling is what makes this dish so comforting, satisfying, and absolutely irresistible.
Would you like me to include a dairy-free or gluten-free alternative for the sauce?
For the Cheddar Bay Biscuit Topping: The Ultimate Savory Crust
One of the standout features of this Heavenly Cheddar Bay Biscuit Chicken Pot Pie is its irresistible biscuit topping. Instead of using a traditional pie crust, this recipe incorporates fluffy, cheesy, garlicky Cheddar Bay Biscuits, creating a golden, buttery layer that pairs perfectly with the creamy chicken filling. The result? A flavor-packed upgrade to the classic pot pie that’s easier to make and even more delicious!
1. Why Cheddar Bay Biscuits?
If you’ve ever had Red Lobster’s famous Cheddar Bay Biscuits, you know just how buttery, garlicky, and melt-in-your-mouth delicious they are. Adding them to this pot pie gives you:
✅ A light, fluffy texture – Unlike dense pie crust, these biscuits bake up soft and airy, soaking up just the right amount of sauce.
✅ A crispy, golden exterior – The tops of the biscuits get slightly crisp and buttery, creating a satisfying contrast to the creamy filling.
✅ A rich, cheesy flavor – Sharp cheddar cheese melted into the biscuit dough adds a delicious savory depth.
✅ Garlic butter finish – Brushing the biscuits with melted garlic butter after baking takes the flavor to the next level.
2. Key Ingredients for the Biscuit Topping
The beauty of this Cheddar Bay Biscuit topping is that it’s simple to make with just a few ingredients. Here’s what you’ll need:
Base Ingredients:
- Biscuit Mix – Using Red Lobster’s Cheddar Bay Biscuit Mix saves time while delivering the authentic flavor. If making from scratch, you’ll need flour, baking powder, and butter.
- Sharp Cheddar Cheese – Freshly shredded cheddar melts into the dough, giving the biscuits their signature cheesy goodness.
- Buttermilk – Adds moisture, keeping the biscuits light and fluffy. If you don’t have buttermilk, mix regular milk with a teaspoon of vinegar as a substitute.
- Butter – Gives the biscuits their rich, buttery taste and helps create a crisp golden crust.
Seasoning Blend for Extra Flavor:
- Garlic Powder – A key ingredient for that classic Cheddar Bay Biscuit taste.
- Parsley Flakes – Adds a touch of freshness and color.
- Salt & Black Pepper – Balances the flavors and enhances the cheesy, garlicky notes.
For the Garlic Butter Glaze (Brushed on After Baking):
- Melted Butter – Gives the biscuits their signature glossy finish.
- Minced Garlic or Garlic Powder – Enhances the garlic flavor.
- Chopped Parsley – Adds a hint of freshness and color.
3. How to Make the Perfect Cheddar Bay Biscuit Topping
1️⃣ Mix the Biscuit Dough
- In a bowl, combine biscuit mix, shredded cheddar cheese, and seasonings.
- Stir in buttermilk and melted butter until just combined.
- Be careful not to overmix—this keeps the biscuits tender and fluffy.
2️⃣ Drop the Dough Over the Filling
- Using a large spoon or cookie scoop, drop spoonfuls of biscuit dough evenly over the chicken pot pie filling.
- The biscuits will expand as they bake, creating a beautiful golden, puffy crust.
3️⃣ Bake Until Golden Brown
- Place the dish in a preheated oven at 400°F (200°C) and bake for 25-30 minutes.
- The biscuits should be golden brown on top and fully cooked through.
4️⃣ Brush with Garlic Butter
- As soon as the pot pie comes out of the oven, brush the biscuits with melted garlic butter.
- This step enhances the flavor and gives the biscuits their signature shine.
4. Customizing the Biscuit Topping
While the classic Cheddar Bay Biscuit topping is already packed with flavor, here are some fun ways to customize it:
✅ Spicy Kick – Add a pinch of cayenne pepper or red pepper flakes to the dough.
✅ Extra Cheesy – Mix in Parmesan or Pepper Jack cheese for even more cheesy goodness.
✅ Herb-Infused – Stir in fresh chives, rosemary, or thyme for added aroma and freshness.
✅ Crispier Finish – Brush the tops with an egg wash before baking for an extra golden, crispy crust.
5. Why This Biscuit Topping is Better Than Pie Crust
Traditional pot pies use a pie crust, which can sometimes be dry, dense, or tricky to work with. The Cheddar Bay Biscuit topping is:
✔️ Easier – No rolling, chilling, or cutting required—just mix and drop!
✔️ More flavorful – The biscuits have cheddar, garlic, and butter, making them taste incredible on their own.
✔️ Better texture – They’re light and fluffy but still crisp on the edges, unlike a soggy bottom crust.
✔️ Faster to bake – Pie crusts need longer baking times, while these biscuits bake up in just 25-30 minutes.
Final Thoughts: The Perfect Finishing Touch
The cheesy, garlicky, buttery biscuits in this recipe transform chicken pot pie into something extra special. With minimal effort, you get a crisp, golden topping that perfectly complements the creamy, savory filling underneath. Whether you’re making this dish for a weeknight family dinner or a special gathering, these biscuits will steal the show!
Would you like a homemade version of the Cheddar Bay Biscuit mix or alternative options like gluten-free biscuits?
Optional Additions: Customize Your Cheddar Bay Biscuit Chicken Pot Pie
One of the best things about this Heavenly Cheddar Bay Biscuit Chicken Pot Pie is its versatility. While the classic combination of creamy chicken filling and buttery biscuits is already delicious, you can easily customize the recipe to suit your taste preferences, dietary needs, or even add a fun twist.
Below are some optional additions that will take your pot pie to the next level!
1. Protein Upgrades: Beyond Chicken
While chicken is the star of this dish, you can switch up the protein for a unique spin.
- Turkey – A great alternative, especially if you have leftover Thanksgiving turkey.
- Ham & Chicken Combo – The salty, smoky flavor of ham pairs beautifully with the creamy filling.
- Bacon Bits – Crispy bacon pieces add a smoky crunch to the filling.
- Shrimp or Seafood – For a coastal twist, swap chicken for shrimp, crab, or a seafood medley. This pairs especially well with the Cheddar Bay Biscuit topping.
- Ground Sausage – Browned Italian or breakfast sausage adds a savory, spiced depth to the dish.
✅ Pro Tip: If using shrimp or seafood, add it in the last 5-10 minutes of baking to prevent overcooking.
2. Flavor Boosters: Herbs, Spices, and Seasonings
Give your pot pie filling even more depth and complexity with these flavor enhancers:
- Smoked Paprika – Adds a subtle smokiness that enhances the roasted flavors.
- Cajun or Old Bay Seasoning – Perfect for a zesty Southern-style pot pie, especially if using seafood.
- Dijon Mustard – A small spoonful adds a tangy kick and enhances the richness of the sauce.
- Worcestershire Sauce – Gives the filling a savory umami boost.
- Fresh Herbs – Stir in chopped parsley, thyme, or rosemary for a fresh, aromatic touch.
✅ Pro Tip: If you want a little heat, add a pinch of cayenne pepper or red pepper flakes.
3. Extra Vegetables: Add More Nutrients & Texture
Want to add more color, texture, and nutrition to your pot pie? Try these veggie add-ins:
- Mushrooms – Add a meaty texture and earthy flavor.
- Diced Potatoes or Sweet Potatoes – Makes the dish even heartier.
- Spinach or Kale – Stir in chopped greens for added nutrients.
- Roasted Red Peppers – Adds a subtle sweetness and bold color contrast.
- Broccoli or Cauliflower – Great for adding extra fiber and crunch.
✅ Pro Tip: If using fresh vegetables, sauté them before adding to the filling to enhance their flavor.
4. Cheese Lovers’ Edition: More Cheesy Goodness!
If you love cheese, you can take this dish to the next level by adding even more:
- Extra Cheddar Cheese – Mix additional shredded cheese into the biscuit dough.
- Parmesan or Asiago – Sprinkle on top before baking for a crispy, cheesy crust.
- Pepper Jack or Gouda – For a spicy or smoky twist.
- Cream Cheese or Boursin – Stir a few spoonfuls into the filling for an extra creamy texture.
✅ Pro Tip: For maximum cheesiness, add a layer of shredded cheddar between the filling and biscuits!
5. Make It Spicy: Kick Up the Heat
If you love bold, spicy flavors, here are some ways to bring the heat:
- Chopped Jalapeños – Adds a zesty, spicy bite.
- Hot Sauce – A splash of Sriracha, Tabasco, or buffalo sauce enhances the filling.
- Crushed Red Pepper Flakes – A simple way to add a slow, building heat.
- Chipotle Powder – Adds a smoky, spicy twist that works well with cheddar biscuits.
✅ Pro Tip: To balance out spice, pair it with extra cheese or a touch of honey for a sweet-spicy contrast.
6. Gluten-Free & Low-Carb Options
Need a gluten-free or low-carb version? No problem!
- Gluten-Free Biscuit Mix – Use a gluten-free baking mix like King Arthur’s or Bob’s Red Mill.
- Almond Flour Biscuits – Substituting almond or coconut flour makes the biscuits low-carb.
- Cauliflower Crust or Mashed Cauliflower – Instead of biscuits, top the filling with cheesy mashed cauliflower for a keto-friendly twist.
✅ Pro Tip: If making gluten-free biscuits, add an extra egg or bit of xanthan gum to help with texture.
7. Creative Toppings: Beyond Biscuits
Want to change things up? Try these alternative crust ideas:
- Puff Pastry – For a flaky, bakery-style crust.
- Crescent Roll Dough – A fun and easy option that bakes up buttery and golden.
- Mashed Potatoes – Turn it into a chicken pot pie shepherd’s pie by topping with cheesy mashed potatoes.
- Cornbread Topping – A sweet and savory combo that’s perfect for a Southern twist.
✅ Pro Tip: If using puff pastry or crescent dough, brush the top with an egg wash for a crisp, golden finish.
Final Thoughts: Make It Your Own!
This Cheddar Bay Biscuit Chicken Pot Pie is already rich, creamy, and delicious, but with these optional additions, you can make it spicier, cheesier, heartier, or even healthier. Whether you add extra vegetables, protein, or swap in a fun topping, this dish is highly customizable to fit your family’s tastes!
Would you like me to create a custom variation recipe based on your preferences?
Prepare the Creamy Chicken Filling: The Heart of the Pot Pie
The creamy chicken filling is the soul of this Cheddar Bay Biscuit Chicken Pot Pie—it’s what makes every bite rich, savory, and incredibly comforting. The perfect filling should be thick and velvety, packed with tender chicken, vibrant vegetables, and a flavorful sauce that binds everything together.
In this section, we’ll go step by step to create a deliciously creamy and well-balanced filling, ensuring every spoonful is full of flavor and texture.
1. Start with a Flavorful Base: Butter, Aromatics & Roux
A good pot pie filling starts with a rich and flavorful base. This is achieved by sautéing aromatics in butter and then thickening the sauce with a roux (a mixture of butter and flour).
Step 1: Sauté Aromatics
- Melt 2 tablespoons of butter in a large skillet or Dutch oven over medium heat.
- Add diced onions, minced garlic, and celery and sauté until soft and fragrant, about 3-4 minutes.
- If you like a hint of smokiness, sprinkle in a pinch of smoked paprika for depth.
Step 2: Make the Roux (Thickening Base)
- Once the onions are translucent, sprinkle in ¼ cup of all-purpose flour and stir continuously.
- Cook the mixture for 1-2 minutes until it turns a light golden color—this removes the raw flour taste.
- The roux helps thicken the filling so it stays creamy without becoming watery.
✅ Pro Tip: Want an extra silky texture? Use a combination of butter and a little olive oil to prevent the roux from getting too thick too quickly.
2. Build the Creamy, Savory Sauce
Now that you have your buttery roux, it’s time to create the creamy sauce that will coat every bite of chicken and veggies.
Step 3: Add Liquid Ingredients
- Gradually whisk in 2 cups of chicken broth, stirring continuously to prevent lumps.
- Add 1 cup of heavy cream or half-and-half to create a luxuriously rich texture.
- Let the mixture simmer for 3-5 minutes, stirring frequently until it begins to thicken.
✅ Dairy-Free Alternative: Use coconut milk or cashew cream instead of heavy cream for a silky, dairy-free version.
Step 4: Season to Perfection
A good filling is full of flavor—here’s what to add:
✔️ 1 teaspoon salt – Enhances all the other flavors.
✔️ ½ teaspoon black pepper – Adds a mild warmth.
✔️ ½ teaspoon dried thyme – Classic herb that pairs beautifully with chicken.
✔️ ¼ teaspoon paprika – Adds a subtle smokiness.
✔️ 1 teaspoon Dijon mustard (optional) – Provides a touch of tang and depth.
✅ Pro Tip: If you like a zesty kick, add a dash of Worcestershire sauce or a splash of white wine for extra depth.
3. Add the Chicken & Vegetables
With the creamy sauce base ready, it’s time to fold in the main ingredients:
Step 5: Add the Chicken
- Stir in 2-3 cups of cooked, shredded chicken (rotisserie chicken works great).
- Mix well so the chicken is evenly coated in the creamy sauce.
Step 6: Stir in the Vegetables
- Add 1 ½ cups of frozen mixed vegetables (peas, carrots, corn, and green beans).
- If using fresh vegetables like mushrooms or spinach, sauté them separately before adding.
- Let everything simmer for another 3-5 minutes, allowing the flavors to meld together.
✅ Customization Tip: Want extra heartiness? Stir in small diced potatoes or mushrooms for a richer, chunkier filling.
4. Adjust the Consistency: Thick But Creamy
The final step is making sure your filling is thick enough to support the biscuit topping without being too dry.
Step 7: Adjust Thickness as Needed
- If the filling is too thick, stir in a splash of chicken broth or milk to loosen it.
- If it’s too thin, let it simmer for a few more minutes to reduce excess liquid.
The perfect filling consistency should be thick enough to coat a spoon but not so thick that it turns solid—it should remain creamy and scoopable.
✅ Pro Tip: If you accidentally make the filling too thick, add 1-2 tablespoons of butter at the end for extra silkiness.
5. Final Touches Before Assembling the Pot Pie
Before transferring the filling to your baking dish, do a quick taste test to adjust seasoning.
Step 8: Add Final Seasonings (If Needed)
- More salt & pepper? Adjust to taste.
- Need more creaminess? Stir in a little extra heavy cream.
- Want a cheesy touch? Sprinkle in ½ cup of shredded cheddar cheese for an extra rich and gooey texture.
✅ Pro Tip: For an extra luxurious finish, stir in a tablespoon of sour cream or cream cheese at the very end for a slightly tangy, ultra-creamy texture.
Final Thoughts: The Key to a Perfectly Creamy Filling
✔️ Rich & Buttery – Thanks to the butter, cream, and roux base.
✔️ Perfectly Thick – Holds together well under the biscuits without being too soupy or too dry.
✔️ Loaded with Flavor – Seasonings, garlic, thyme, and a touch of mustard enhance the overall depth.
✔️ Balanced with Tender Chicken & Fresh Veggies – Every bite is packed with protein, color, and texture.
With this silky, creamy, and well-seasoned filling, your Cheddar Bay Biscuit Chicken Pot Pie will be the ultimate comfort food masterpiece!
Would you like a variation for a dairy-free or gluten-free version?
Make the Cheddar Bay Biscuit Dough: The Ultimate Buttery, Cheesy Topping
The Cheddar Bay Biscuit topping is what makes this Chicken Pot Pie truly unforgettable. Instead of a traditional pie crust, these biscuits add a fluffy, cheesy, garlicky twist that elevates the entire dish. They bake up golden brown and crispy on the outside while staying light, buttery, and melt-in-your-mouth soft on the inside.
This section will walk you through step-by-step instructions on how to make the perfect Cheddar Bay Biscuit dough—whether you’re using store-bought biscuit mix or making it from scratch!
1. What Makes Cheddar Bay Biscuits So Special?
Unlike regular biscuits, Cheddar Bay Biscuits are:
✔️ Loaded with Cheese – Freshly shredded sharp cheddar cheese melts into every bite.
✔️ Infused with Garlic Butter – A touch of garlic powder in the dough and a buttery garlic glaze after baking give them their signature flavor.
✔️ Soft, Fluffy, and Flaky – The biscuits have a perfect rise and a light, airy texture thanks to buttermilk and baking powder.
✔️ Easy to Make – They come together in minutes with no kneading or rolling required!
✅ Pro Tip: For the best flavor, use sharp cheddar cheese and freshly shred it yourself—pre-shredded cheese contains anti-caking agents that prevent it from melting smoothly.
2. Ingredients for Cheddar Bay Biscuit Dough
You can either use a store-bought mix (like Red Lobster’s Cheddar Bay Biscuit Mix) or make them from scratch.
Option 1: Using Store-Bought Biscuit Mix (Quickest Method!)
If you’re short on time, the Red Lobster Cheddar Bay Biscuit Mix is a great shortcut.
✔️ 1 package of Cheddar Bay Biscuit Mix
✔️ ½ cup cold water
✔️ ½ cup shredded cheddar cheese
✔️ 4 tbsp melted butter (for brushing after baking)
✔️ ½ tsp garlic powder (optional, for extra flavor)
👉 How to Use: Simply follow the package instructions, adding extra cheddar for maximum cheesiness!
Option 2: Homemade Cheddar Bay Biscuit Dough (Best for Fresh, Fluffy Biscuits!)
For homemade biscuits, you’ll need:
✔️ 2 cups all-purpose flour
✔️ 1 tbsp baking powder
✔️ ½ tsp baking soda
✔️ 1 tsp garlic powder (for that signature flavor!)
✔️ ½ tsp salt
✔️ ½ tsp smoked paprika (optional, adds depth to the biscuits!)
✔️ 1 cup sharp cheddar cheese, shredded
✔️ ½ cup cold unsalted butter, cubed (keeps biscuits flaky!)
✔️ ¾ cup buttermilk (makes biscuits soft and tender!)
✅ Pro Tip: No buttermilk? No problem! Make your own by mixing ¾ cup milk with 1 tbsp lemon juice or vinegar, and let it sit for 5 minutes before using.
3. Step-by-Step Instructions to Make the Biscuit Dough
Step 1: Mix the Dry Ingredients
- In a large mixing bowl, whisk together flour, baking powder, baking soda, garlic powder, salt, and paprika.
- Stir in shredded cheddar cheese until evenly distributed.
Step 2: Cut in the Butter (For a Perfect Flaky Texture!)
- Add the cold cubed butter into the dry ingredients.
- Use a pastry cutter, fork, or your fingertips to cut the butter into the flour mixture until it resembles coarse crumbs with pea-sized butter pieces.
✅ Why Cold Butter? Cold butter melts as the biscuits bake, creating steam pockets that make them light and fluffy instead of dense.
Step 3: Add the Buttermilk & Mix the Dough
- Pour in buttermilk and gently stir until just combined.
- Do not overmix! The dough should be slightly sticky and lumpy—this ensures soft, tender biscuits.
✅ Pro Tip: If the dough seems too dry, add a splash more buttermilk; if too wet, sprinkle in a little extra flour.
4. How to Shape & Drop the Biscuits on the Pot Pie
Unlike rolled biscuits, Cheddar Bay Biscuits are drop biscuits, which means no rolling or cutting is required!
✔️ Use a large spoon or cookie scoop to drop mounds of dough evenly over the prepared chicken pot pie filling.
✔️ Leave small gaps between each biscuit—they will expand and rise as they bake.
✔️ For even, round biscuits, gently shape the dough with your fingers before placing it on the filling.
✅ Pro Tip: Want extra tall biscuits? Chill the dough for 10 minutes before baking—this keeps the butter cold, which helps the biscuits rise higher!
5. Baking Tips for Perfect Cheddar Bay Biscuits
✔️ Bake at 400°F (200°C) for 25-30 minutes or until the biscuits are golden brown and crisp on top.
✔️ If biscuits are browning too quickly, cover loosely with foil for the last 5 minutes.
✔️ If biscuits are too pale, bake for an extra 2-3 minutes under the broiler for a golden finish.
✅ Pro Tip: If you love extra crispy biscuit tops, brush them with a light egg wash (1 beaten egg + 1 tbsp milk) before baking!
6. Brush with Garlic Butter for the Final Touch
Once the biscuits come out of the oven, they’re ready for the finishing touch—melted garlic butter!
✔️ Melt 4 tbsp butter and mix with ½ tsp garlic powder and 1 tsp dried parsley.
✔️ Brush generously over the hot biscuits for an extra garlicky, buttery flavor.
✔️ Let it soak in for 2 minutes before serving.
✅ Pro Tip: Want a cheesy crust? Sprinkle grated Parmesan over the biscuits before serving!
7. Customizing Your Cheddar Bay Biscuits
Want to make these biscuits even more special? Try these fun variations!
🔥 Spicy Cheddar Biscuits – Add ½ tsp cayenne pepper or diced jalapeños for a kick!
🧀 Extra Cheesy Biscuits – Stir in ½ cup Parmesan or Pepper Jack cheese for even more flavor.
🌿 Herb Biscuits – Mix in chopped chives, rosemary, or thyme for a fresh twist.
🥓 Bacon Cheddar Biscuits – Add crispy bacon bits for a smoky, savory bite!
Final Thoughts: The Perfect Biscuit Topping for Your Pot Pie
By making this easy, cheesy, and buttery Cheddar Bay Biscuit dough, your chicken pot pie transforms into an indulgent, flavor-packed masterpiece!
✔️ Fluffy, cheesy, and infused with garlic butter
✔️ Simple drop biscuit method—no rolling required!
✔️ Golden brown and crispy on top, soft inside
✔️ Perfectly complements the creamy pot pie filling
With this foolproof recipe, you’ll get the most irresistible biscuit topping that takes your pot pie to next-level deliciousness.
Would you like a gluten-free or keto version of these biscuits? Let me know! 😊
Assemble and Bake: Bringing It All Together
Now that you have your rich, creamy chicken filling and your cheesy, garlicky Cheddar Bay Biscuit dough ready to go, it’s time for the most exciting step—assembling and baking your Chicken Pot Pie!
This step is all about layering flavors and textures, ensuring the filling stays creamy and thick while the biscuits bake up golden, fluffy, and buttery on top. Follow these steps to perfectly assemble and bake your Cheddar Bay Biscuit Chicken Pot Pie for the ultimate comfort food experience.
1. Transfer the Filling to a Baking Dish
Once your creamy chicken filling is thick, well-seasoned, and fully cooked on the stovetop, it’s time to get it into the oven!
✔️ Choose the Right Baking Dish
- Use a 9×13-inch casserole dish for a larger pot pie with more servings.
- If making a smaller batch, a 9-inch round deep-dish pie pan or an oven-safe cast-iron skillet works perfectly.
✔️ Prepare the Dish
- Lightly grease the baking dish with butter or cooking spray to prevent sticking.
- Pour the warm, creamy chicken filling evenly into the dish, making sure to spread it out smoothly.
✅ Pro Tip: If you want an extra cheesy twist, sprinkle ½ cup of shredded cheddar cheese over the filling before adding the biscuits!
2. Drop the Cheddar Bay Biscuit Dough on Top
Now, it’s time to add the buttery, cheesy biscuit topping that takes this pot pie to the next level!
✔️ How to Add the Biscuits
- Use a large spoon or a cookie scoop to drop evenly spaced spoonfuls of biscuit dough over the filling.
- Aim for about 8-10 biscuits—they will expand and rise as they bake.
- Leave some gaps between the biscuit scoops to allow the steam from the filling to escape, ensuring the biscuits bake up light and fluffy instead of dense.
✔️ Shaping Tip
- If you prefer a more uniform look, gently pat down the biscuit dough with wet fingers to even out the tops while keeping the rustic, drop-biscuit texture.
✅ Pro Tip: Want extra cheesy biscuits? Lightly sprinkle grated cheddar cheese on top before baking!
3. Bake Until Golden Brown and Bubbling
Now it’s time to bake your masterpiece!
✔️ Set Your Oven Temperature
- Preheat your oven to 400°F (200°C) for a perfect balance of crispy biscuits and bubbly filling.
✔️ Bake Time & What to Watch For
- Bake for 25-30 minutes, or until:
✅ The biscuits are golden brown on top and cooked through.
✅ The filling is bubbling up around the edges.
✔️ How to Check for Doneness
- Insert a toothpick or fork into the center of a biscuit—if it comes out clean and dry, they’re ready!
- If the biscuits are browning too quickly, but the filling needs more time, cover the dish loosely with aluminum foil for the last 10 minutes.
✅ Pro Tip: For an extra crispy biscuit top, brush the biscuits with melted butter halfway through baking and return to the oven!
4. Brush with Garlic Butter for the Ultimate Flavor
Once the pot pie is out of the oven, there’s one final step that makes these biscuits absolutely irresistible—brushing them with garlic butter!
✔️ Make the Garlic Butter Topping
- Melt 2 tablespoons of butter in a small bowl.
- Stir in ½ teaspoon garlic powder and 1 teaspoon chopped parsley.
✔️ Brush Over Hot Biscuits
- Using a pastry brush, generously coat each warm biscuit with the garlic butter.
- This adds a rich, savory finish and enhances the classic Cheddar Bay Biscuit flavor.
✅ Pro Tip: Want even more flavor? Sprinkle a little Parmesan cheese over the biscuits before serving!
5. Let It Rest Before Serving
✔️ Why Let It Rest?
- The filling will be very hot and bubbly straight out of the oven, so let it rest for 5-10 minutes before serving.
- This allows the sauce to thicken slightly, ensuring you get perfect, creamy spoonfuls without a runny mess.
✔️ Serving Suggestions
- Serve your Cheddar Bay Biscuit Chicken Pot Pie on its own or with a simple side salad, roasted vegetables, or garlic green beans.
✅ Pro Tip: If you have leftovers, reheat them in the oven at 350°F for 10-15 minutes to keep the biscuits crispy!
Final Thoughts: The Perfect Comfort Food, Baked to Perfection
✔️ Golden, buttery biscuits that soak up the creamy sauce while staying crispy on top.
✔️ Rich, cheesy flavor enhanced by the final garlic butter glaze.
✔️ Thick, hearty filling that’s packed with tender chicken, veggies, and a velvety sauce.
✔️ Simple, foolproof baking process that guarantees perfect results every time!
By following these assembly and baking steps, you’ll create a pot pie that’s not just a meal, but an experience—one that brings warmth, comfort, and flavor to every bite.
Would you like a variation for individual pot pies or a freezer-friendly version?
Finish with Garlic Butter: The Ultimate Flavor Boost
The final step in creating the perfect Cheddar Bay Biscuit Chicken Pot Pie is brushing the warm biscuits with garlic butter straight out of the oven. This small but crucial step elevates the dish by adding a rich, buttery finish with hints of garlic and herbs, making each bite even more indulgent.
If you’ve ever had Red Lobster’s famous Cheddar Bay Biscuits, you know that the secret to their irresistible flavor is the garlic butter glaze—and that’s exactly what we’re recreating here!
1. Why Garlic Butter is Essential
The garlic butter finish does more than just add flavor—it enhances the overall texture and experience of the dish.
✔️ Adds a Buttery Shine – The biscuits come out of the oven golden brown, but brushing them with garlic butter gives them a beautiful glossy finish.
✔️ Deepens the Garlic Flavor – The rich, savory garlic butter infuses into the biscuits, making them even more flavorful.
✔️ Softens the Biscuit Tops Slightly – While the edges stay crisp, the tops absorb just enough butter to become perfectly tender and rich.
✔️ Creates a Signature Taste – This step ties everything together, making the pot pie taste like a gourmet dish rather than just another chicken pot pie.
2. How to Make the Perfect Garlic Butter
Making homemade garlic butter is quick and easy, yet it transforms the flavor profile of the dish. Here’s how to do it:
Ingredients for Garlic Butter:
- 2 tablespoons unsalted butter (melted)
- ½ teaspoon garlic powder or 1 small garlic clove, finely minced
- ½ teaspoon dried parsley or 1 teaspoon fresh parsley (chopped finely)
- ¼ teaspoon salt (optional, if using unsalted butter)
Step-by-Step Instructions:
1️⃣ Melt the Butter – In a small saucepan or microwave-safe bowl, melt 2 tablespoons of butter until fully liquid.
2️⃣ Add Garlic & Herbs – Stir in garlic powder (or minced garlic) and parsley. If using fresh garlic, let it sit for a minute to infuse into the butter.
3️⃣ Season (If Needed) – If using unsalted butter, add a pinch of salt for extra flavor.
✅ Pro Tip: If you love a stronger garlic flavor, sauté minced garlic in butter for 30 seconds before brushing it on the biscuits!
3. How to Apply the Garlic Butter for Maximum Flavor
✔️ When to Apply It
- As soon as the biscuits come out of the oven, while they’re still hot and fresh.
- The warm biscuits will absorb the butter, enhancing their flavor and texture.
✔️ How to Apply It
- Use a pastry brush to generously coat the tops of each biscuit with garlic butter.
- Let the butter drizzle slightly down the sides for even more richness and flavor.
- If you don’t have a brush, spoon the butter over the biscuits and tilt the pan slightly so they soak it up.
4. Variations & Customizations for Garlic Butter
Want to switch things up? Here are some fun ways to customize your garlic butter:
✅ Cheesy Garlic Butter – Stir in 1 tablespoon of grated Parmesan cheese for a cheesy, umami-rich finish.
✅ Spicy Kick – Add a pinch of cayenne pepper or red pepper flakes to the butter for a little heat.
✅ Herb-Infused Butter – Mix in fresh herbs like thyme, rosemary, or chives for an even more aromatic topping.
✅ Honey Garlic Butter – Add ½ teaspoon of honey to balance out the garlic with a touch of sweetness.
✅ Pro Tip: Want extra crispy biscuits? Pop them back in the oven for 2-3 minutes after brushing with garlic butter to caramelize the topping!
5. Final Touch: Let It Set & Serve!
✔️ Let the butter soak in for about 2 minutes before serving—this ensures the biscuits stay moist, flavorful, and glossy.
✔️ Garnish with extra parsley or grated cheese for a restaurant-style presentation.
✔️ Serve while hot for the best taste—this dish is at its most delicious when fresh from the oven!
Final Thoughts: The Perfect Finishing Touch
Adding garlic butter to the Cheddar Bay Biscuit topping takes this pot pie from delicious to absolutely unforgettable. It’s buttery, garlicky, and infused with herbs, creating a flavor explosion in every bite. Whether you enjoy it on a weeknight or for a special occasion, this final touch ensures your Chicken Pot Pie is the best version it can be!
Would you like a garlic butter dipping sauce or more variations for an extra-special finish?
Shortcut Tip: How to Save Time Without Sacrificing Flavor
If you’re craving the comfort of homemade Cheddar Bay Biscuit Chicken Pot Pie but don’t have a lot of time, don’t worry—there are several easy shortcuts that will help you get this delicious meal on the table faster while still delivering all the rich, creamy, and cheesy flavors you love.
By using pre-made ingredients and smart cooking techniques, you can cut your prep time in half without sacrificing the homemade taste and texture of this dish.
1. Use Rotisserie Chicken for Instant Flavor
Instead of cooking and shredding chicken from scratch, grab a store-bought rotisserie chicken to speed things up.
✔️ Why It Works
- Rotisserie chicken is already perfectly seasoned, tender, and juicy.
- It eliminates the need to boil, bake, or grill chicken, cutting out 20-30 minutes of cooking time.
- You can simply pull the meat apart with forks and toss it straight into the creamy filling.
✔️ Best Way to Use It
- Remove the skin and bones, then shred or chop the white and dark meat into bite-sized pieces.
- Use about 2-3 cups of shredded chicken for the filling.
- If you want extra depth of flavor, add a splash of the rotisserie chicken drippings to your sauce for a richer taste!
✅ Pro Tip: If you don’t have rotisserie chicken, you can use pre-cooked frozen grilled chicken strips or even canned chicken (drained and flaked) as a quick alternative!
2. Use Frozen or Pre-Chopped Vegetables
Chopping fresh vegetables can be one of the most time-consuming steps in cooking. Instead, take a shortcut with frozen mixed vegetables or pre-cut fresh veggies.
✔️ Best Vegetable Shortcuts:
- Frozen Mixed Vegetables – A blend of peas, carrots, corn, and green beans works perfectly for pot pie. No peeling, chopping, or measuring—just pour them straight into the sauce!
- Pre-Chopped Onion & Garlic – Many grocery stores sell pre-diced onion and minced garlic in the produce section to save prep time.
- Frozen Diced Potatoes – If you like potatoes in your pot pie, use frozen hash brown cubes instead of peeling and dicing fresh potatoes.
✔️ How to Use Them:
- Add frozen vegetables directly to the filling—no need to thaw them first.
- If using pre-cut onions and garlic, simply sauté them as usual without extra prep work.
✅ Pro Tip: Want extra texture and freshness? Add a handful of fresh spinach or chopped mushrooms to the filling at the last minute—they cook quickly and require no extra chopping!
3. Use a Pre-Made Biscuit Mix for Easy Cheddar Bay Biscuits
Making biscuits from scratch can be fun, but if you’re short on time, using a store-bought biscuit mix will make things way easier.
✔️ Best Biscuit Mixes for This Recipe:
- Red Lobster Cheddar Bay Biscuit Mix – The fastest and most flavorful shortcut. It already includes the cheddar and garlic seasonings—just add liquid and mix!
- Refrigerated Biscuit Dough (Pillsbury Grands!) – If you don’t mind skipping the Cheddar Bay flavor, you can use refrigerated biscuit dough and brush it with garlic butter after baking.
- Bisquick Mix + Cheddar Cheese – If you have Bisquick at home, mix it with shredded cheddar and buttermilk for an easy DIY version.
✔️ How to Use Them:
- If using Cheddar Bay Biscuit mix, just follow the package directions and drop spoonfuls of dough over the filling.
- If using refrigerated biscuit dough, flatten each biscuit slightly before placing them on top, so they bake evenly.
- Brush with garlic butter right after baking to lock in the signature flavor!
✅ Pro Tip: Want a super crispy, golden biscuit top? Bake the biscuits separately and place them on the pot pie just before serving for maximum crunch!
4. Make the Filling Ahead of Time
If you’re preparing this dish for a busy weeknight or a special occasion, you can make the creamy chicken filling in advance and store it in the fridge or freezer.
✔️ How to Make It Ahead:
- Cook the filling as usual, then let it cool completely.
- Store it in an airtight container in the fridge for up to 3 days.
- When ready to assemble, pour the filling into the baking dish, add your biscuit topping, and bake as directed.
✔️ Can You Freeze the Filling?
- Yes! The filling freezes well for up to 3 months.
- Freeze in a freezer-safe bag or container. When ready to use, thaw overnight in the fridge and then reheat before adding the biscuits.
✅ Pro Tip: Do not freeze the biscuits—make them fresh so they stay light, fluffy, and crisp!
5. Bake Everything in One Skillet for Fewer Dishes
Want to save time on cleanup? Use a large oven-safe skillet (like a cast-iron pan) to cook the filling and bake the pot pie in the same dish!
✔️ How to Do It:
- Sauté the aromatics, make the creamy filling, and stir in the chicken & veggies directly in the cast-iron skillet.
- Drop the biscuit dough on top and transfer the entire skillet into the oven to bake.
- Once done, serve straight from the pan—fewer dishes, same delicious result!
✅ Pro Tip: This works best with a 10- or 12-inch cast-iron skillet that distributes heat evenly for a perfectly golden biscuit crust.
Final Thoughts: A Faster, Easier Way to Make the Perfect Pot Pie
By using smart shortcuts, you can make this Cheddar Bay Biscuit Chicken Pot Pie in half the time without sacrificing flavor or texture. Whether you use rotisserie chicken, frozen veggies, or a pre-made biscuit mix, these tricks will help you whip up this delicious comfort meal in no time!
✔️ Use Rotisserie Chicken – No need to cook chicken from scratch.
✔️ Use Frozen or Pre-Chopped Veggies – Saves time without losing flavor.
✔️ Use a Pre-Made Biscuit Mix – Same great taste, less work.
✔️ Make the Filling Ahead of Time – Cuts down on prep when you’re ready to bake.
✔️ Bake in a Cast-Iron Skillet – One pan, fewer dishes!
With these easy hacks, you can enjoy a warm, cheesy, buttery pot pie with minimal effort—perfect for weeknights, meal prep, or even impressing guests without spending hours in the kitchen!
Would you like a super-fast 30-minute version using these shortcuts?
Dairy-Free Option: How to Enjoy Cheddar Bay Biscuit Chicken Pot Pie Without Dairy
If you’re lactose intolerant, following a dairy-free diet, or simply prefer non-dairy alternatives, you don’t have to miss out on the deliciousness of Cheddar Bay Biscuit Chicken Pot Pie! By making a few simple swaps, you can still enjoy a creamy, cheesy, and buttery-tasting pot pie—without using any dairy products.
The key to a great dairy-free version is choosing the right substitutes that mimic the richness, texture, and flavor of butter, cream, and cheese. Below, we’ll break down how to make the creamy filling, flaky biscuit topping, and garlic butter finish all without dairy!
1. Dairy-Free Substitutes for the Creamy Filling
The traditional pot pie filling uses butter, heavy cream, and sometimes cheese to create a thick, rich sauce. Here’s how to achieve the same creamy texture and depth of flavor using dairy-free alternatives:
✔️ Butter Substitute:
- Use vegan butter (like Earth Balance or Miyoko’s) for the same richness and buttery flavor.
- Alternatively, olive oil or avocado oil can be used, but they won’t have the same depth of flavor as butter.
✔️ Milk & Cream Substitute:
- Full-fat canned coconut milk – The best substitute for heavy cream, as it’s thick and creamy without a strong coconut taste.
- Cashew cream – Blend soaked cashews with water to create a smooth, creamy base.
- Oat milk or unsweetened almond milk – Works well for a lighter option, but may need thickening with a little cornstarch or flour.
✔️ Cheese Substitute (Optional):
- If you want a cheesy taste, add nutritional yeast (about 2 tablespoons) or use a dairy-free shredded cheese like Violife or Daiya.
- Vegan cheeses tend to melt differently, so choose one that works well for creamy dishes.
✔️ Final Tip: If you want extra richness, add a tablespoon of dairy-free sour cream (like Kite Hill or Forager) to the filling for a smooth, tangy touch.
2. Dairy-Free Cheddar Bay Biscuit Topping
The traditional Cheddar Bay Biscuit topping is loaded with cheese, butter, and buttermilk—but you can easily make a dairy-free version that’s just as fluffy, buttery, and flavorful!
Dairy-Free Biscuit Ingredient Swaps:
✔️ Cheese Substitute:
- Use dairy-free shredded cheddar (Violife, Daiya, or Follow Your Heart) for a similar taste and texture.
- If you prefer a natural, umami flavor, nutritional yeast (2 tbsp) works well to mimic the cheesiness.
✔️ Buttermilk Substitute:
- Mix unsweetened almond milk, soy milk, or oat milk with 1 teaspoon of apple cider vinegar or lemon juice to create a dairy-free buttermilk alternative.
- Let the mixture sit for 5 minutes to slightly curdle before using it in the biscuit dough.
✔️ Butter Substitute:
- Use vegan butter for the best flavor.
- If you don’t have vegan butter, coconut oil (solid, not melted) can work, but it may add a mild coconut taste.
✔️ Final Tip: If using coconut oil, add a pinch of salt to enhance the buttery taste.
3. Dairy-Free Garlic Butter Finish
The garlic butter brushed on top of the biscuits is what gives this dish its signature savory, buttery finish.
How to Make Dairy-Free Garlic Butter:
✔️ Use Vegan Butter: – Melt 2 tablespoons of dairy-free butter and mix it with ½ teaspoon garlic powder and 1 teaspoon chopped parsley.
✔️ Olive Oil Alternative: – If you don’t have vegan butter, extra virgin olive oil can work as a substitute. It won’t taste exactly the same, but it will still add a rich, garlicky touch.
✔️ Coconut Oil Option: – If using refined coconut oil, add a pinch of salt to mimic the buttery flavor.
✅ Final Tip: If you want a cheesier garlic butter finish, mix in a teaspoon of nutritional yeast or vegan Parmesan before brushing it on!
4. Adjusting the Baking Process for Dairy-Free Ingredients
When using dairy-free substitutes, the baking time and texture may differ slightly. Here’s how to ensure the best results:
✔️ Biscuit Dough Consistency:
- Dairy-free biscuit dough may be slightly wetter than traditional dough. If needed, add an extra tablespoon of flour to balance it out.
✔️ Baking Temperature & Time:
- Bake at the same 400°F (200°C) temperature, but check the biscuits 5 minutes early to avoid over-browning.
- If the biscuits are not browning as much, lightly brush the tops with extra vegan butter or oil halfway through baking.
5. Additional Flavor Enhancements for Dairy-Free Pot Pie
If you’re skipping dairy, here are a few ways to enhance the richness and depth of flavor:
✔️ Use a Splash of White Wine – Adds complexity to the filling without dairy.
✔️ Add Dijon Mustard or Worcestershire Sauce – Gives the sauce a savory umami boost.
✔️ Roast the Vegetables Before Adding – This enhances their natural sweetness and makes the dish more flavorful.
✅ Final Tip: If you love buttery flavor, try using a vegan butter alternative that contains natural butter flavor (like Miyoko’s or Earth Balance).
6. Final Dairy-Free Recipe Adjustments
Dairy-Based Ingredients & Their Substitutes
| Traditional Ingredient | Dairy-Free Substitute |
|---|---|
| Butter | Vegan butter, olive oil, or coconut oil |
| Heavy Cream | Full-fat coconut milk or cashew cream |
| Buttermilk | Almond or oat milk + 1 tsp vinegar |
| Cheddar Cheese | Dairy-free shredded cheddar or nutritional yeast |
| Garlic Butter | Vegan butter + garlic + parsley |
Final Thoughts: A Delicious Dairy-Free Pot Pie Without Compromise
By making a few simple swaps, you can enjoy a rich, creamy, and flavorful Cheddar Bay Biscuit Chicken Pot Pie without any dairy. The coconut milk, vegan butter, and dairy-free cheddar keep the dish indulgent, while the garlic butter glaze ensures the biscuits stay fluffy and flavorful.
✔️ Creamy, cheesy, and buttery—without the dairy!
✔️ Simple ingredient swaps for the same great taste
✔️ Perfect for those with lactose intolerance or dairy-free diets
Would you like me to provide a fully written-out dairy-free recipe version with measurements and instructions?
Vegetarian Twist: A Meat-Free Version of Cheddar Bay Biscuit Pot Pie
Craving the rich, comforting flavors of Cheddar Bay Biscuit Chicken Pot Pie but want a vegetarian-friendly version? No problem! This dish can easily be transformed into a hearty, meat-free pot pie that’s just as creamy, flavorful, and satisfying as the original.
By swapping out the chicken for plant-based proteins and extra vegetables, you can create a dish that’s packed with flavor and texture while still delivering the ultimate comfort food experience.
1. Best Protein Substitutes for a Vegetarian Pot Pie
Since traditional chicken pot pie is protein-rich, it’s important to replace the chicken with an ingredient that provides a hearty bite and protein boost. Here are some excellent vegetarian options:
✔️ Mushrooms – A great meat substitute because of their meaty texture and umami flavor. Use sliced portobello, cremini, or shiitake mushrooms for the best results.
✔️ Chickpeas (Garbanzo Beans) – High in protein and fiber, they add a slightly nutty taste and a chewy bite.
✔️ Lentils – Brown or green lentils work great, providing protein and an earthy depth.
✔️ Tofu (Extra-Firm or Crumbled) – If you want a texture similar to shredded chicken, crumble or cube extra-firm tofu, then pan-fry it for a crispy bite before adding it to the filling.
✔️ Plant-Based Chicken – Brands like Beyond Meat, Gardein, or MorningStar Farms offer meatless chicken strips that can be sautéed and added to the filling.
✅ Pro Tip: Want to add more depth and smokiness? Sauté your vegetarian protein with a dash of soy sauce, smoked paprika, or Worcestershire sauce (use a vegetarian version) before adding it to the filling.
2. Bulk Up with Extra Vegetables
To make this dish even heartier and full of texture, add a variety of vegetables. The best choices for a vegetarian pot pie include:
✔️ Classic Frozen Mixed Vegetables – Peas, carrots, corn, and green beans make a great base.
✔️ Baby Potatoes or Sweet Potatoes – Dice them small for a more filling, starchy addition.
✔️ Zucchini or Yellow Squash – Adds a tender bite and extra color.
✔️ Spinach or Kale – For an extra dose of greens and nutrients.
✔️ Roasted Cauliflower or Broccoli – Brings a slightly nutty, roasted flavor that pairs perfectly with the creamy sauce.
✅ Pro Tip: For the best flavor, roast the mushrooms, potatoes, or cauliflower before adding them to the filling—this gives them a rich, caramelized taste.
3. Making the Perfect Creamy Vegetarian Filling
The creamy filling is what brings this dish together. While traditional pot pie fillings use chicken broth and dairy, here’s how to make it just as creamy and flavorful without meat.
✔️ Vegetable Broth Instead of Chicken Broth
- Use a rich vegetable broth or stock to keep the deep, savory flavors.
- If you want extra umami, add a splash of soy sauce or miso paste to the broth.
✔️ Dairy-Free or Regular Cream Alternatives
- Full-fat coconut milk – Gives a thick, creamy texture without an overpowering coconut taste.
- Cashew cream – Blend soaked cashews with a bit of broth for a silky, dairy-free cream sauce.
- Heavy cream or half-and-half (for non-vegan option) – Works if you eat dairy and want a traditional rich texture.
✔️ Seasonings for a Bold Flavor
- Thyme, rosemary, and sage – Classic pot pie herbs that add warmth and depth.
- A pinch of nutmeg – A little goes a long way in enhancing cream-based sauces.
- Garlic and onion powder – Helps boost the savory, umami flavor.
✅ Pro Tip: If you want an extra-cheesy taste, stir in nutritional yeast or dairy-free shredded cheese to the sauce
4. Cheddar Bay Biscuit Topping – Vegetarian Style
Luckily, the Cheddar Bay Biscuit topping is already vegetarian-friendly, but here’s how to adjust it if needed:
✔️ For Dairy-Free Biscuits:
- Use dairy-free shredded cheddar (like Violife or Daiya).
- Replace buttermilk with almond, soy, or oat milk mixed with 1 tsp lemon juice.
- Use vegan butter instead of regular butter.
✔️ For a Whole-Grain or Gluten-Free Twist:
- Substitute whole wheat flour or use a gluten-free biscuit mix.
- Make cornbread topping instead of biscuits for a Southern-inspired twist.
✅ Pro Tip: Want extra crispy biscuits? Brush them with garlic-infused olive oil instead of butter for a flavorful finish.
5. Cooking and Baking Adjustments for a Vegetarian Pot Pie
A vegetarian pot pie bakes the same way as the classic version, but here are a few tips to get the best texture and flavor:
✔️ Sauté Vegetables First – Since there’s no chicken, sautéing the mushrooms, onions, and root vegetables before adding the broth creates a deeper flavor base.
✔️ Thicken the Sauce Properly – If the filling is too thin, stir in a cornstarch slurry (1 tbsp cornstarch + 2 tbsp water) to help it thicken before baking.
✔️ Bake at 400°F (200°C) for 25-30 Minutes – The biscuits should be golden brown and the filling should be bubbling around the edges.
✅ Pro Tip: For individual portions, bake the filling in ramekins or small oven-safe bowls and top each one with a single cheddar biscuit!
6. Extra Ways to Customize Your Vegetarian Pot Pie
Want to get creative with your vegetarian version? Try these delicious flavor variations:
✔️ Spicy Kick – Add chopped jalapeños, a pinch of cayenne, or smoked paprika for heat.
✔️ Mediterranean Twist – Add sundried tomatoes, olives, and feta cheese for a Greek-inspired variation.
✔️ Indian-Inspired Version – Stir in curry powder, turmeric, and coconut milk for a spiced-up take on pot pie.
✔️ Tex-Mex Style – Use black beans, corn, cumin, and chili powder, then serve with avocado slices on top.
✅ Pro Tip: If making a vegan version, use a dairy-free garlic butter glaze and swap out any animal-based ingredients!
7. Final Thoughts: A Hearty & Satisfying Vegetarian Comfort Food
A vegetarian Cheddar Bay Biscuit Pot Pie is just as rich, creamy, and indulgent as the original, with plenty of texture, flavor, and protein-packed ingredients. Whether you use mushrooms, chickpeas, lentils, or tofu, this meatless version is guaranteed to please both vegetarians and meat-eaters alike!
✔️ Creamy, cheesy, and comforting—without the chicken!
✔️ Packed with vegetables and plant-based protein for a filling meal.
✔️ Easily customizable for dairy-free, gluten-free, or spicier versions.
✔️ Perfect for meal prep, family dinners, or even holiday gatherings.
Would you like a step-by-step vegetarian recipe with specific measurements and instructions?
Crispier Topping Hack: How to Achieve the Ultimate Golden, Crunchy Biscuit Crust
One of the best parts of this Cheddar Bay Biscuit Chicken Pot Pie is the flaky, golden-brown biscuit topping. While the standard biscuit method already delivers a delicious, buttery crust, sometimes you want even more crispiness and crunch—especially on the edges!
This section will cover expert tips and tricks to ensure your biscuit topping bakes up perfectly crisp on the outside while staying soft and fluffy on the inside.
1. Brush the Biscuits with an Egg Wash Before Baking
One of the easiest ways to get a crispy, golden crust on your biscuits is by brushing them with an egg wash before baking.
✔️ What is an Egg Wash?
- An egg wash is simply a beaten egg mixed with a little water or milk.
- Brushing it over the biscuits before baking enhances browning, adds shine, and creates a firmer crust.
✔️ How to Make It:
- Beat 1 egg with 1 tablespoon of water or milk until fully combined.
- Using a pastry brush, lightly coat the tops of the biscuits before placing the dish in the oven.
✅ Pro Tip: If you want extra crispiness, mix in a pinch of salt and garlic powder into the egg wash for added flavor!
2. Pre-Bake the Biscuits Separately for Extra Crispiness
Instead of baking the biscuits directly on top of the filling, try baking them separately for a crispier texture.
✔️ Why This Works:
- Baking the biscuits on a separate baking sheet allows them to brown evenly on all sides instead of just the top.
- Once the filling is hot and bubbly, place the pre-baked biscuits on top and bake everything together for a few more minutes to help them absorb just a little of the sauce without getting soggy.
✔️ How to Do It:
- Drop the biscuit dough onto a parchment-lined baking sheet instead of the filling.
- Bake at 400°F (200°C) for 10-12 minutes, or until lightly golden but not fully baked.
- Remove from the oven and carefully place the semi-baked biscuits on top of the pot pie filling.
- Return the dish to the oven and bake for another 10-15 minutes until golden brown and fully cooked.
✅ Pro Tip: If you love a super crispy biscuit crust, bake the biscuits fully on the side and place them on top only after serving—this keeps them crisp the entire time!
3. Use a Cast-Iron Skillet for a Crispier Bottom Crust
For an extra crispy bottom and edges, try baking your pot pie in a cast-iron skillet instead of a regular baking dish.
✔️ Why Cast Iron Works Better:
- Cast iron retains and distributes heat evenly, creating a crispier crust compared to a glass or ceramic dish.
- The bottom of the biscuits gets a beautiful golden-brown crust, while the tops stay fluffy.
✔️ How to Use It:
- Prepare the creamy chicken filling directly in a large, oven-safe cast-iron skillet.
- Drop the biscuit dough on top.
- Bake as usual at 400°F (200°C) for 25-30 minutes until golden and bubbling.
✅ Pro Tip: If you want an even crispier bottom crust, heat the cast-iron skillet on the stovetop for 2 minutes before adding the filling—this gives the bottom a head start!
4. Add a Crispy Cheese Layer Before Baking
If you love the crispy edges of baked cheese, this trick will take your biscuit topping to the next level!
✔️ How to Do It:
- Sprinkle shredded sharp cheddar cheese directly on top of the biscuit dough before baking.
- As it bakes, the cheese will melt, crisp up, and create a crunchy, cheesy crust.
- You can also press a little cheese onto the bottoms of the biscuits before placing them on the filling for extra crispiness.
✅ Pro Tip: Try using a mix of cheddar and Parmesan for an even richer, crispier crust!
5. Finish with a Second Layer of Garlic Butter After Baking
Brushing melted garlic butter on the biscuits before baking is standard—but doing it again after baking makes them even crispier and more flavorful.
✔️ How to Do It:
- Bake the pot pie until the biscuits are golden and fully cooked.
- Remove from the oven and immediately brush another layer of garlic butter over the biscuits.
- Let it sit for 2-3 minutes before serving—this allows the butter to soak in without making the biscuits soggy.
✅ Pro Tip: If you want an ultra-crispy top, pop the dish under the broiler for 2-3 minutes after applying the second layer of garlic butter!
6. Adjust Your Biscuit Dough for a Crispier Texture
✔️ Use Less Liquid in the Dough:
- A slightly drier biscuit dough creates a crispier texture when baked.
- If your dough seems very sticky, add 1-2 extra tablespoons of flour.
✔️ Chill the Dough Before Baking:
- Cold biscuit dough creates a flakier texture, which helps prevent them from absorbing too much moisture from the filling.
- If time allows, chill the biscuit dough for 10-15 minutes before baking.
✔️ Bake at a Higher Temperature for the First 5 Minutes:
- Start baking at 425°F (218°C) for the first 5 minutes, then reduce to 400°F (200°C) for the rest of the baking time.
- This gives the biscuits a quick rise and a crispier outer layer.
✅ Pro Tip: If you want a super crunchy texture, try using half all-purpose flour and half cornmeal in the biscuit dough—this gives the biscuits a slightly Southern-style crunch!
Final Thoughts: How to Get the Crispiest Biscuit Topping
If you want to take your Cheddar Bay Biscuit topping to the next level, these expert hacks will help you achieve the ultimate crispy, golden crust while keeping the biscuits soft and fluffy inside.
✔️ Brush with an Egg Wash for a glossy, crisp crust.
✔️ Pre-Bake the Biscuits Separately for extra crunch.
✔️ Use a Cast-Iron Skillet for a crispier bottom layer.
✔️ Add a Crispy Cheese Layer for extra texture.
✔️ Double-Brush with Garlic Butter for rich flavor.
✔️ Adjust the Biscuit Dough for the perfect balance of crisp and fluffy.
By following these crispy topping hacks, your Cheddar Bay Biscuit Chicken Pot Pie will have a beautifully golden, crunchy, and buttery crust that’s just as exciting as the creamy filling underneath!
Would you like a specific step-by-step guide for one of these hacks, or a variation using puff pastry or cornbread instead of biscuits?
Best Side Dishes to Serve with Cheddar Bay Biscuit Chicken Pot Pie
While Cheddar Bay Biscuit Chicken Pot Pie is a hearty, satisfying meal on its own, pairing it with the right side dishes can take your dinner to the next level. The creamy filling and buttery biscuit topping create a rich and indulgent flavor profile, so the best side dishes will either complement the comfort food feel or add freshness and contrast to balance the dish.
Here are some perfect side dishes that pair beautifully with this savory, cheesy, and comforting pot pie.
1. Fresh and Light Side Salads
Since pot pie is rich and creamy, serving it with a light, crisp salad helps balance the meal by adding freshness, acidity, and crunch.
Best Salad Pairings:
✔️ Classic Garden Salad – A mix of romaine, cherry tomatoes, cucumbers, and red onions, tossed in a light vinaigrette.
✔️ Caesar Salad – Crisp Romaine lettuce, shaved Parmesan, and crunchy croutons with a creamy dressing for a cool, tangy contrast.
✔️ Apple Walnut Salad – Mixed greens with sliced apples, walnuts, dried cranberries, and feta cheese, dressed with a light balsamic vinaigrette for a sweet-savory contrast.
✔️ Arugula & Lemon Salad – Peppery arugula, shaved Parmesan, and a lemony olive oil dressing add a bright, citrusy contrast.
✅ Pro Tip: Use a tangy or acidic dressing like balsamic vinaigrette, lemon dressing, or apple cider vinaigrette to cut through the richness of the pot pie.
2. Roasted or Steamed Vegetables for a Nutritious Boost
Adding a simple vegetable side brings color, nutrients, and variety to your plate while complementing the creamy chicken pot pie filling.
Best Vegetables to Serve:
✔️ Garlic Roasted Green Beans – Toss fresh green beans with olive oil, garlic, salt, and pepper, then roast until tender-crisp.
✔️ Honey-Glazed Carrots – Roasted or sautéed carrots with a touch of honey and butter add a natural sweetness to balance the savory pot pie.
✔️ Parmesan Roasted Brussels Sprouts – Roasting Brussels sprouts with olive oil, Parmesan, and garlic makes them crispy and flavorful.
✔️ Steamed Broccoli with Lemon Zest – A light, refreshing side that adds fiber and pairs well with the creamy filling.
✔️ Sautéed Spinach with Garlic – Quick, easy, and a perfect way to add greens to the meal.
✅ Pro Tip: If roasting vegetables, bake them at 400°F (200°C) for 20-25 minutes—you can cook them alongside the pot pie to save time!
3. Starchy Sides for Extra Comfort
If you’re craving even more comfort food, these warm, hearty side dishes will make your meal extra satisfying.
Best Starchy Side Dishes:
✔️ Mashed Potatoes – Creamy, buttery mashed potatoes make the ultimate comfort-food pairing with pot pie. For extra flavor, try garlic mashed potatoes or cheddar mashed potatoes.
✔️ Roasted Sweet Potatoes – Their natural sweetness pairs beautifully with the rich pot pie.
✔️ Cornbread or Corn Casserole – If you love Southern-style comfort food, a side of fluffy cornbread or a creamy corn pudding is a perfect match.
✔️ Buttery Dinner Rolls – Light and fluffy rolls are great for soaking up any extra creamy filling.
✔️ Baked Mac and Cheese – For the ultimate indulgent pairing, serve your pot pie with a side of cheesy, gooey mac and cheese.
✅ Pro Tip: If making mashed potatoes, add roasted garlic, Parmesan, or chives for extra flavor!
4. Soups for a Cozy, Comforting Meal
Pairing your pot pie with a light, brothy soup or a seasonal favorite makes for a warming, satisfying meal.
Best Soup Pairings:
✔️ Tomato Basil Soup – A light, tangy soup that complements the cheesy biscuit topping.
✔️ Butternut Squash Soup – Velvety and slightly sweet, it pairs beautifully with the savory pot pie.
✔️ French Onion Soup – The caramelized onions and cheesy crouton topping match the rich, buttery flavors of the pot pie.
✔️ Lemon Orzo Soup – A refreshing, zesty soup that balances the richness of the dish.
✅ Pro Tip: If serving soup as a side, choose one that’s lighter and brothy rather than thick and creamy, so it doesn’t overpower the pot pie.
5. Pickled or Tangy Sides for Contrast
Because pot pie is rich and creamy, pairing it with something tangy, pickled, or acidic helps cut through the heaviness and add brightness to the meal.
Best Tangy or Pickled Sides:
✔️ Pickled Red Onions – Their acidity and crunch balance out the creamy filling.
✔️ Cranberry Sauce – A touch of sweetness and tartness makes for a surprising but delicious pairing.
✔️ Coleslaw with Vinegar Dressing – A light, tangy coleslaw adds freshness without being too heavy.
✔️ Dill Pickles or Pickled Vegetables – Their tanginess helps cleanse the palate.
✅ Pro Tip: If making a vinaigrette dressing or pickled side, use apple cider vinegar or lemon juice for the best bright, tangy flavor.
6. Drinks That Pair Well with Pot Pie
To complete your meal, pair your Cheddar Bay Biscuit Chicken Pot Pie with a drink that enhances the rich, savory flavors.
Best Drink Pairings:
✔️ White Wine – A crisp Chardonnay or Sauvignon Blanc complements the creamy filling.
✔️ Light Beer – A lager or pale ale balances the richness of the dish.
✔️ Apple Cider (Hot or Cold) – A great non-alcoholic pairing with a touch of sweetness.
✔️ Iced Tea with Lemon – Refreshing and light, perfect for cutting through the richness.
✅ Pro Tip: If serving wine, avoid heavy reds, as they can overpower the delicate flavors of the dish. Stick to white wines or light reds like Pinot Noir.
Final Thoughts: The Perfect Pairings for Pot Pie
While Cheddar Bay Biscuit Chicken Pot Pie is delicious on its own, serving it with the right side dish can take the meal to the next level. Whether you prefer a light salad, roasted vegetables, a cozy soup, or a starchy comfort side, these pairings will help balance the richness and enhance the overall dining experience.
✔️ For a balanced meal: Serve with a crisp salad or roasted veggies.
✔️ For extra indulgence: Add mashed potatoes, cornbread, or mac and cheese.
✔️ For a cozy feel: Pair with a light soup or warm dinner rolls.
✔️ For contrast: Add a pickled side or tangy vinaigrette salad.
Would you like a step-by-step recipe for a perfect side dish, like garlic roasted green beans, mashed potatoes, or a fresh salad?
How to Store & Reheat: Keeping Your Cheddar Bay Biscuit Chicken Pot Pie Fresh & Delicious
One of the best things about Cheddar Bay Biscuit Chicken Pot Pie is that it stores and reheats beautifully, making it a great option for leftovers, meal prep, or even freezing for a later date. Whether you want to store it for a few days in the fridge or freeze it for long-term enjoyment, these step-by-step storage and reheating tips will ensure your pot pie stays just as creamy, cheesy, and delicious as when it was freshly baked.
1. How to Store Leftovers in the Refrigerator
If you have leftovers, proper storage will maintain the flavor and texture of your pot pie while keeping it fresh for several days.
Step-by-Step Storage Instructions for the Fridge:
✔️ Let the pot pie cool to room temperature – Do not store it while it’s still hot, as this can create condensation, making the biscuits soggy.
✔️ Transfer to an airtight container – If you’ve made it in a large casserole dish, you can either:
- Cover the entire dish tightly with plastic wrap or aluminum foil.
- Transfer individual portions into airtight meal prep containers for easy reheating later.
✔️ Refrigerate for up to 3-4 days – After this time, the biscuits may start to become too soft, and the filling may lose its freshness.
✅ Pro Tip: Store the biscuits separately (if possible) to keep them crisp when reheating.
2. How to Freeze Cheddar Bay Biscuit Chicken Pot Pie
Freezing is a great option if you want to make pot pie ahead of time or if you have leftovers you won’t eat within a few days. You can freeze the entire dish, individual portions, or just the filling for future use.
Freezing the Whole Pot Pie (Best for Meal Prep & Future Dinners)
✔️ Cool the pot pie completely before freezing to avoid ice crystals forming.
✔️ Wrap it securely in two layers of plastic wrap, followed by a layer of aluminum foil to prevent freezer burn.
✔️ Label it with the date and store it in the freezer for up to 3 months.
Freezing Individual Portions (Best for Quick Meals)
✔️ Cut the pot pie into single-serving portions and transfer them into freezer-safe containers.
✔️ For best results, wrap each portion in plastic wrap before placing it in the container.
✔️ This method makes it easy to grab one serving at a time when you need a quick meal!
Freezing Just the Filling (Best for Quick Assembly Later)
✔️ Prepare the chicken pot pie filling, let it cool, and transfer it to a freezer-safe zip-top bag or airtight container.
✔️ Freeze for up to 3 months.
✔️ When ready to use, thaw, heat the filling, and add freshly made Cheddar Bay Biscuits on top before baking.
✅ Pro Tip: Avoid freezing the biscuits unbaked, as the texture won’t be the same when thawed. Instead, bake them fresh when ready to eat.
3. How to Reheat Cheddar Bay Biscuit Chicken Pot Pie
Reheating properly ensures the filling stays creamy and the biscuits remain crisp, rather than becoming mushy. Here’s how to reheat it using different methods depending on your time and preference.
A. Reheating in the Oven (Best Method for Maintaining Texture & Crispiness)
Why? The oven reheats everything evenly, keeping the biscuits fluffy and crispy while warming the filling thoroughly.
✔️ Preheat the oven to 350°F (175°C).
✔️ If reheating the entire pot pie, cover it loosely with foil to prevent over-browning of the biscuits.
✔️ If reheating individual portions, place them in an oven-safe dish and cover lightly with foil.
✔️ Bake for 15-20 minutes (whole dish) or 10-15 minutes (individual portions) until heated through.
✔️ Remove the foil for the last 5 minutes to crisp up the biscuit topping.
✅ Pro Tip: Brush the biscuits with a little melted butter or garlic butter before reheating for extra moisture and flavor.
B. Reheating in the Microwave (Fastest Method for Quick Meals)
Why? The microwave is the quickest way to reheat individual portions, but it can make the biscuits soft.
✔️ Place a single serving of pot pie on a microwave-safe plate.
✔️ Cover with a damp paper towel to help retain moisture in the filling.
✔️ Heat on medium power (50-70%) for 1-2 minutes, then check for doneness.
✔️ If needed, heat for another 30 seconds to 1 minute, until fully warmed.
✅ Pro Tip: If you want the biscuits to be crispier after microwaving, pop them under the broiler for 2-3 minutes to regain some crunch!
C. Reheating in an Air Fryer (Best for Extra Crispy Biscuits)
Why? The air fryer reheats quickly while crisping up the biscuits, making it a great option.
✔️ Preheat the air fryer to 325°F (160°C).
✔️ Place individual portions of the pot pie in the air fryer basket (use foil underneath for easy cleanup).
✔️ Heat for 5-7 minutes until the filling is hot and the biscuits are crisp.
✅ Pro Tip: If reheating a large portion, microwave it first for 1-2 minutes, then finish in the air fryer for extra crispiness.
D. Reheating from Frozen (No Need to Thaw!)
If you’re reheating a frozen pot pie, you can bake it directly from the freezer—just add extra baking time!
✔️ Preheat oven to 375°F (190°C).
✔️ Place the frozen pot pie in an oven-safe dish and cover with foil.
✔️ Bake for 40-50 minutes, then remove the foil.
✔️ Continue baking for 10-15 minutes, or until the biscuits are golden brown and the filling is bubbling hot.
✅ Pro Tip: To speed up reheating, let the frozen pot pie thaw overnight in the fridge before baking—it will reheat faster and more evenly.
4. How Long Does Leftover Pot Pie Last?
| Storage Method | How Long It Lasts |
|---|---|
| Refrigerated (covered) | 3-4 days |
| Frozen (whole pot pie) | Up to 3 months |
| Frozen (individual portions) | Up to 3 months |
| Frozen (just the filling) | Up to 3 months |
✅ Pro Tip: If you’re freezing the pot pie, label it with the date you made it so you don’t forget how long it’s been stored!
Final Thoughts: Keeping Your Pot Pie Fresh & Delicious
By storing and reheating it properly, you can enjoy your Cheddar Bay Biscuit Chicken Pot Pie multiple times without losing any of its creamy, cheesy, buttery goodness!
✔️ Store in an airtight container in the fridge for up to 4 days.
✔️ Freeze for up to 3 months for easy meal prep.
✔️ Reheat in the oven for best texture (or use an air fryer for extra crispy biscuits!).
✔️ Use the microwave for quick heating, but finish in the oven for crispiness.
Would you like a step-by-step guide on freezing pot pies for easy meal prep, or do you need low-waste storage solutions?
Can You Freeze It? A Complete Guide to Freezing Cheddar Bay Biscuit Chicken Pot Pie
Yes! Cheddar Bay Biscuit Chicken Pot Pie is an excellent dish to freeze for later. Whether you want to meal prep for busy weeks, store leftovers, or make a batch ahead of time, freezing ensures you can enjoy this comforting dish anytime without sacrificing flavor or texture.
That said, the key to freezing pot pie successfully is knowing how to properly store, thaw, and reheat it so that the biscuits stay fluffy and crisp, and the filling remains rich and creamy. Below, we’ll go over the best methods for freezing the whole pot pie, individual portions, or just the filling for later use.
1. Can You Freeze a Fully Assembled and Baked Pot Pie?
Yes, you can freeze the entire pot pie after baking, but the biscuits may soften slightly when thawed and reheated. If you don’t mind a slightly softer texture, this is the easiest method for meal prep.
How to Freeze a Fully Baked Pot Pie:
✔️ Let it cool completely – Do not freeze while it’s hot, or condensation will form, making the biscuits soggy.
✔️ Wrap tightly – Cover the dish tightly with two layers of plastic wrap, followed by a layer of aluminum foil to prevent freezer burn.
✔️ Label & Freeze – Mark it with the date and freeze for up to 3 months.
How to Reheat a Frozen Baked Pot Pie:
1️⃣ Reheat directly from frozen – No need to thaw first!
2️⃣ Preheat oven to 375°F (190°C).
3️⃣ Cover with foil and bake for 40-50 minutes, then uncover and bake for another 10-15 minutes until fully heated.
4️⃣ Brush with garlic butter after reheating for extra flavor.
✅ Pro Tip: To keep the biscuits crisp, remove them before freezing and bake fresh when ready to eat.
2. Can You Freeze an Unbaked Pot Pie? (Best for Fresh Results!)
Freezing an unbaked pot pie is the best method if you want freshly baked biscuits with perfect texture when you’re ready to eat.
How to Freeze an Unbaked Pot Pie:
✔️ Prepare the filling and pour it into a freezer-safe dish (but do not add the biscuit topping yet).
✔️ Cool the filling completely before freezing to avoid excess moisture.
✔️ Cover tightly with plastic wrap & foil to prevent freezer burn.
✔️ Freeze the biscuit dough separately – Shape the biscuit dough into rounds, place them on a baking sheet, and freeze until solid. Then transfer to a freezer bag.
How to Bake from Frozen:
1️⃣ Thaw the filling overnight in the fridge (or heat from frozen).
2️⃣ If needed, warm the filling on the stovetop before adding the biscuits.
3️⃣ Drop fresh or thawed frozen biscuits on top and bake at 400°F (200°C) for 25-30 minutes.
✅ Pro Tip: If using frozen biscuits, add 5 extra minutes to the baking time for them to cook through completely.
3. Can You Freeze Individual Portions? (Best for Quick Meals!)
Freezing individual servings makes it easy to grab a single portion when you’re in a hurry. This is a great option for meal prepping and portion control.
How to Freeze Individual Portions:
✔️ Cut the cooled pot pie into individual servings.
✔️ Wrap each portion tightly in plastic wrap, then place in a freezer-safe container or zip-top bag.
✔️ Label & freeze for up to 3 months.
How to Reheat Frozen Individual Portions:
1️⃣ Oven Method (Best for Texture):
- Place a frozen portion in an oven-safe dish, cover with foil, and bake at 375°F (190°C) for 20-25 minutes.
2️⃣ Microwave Method (Fastest):
- Place on a microwave-safe plate, cover with a damp paper towel, and heat on medium power (50-70%) for 2-3 minutes.
- Finish under the broiler for 2 minutes to crisp up the biscuit topping.
✅ Pro Tip: If reheating multiple portions, consider using an air fryer at 325°F (160°C) for 5-7 minutes to restore crispiness.
4. Can You Freeze Just the Filling? (Best for Fresh-Baked Biscuits)
If you want the freshest biscuits possible, you can freeze just the filling and make the biscuit dough fresh when you’re ready to eat.
How to Freeze the Filling Only:
✔️ Cool the filling completely before transferring to an airtight freezer-safe container or zip-top freezer bag.
✔️ Lay the bag flat in the freezer for easier storage and quicker thawing.
✔️ Label & freeze for up to 3 months.
How to Reheat & Assemble Later:
1️⃣ Thaw the filling overnight in the fridge (or heat directly from frozen).
2️⃣ Reheat on the stovetop until warmed through.
3️⃣ Pour into a baking dish and top with freshly made biscuit dough.
4️⃣ Bake at 400°F (200°C) for 25-30 minutes until golden brown.
✅ Pro Tip: If the thawed filling seems too thick, add a splash of broth or cream to loosen it before baking.
5. How Long Does Pot Pie Last in the Freezer?
| Freezing Method | How Long It Lasts |
|---|---|
| Fully baked, whole | Up to 3 months |
| Unbaked (best method) | Up to 3 months |
| Individual portions | Up to 3 months |
| Just the filling | Up to 3 months |
✅ Pro Tip: Always label frozen pot pies with the date of freezing to keep track of freshness!
Final Thoughts: The Best Way to Freeze Your Pot Pie
✔️ Want the freshest biscuits? Freeze just the filling and make the biscuits fresh when ready.
✔️ Need a quick, reheatable meal? Freeze fully baked individual portions for easy microwave or oven heating.
✔️ Prepping ahead? Freeze an unbaked pot pie and bake fresh for the best results.
✔️ Short on time? Reheat directly from frozen in the oven at 375°F (190°C) for 40-50 minutes.
By following these freezing and reheating methods, you can enjoy Cheddar Bay Biscuit Chicken Pot Pie anytime—without losing flavor, texture, or quality!
Would you like a step-by-step meal prep plan for making freezer-friendly pot pies?