

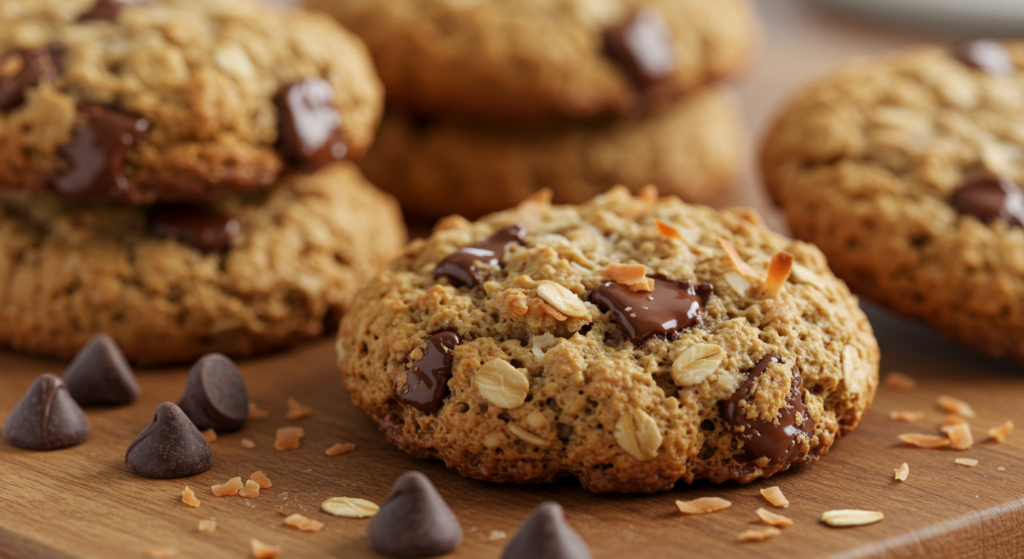
If you love cookies that are soft, chewy, and packed with flavor, then these Oatmeal Coconut Chocolate Chip Cookies are for you! Combining the hearty texture of oats, the natural sweetness of shredded coconut, and the indulgent richness of chocolate chips, these cookies are a delightful treat for any occasion.
Unlike traditional chocolate chip cookies, this recipe adds an extra layer of chewiness from oats and coconut, making every bite irresistibly delicious. Plus, they’re easy to make with simple pantry ingredients, making them perfect for a quick homemade dessert or snack. Whether you enjoy them fresh out of the oven with a glass of milk or save them for later, these cookies are guaranteed to be a family favorite.
Ready to bake? Let’s dive into what makes these cookies so special and how you can make them at home!
Perfect Texture: The Ultimate Chewy and Crispy Balance
One of the best things about Oatmeal Coconut Chocolate Chip Cookies is their unique texture. These cookies strike the perfect balance between chewy, crispy, and soft, making them an absolute delight for cookie lovers.
1. The Role of Oats in Texture
Oats are the secret ingredient that gives these cookies their hearty, chewy bite. Unlike traditional cookies that rely solely on flour, the oats create a slightly dense yet soft texture, ensuring every bite is satisfying. Rolled oats provide more chewiness, while quick oats create a softer, more uniform texture. Depending on your preference, you can adjust the type of oats used.
2. Coconut for Extra Chewiness
Shredded coconut adds an unexpected but delightful chew to these cookies. As the cookies bake, the coconut absorbs moisture, making the texture rich and soft. Sweetened coconut flakes enhance the sweetness and chew, while unsweetened shredded coconut gives a more subtle flavor and slightly firmer texture. If you prefer a more pronounced coconut flavor, toasting the coconut before mixing it into the dough can add an extra depth of flavor.
3. Crispy Edges and Soft Centers
The combination of butter, brown sugar, and proper baking time ensures that these cookies have crispy, golden edges while remaining soft in the center. The brown sugar helps retain moisture, keeping the cookies tender, while the butter contributes to the crispiness. If you like your cookies even crispier, you can bake them a little longer or flatten the dough slightly before baking.
4. How Chocolate Chips Enhance Texture
The chocolate chips add a melt-in-your-mouth contrast to the chewiness of the oats and coconut. As they bake, the chocolate softens and creates gooey pockets of richness, making each bite extra indulgent. You can choose from semi-sweet, dark, or milk chocolate chips, depending on how sweet or intense you want the chocolate flavor to be.
5. The Impact of Chilling the Dough
For an even better texture, chilling the cookie dough before baking is highly recommended. Letting the dough rest in the refrigerator for 30 minutes to an hour allows the ingredients to fully absorb moisture, preventing the cookies from spreading too much in the oven. This step results in thicker cookies with a more developed flavor and a perfectly chewy center.
By balancing the chewiness from oats and coconut with the crisp edges and gooey chocolate chips, these cookies offer the perfect texture that will make you crave more! Whether you like them extra soft or with a bit of crunch, you can adjust the ingredients and baking time to get the consistency just right.
Healthier Alternative: A Nutritious Twist on Classic Cookies
If you’re looking for a delicious cookie that satisfies your sweet cravings while offering some nutritional benefits, these Oatmeal Coconut Chocolate Chip Cookies are a great choice! While cookies are typically considered indulgent treats, this recipe includes wholesome ingredients like oats and coconut that add fiber, healthy fats, and natural sweetness, making them a better alternative to traditional cookies.
1. The Power of Oats: Fiber and Sustained Energy
Oats are a nutrient-rich whole grain that provide an excellent source of fiber, which helps with digestion and keeps you feeling full longer. Unlike refined white flour, which can lead to a quick sugar spike, oats offer complex carbohydrates that release energy slowly, preventing sudden sugar crashes.
Additionally, oats contain beta-glucan, a type of soluble fiber that supports heart health by helping lower cholesterol levels. By swapping out some or all of the flour in your cookie recipe for oats, you create a cookie that’s not only more filling but also has added health benefits.
2. Coconut: Healthy Fats and Natural Sweetness
Coconut adds both flavor and nutrition to these cookies. Shredded coconut is packed with healthy fats, particularly medium-chain triglycerides (MCTs), which are known to support metabolism and provide quick energy.
Additionally, coconut has a natural sweetness that allows you to reduce the amount of refined sugar in the recipe. If you prefer a less sugary cookie, you can even substitute some of the brown sugar with coconut sugar or honey for a more natural sweetness.
3. Chocolate Chips: A Smarter Sweet Treat
While chocolate chips add indulgence, choosing dark chocolate over milk chocolate can provide additional health benefits. Dark chocolate is rich in antioxidants, flavonoids, and minerals like iron and magnesium, which can support heart health and brain function. Opting for semi-sweet or 70% dark chocolate chips can reduce the overall sugar content while still delivering that rich chocolatey taste.
For a dairy-free or healthier alternative, you can also use cacao nibs instead of chocolate chips. These provide a more intense chocolate flavor with less sugar and more nutrients.
4. Substituting Ingredients for an Even Healthier Version
If you want to make these cookies even healthier, consider these simple substitutions:
- Replace white flour with whole wheat flour or a gluten-free flour blend for added fiber.
- Use coconut oil instead of butter for a dairy-free and plant-based fat alternative.
- Swap refined sugar for coconut sugar, honey, or maple syrup to reduce processed sugar intake.
- Add nuts or seeds (like almonds, walnuts, or flaxseeds) for extra protein and crunch.
5. A Guilt-Free Treat for Any Occasion
By incorporating oats, coconut, and dark chocolate, these cookies are not just a sweet treat but also a healthier alternative to regular chocolate chip cookies. They provide a good balance of fiber, healthy fats, and energy-boosting nutrients, making them a great snack for both kids and adults. Whether you enjoy them as a post-workout snack, a mid-day energy boost, or a guilt-free dessert, these cookies allow you to indulge while still feeling good about your choices!
Simple Ingredients: Pantry Staples for a Delicious Cookie
One of the best things about these Oatmeal Coconut Chocolate Chip Cookies is that they are made with simple, everyday ingredients that you probably already have in your pantry. There’s no need for fancy or hard-to-find ingredients—just a handful of kitchen staples that come together to create a cookie that is chewy, flavorful, and absolutely irresistible.
1. Oats – The Heart of the Cookie
Oats are the foundation of these cookies, giving them their signature chewy texture. They also add a nutty flavor and boost the fiber content, making them a more wholesome treat compared to traditional flour-based cookies.
- Rolled Oats – Best for a chewy texture and a heartier cookie.
- Quick Oats – Absorb moisture faster and result in a softer cookie.
Both types work, but if you want a more textured and chewy cookie, rolled oats are the way to go!
2. Shredded Coconut – A Sweet, Chewy Twist
Coconut adds a tropical touch to these cookies, enhancing their flavor and texture. It also helps keep the cookies moist and chewy. You can choose from:
- Sweetened Shredded Coconut – Adds extra sweetness and chewiness.
- Unsweetened Shredded Coconut – A less sugary option that still gives a great coconut flavor.
- Toasted Coconut – Adds a crunchy, nutty depth to the cookies.
If you want a deeper coconut flavor, toasting the shredded coconut before mixing it in can enhance the overall taste.
3. Chocolate Chips – A Classic Indulgence
Chocolate chips are what make these cookies so decadent! When baked, they melt into gooey pockets of rich chocolate, balancing the chewiness of the oats and coconut.
- Semi-Sweet Chocolate Chips – A perfect balance of sweetness and depth.
- Dark Chocolate Chips – Less sugar, more intense chocolate flavor.
- Milk Chocolate Chips – Sweeter and creamier, great for those who love a milder chocolate taste.
- Cacao Nibs – A healthier alternative with a more bitter, intense cocoa flavor.
If you love a chocolate-loaded cookie, feel free to increase the amount of chocolate chips or mix different types for a more complex flavor.
4. Flour – The Structure Builder
Flour helps bind the ingredients together and gives the cookies their shape. For these cookies, you can use:
- All-Purpose Flour – The most common and versatile choice.
- Whole Wheat Flour – Adds extra fiber and a slightly nutty taste.
- Gluten-Free Flour Blend – If you’re making gluten-free cookies, a good 1:1 baking blend will work well.
If you’re looking for a healthier option, replacing half of the all-purpose flour with whole wheat flour can enhance the nutritional value without compromising texture.
5. Butter – For That Rich, Buttery Flavor
Butter adds richness, helps create crisp edges, and contributes to the chewiness of the cookies. You can use:
- Unsalted Butter – Best for controlling the saltiness of the recipe.
- Salted Butter – If using this, reduce the additional salt in the recipe.
- Coconut Oil or Vegan Butter – Great dairy-free alternatives that still add moisture and flavor.
For an extra chewy cookie, using melted butter instead of softened butter can help achieve that texture.
6. Brown Sugar – The Secret to Soft, Chewy Cookies
Brown sugar not only adds sweetness but also helps create a soft and chewy texture due to its moisture content. You can choose:
- Light Brown Sugar – Milder flavor, keeps cookies moist.
- Dark Brown Sugar – More molasses, richer caramel flavor.
If you want a slightly healthier alternative, you can substitute some of the brown sugar with coconut sugar or maple syrup.
7. Eggs – The Binding Agent
Eggs help bind all the ingredients together and give the cookies structure. If you need an egg substitute, you can use:
- Flax Egg (1 tbsp flaxseed meal + 3 tbsp water) – Great for a vegan-friendly version.
- Applesauce or Mashed Banana (¼ cup per egg) – Adds moisture and a slight fruity sweetness.
8. Vanilla Extract – Enhancing the Flavor
A splash of vanilla extract helps round out the flavors, adding a warm, aromatic depth that complements the chocolate and coconut.
If you want to experiment, almond extract can also be a great addition for a nutty twist.
9. Baking Soda – The Leavening Agent
Baking soda helps the cookies rise slightly and gives them their perfect soft yet slightly crispy texture. Be sure to measure accurately—too much can make the cookies spread too thin, while too little can make them too dense.
10. Salt – Bringing Out the Sweetness
A pinch of salt enhances the flavors of all the other ingredients, balancing the sweetness of the chocolate and sugar. If you love a sweet-salty contrast, sprinkling flaky sea salt on top after baking adds a delicious gourmet touch!
Simple Ingredients, Incredible Cookies
With just a few basic ingredients, you can create a batch of chewy, chocolatey, coconut-infused cookies that taste like they came from a bakery. The beauty of this recipe is that it’s easy to customize based on what you have in your pantry—whether you want to make them healthier, gluten-free, or dairy-free.
Now that you know what goes into these cookies, let’s move on to the fun part—baking them!
Versatile Recipe: Customizing Your Oatmeal Coconut Chocolate Chip Cookies
One of the best things about these Oatmeal Coconut Chocolate Chip Cookies is their incredible versatility. Whether you want to make them healthier, gluten-free, dairy-free, or add extra flavors, this recipe is easily adaptable to fit your personal preferences and dietary needs. With just a few simple swaps and additions, you can create a cookie that’s uniquely yours while maintaining the same delicious, chewy texture.
Here’s how you can customize these cookies to suit different tastes and diets:
1. Make It Gluten-Free
If you have gluten sensitivities or just prefer to avoid gluten, you can still enjoy these cookies with simple ingredient swaps:
- Use gluten-free oats – Make sure to use certified gluten-free oats, as some oats are processed in facilities that also handle wheat.
- Replace all-purpose flour with a gluten-free blend – A 1:1 gluten-free flour mix works best, as it mimics the structure of wheat flour without compromising texture.
- Try almond flour or oat flour – If you prefer a more natural gluten-free alternative, almond flour adds richness, while oat flour enhances the oatmeal flavor.
These substitutions will allow you to make delicious gluten-free cookies without sacrificing taste or texture.
2. Make It Dairy-Free
Want a dairy-free version of these cookies? It’s easy to replace the dairy ingredients while keeping the cookies just as soft and chewy.
- Use coconut oil or vegan butter instead of regular butter. Both options keep the cookies moist and add a subtle hint of coconut flavor.
- Choose dairy-free chocolate chips – Many brands offer dairy-free or vegan chocolate chips made with dark chocolate and no milk solids.
- Substitute milk-based ingredients (if any) with almond, coconut, or oat milk – If the recipe includes any milk (such as for binding), plant-based milk works perfectly.
These simple swaps make the cookies completely dairy-free without changing the taste too much.
3. Reduce the Sugar for a Healthier Option
If you want to cut back on refined sugar, there are several ways to make these cookies healthier while keeping them delicious.
- Use coconut sugar instead of brown sugar – Coconut sugar has a lower glycemic index and adds a mild caramel flavor.
- Replace some sugar with maple syrup or honey – These natural sweeteners add moisture and a subtle sweetness.
- Reduce the amount of sugar overall – If you prefer cookies that aren’t too sweet, simply cutting the sugar by 25%–30% won’t significantly impact the texture.
Making small changes to the sugar content helps create a more balanced cookie while keeping it naturally sweet and flavorful.
4. Add Nuts for Extra Crunch
If you love cookies with a bit of crunch, adding nuts is a fantastic way to elevate the texture and taste. Some great options include:
- Walnuts – Adds a buttery, earthy crunch that pairs beautifully with chocolate.
- Almonds – Slightly sweet and crunchy, almonds enhance the nutty flavor of coconut.
- Pecans – Soft and rich, they add a mild sweetness and crunch.
- Macadamia Nuts – A classic pairing with coconut, macadamia nuts provide a rich, tropical taste.
Chop them up and fold them into the dough for an added layer of texture and flavor.
5. Experiment with Different Chocolate Varieties
While chocolate chips are a staple, you can switch up the type of chocolate for a new taste experience.
- Dark chocolate chips (70% or higher) – For a rich, slightly bitter contrast to the sweet cookie.
- Milk chocolate chips – Adds extra creaminess and sweetness.
- White chocolate chips – Pairs well with coconut for a tropical flavor.
- Cacao nibs – A healthier alternative that offers an intense chocolate taste with minimal sugar.
Mixing different types of chocolate or using chunks instead of chips can also enhance the texture and make every bite unique.
6. Turn Them Into No-Bake Cookies
If you don’t want to turn on the oven, you can tweak this recipe to make delicious no-bake cookies instead!
- Melt the butter (or coconut oil) with brown sugar and a splash of milk to create a sticky base.
- Mix in oats, coconut, and chocolate chips, then scoop and shape into small cookie mounds.
- Let them chill in the fridge for at least 30 minutes until firm.
No-bake versions are great for hot weather and can be made in minutes!
7. Add Spices for Extra Warmth and Flavor
Want to give your cookies a unique twist? Adding spices can make a huge difference in flavor.
- Cinnamon – Enhances the warmth and pairs well with oats and chocolate.
- Nutmeg – Adds a subtle, sweet spice that deepens the flavor.
- Cardamom – A fragrant, slightly citrusy spice that adds a unique touch.
- Pumpkin spice – Perfect for fall-inspired cookies.
A dash of spice can elevate the cookies and give them a cozy, comforting flavor.
8. Create a Healthier Breakfast Cookie
Want a cookie that’s great for breakfast? Adjust the recipe slightly to make a wholesome breakfast-friendly version:
- Reduce the sugar or use honey/maple syrup instead.
- Add nuts and seeds (chia seeds, flaxseeds, sunflower seeds) for extra nutrients.
- Include dried fruits (raisins, cranberries, chopped dates) for natural sweetness.
- Use whole wheat or oat flour instead of all-purpose flour for added fiber.
These changes make the cookies more nutritious and filling, perfect for a grab-and-go breakfast or an afternoon snack.
Endless Possibilities for Customization
The beauty of this recipe is that it can be customized to fit any preference. Whether you want a healthier cookie, a gluten-free version, or an indulgent chocolate-loaded treat, these Oatmeal Coconut Chocolate Chip Cookies can be easily adapted.
With so many ways to experiment, you can bake a different variation every time and never get bored! Now that you know how versatile this recipe is, let’s move on to the step-by-step guide to making the perfect batch of cookies.
Oats: The Heart of These Cookies
Oats are the key ingredient that gives Oatmeal Coconut Chocolate Chip Cookies their signature texture, flavor, and nutritional benefits. Unlike traditional flour-based cookies, adding oats provides a chewy bite, a slightly nutty taste, and a more wholesome feel. Oats not only make these cookies delicious but also boost their fiber, protein, and nutrient content, making them a more satisfying treat.
But not all oats are the same! The type of oats you choose can significantly impact the texture and outcome of your cookies. Let’s explore how oats contribute to these cookies and how to choose the right kind.
1. Why Oats Are Essential in These Cookies
Oats do more than just add texture to your cookies. Here’s why they are such a great ingredient:
- Adds chewiness – Oats absorb moisture and expand during baking, giving cookies a thick and chewy consistency.
- Enhances flavor – They have a subtle nutty taste that pairs perfectly with chocolate and coconut.
- Boosts nutrition – Oats are high in fiber (beta-glucan), protein, and essential vitamins like B vitamins and iron.
- Makes cookies more filling – Unlike cookies made with only white flour, oatmeal cookies keep you full longer due to their high fiber content.
- Balances sweetness – The earthiness of oats prevents the cookies from tasting overly sweet.
Using oats in cookies is a great way to add texture, improve nutrition, and create a more satisfying dessert that isn’t just empty calories.
2. Choosing the Right Type of Oats for the Best Texture
Not all oats behave the same way in baking. The type of oats you use will determine whether your cookies turn out extra chewy, soft, or dense.
Rolled Oats (Old-Fashioned Oats) – Best for a Chewy Texture
- The most commonly used oats in oatmeal cookies.
- They are steamed and flattened but still retain their shape during baking.
- Ideal for creating a hearty, chewy texture in cookies.
- Absorb moisture slowly, helping cookies stay moist for longer.
If you love thick, chunky, and chewy cookies, rolled oats are the best option!
Quick Oats – For Softer, More Uniform Cookies
- Quick oats are just rolled oats that have been cut into smaller pieces for faster cooking.
- They absorb moisture more quickly, making cookies softer and less chunky.
- Ideal for those who prefer a smoother texture rather than a hearty chew.
If you want a less textured cookie with a more even consistency, quick oats work well.
Instant Oats – Not Recommended
- These are finely processed and precooked, leading to an almost powdery texture.
- They absorb too much moisture, making cookies too soft and sometimes mushy.
- They don’t provide the chewiness that makes oatmeal cookies special.
For the best results, avoid using instant oats in this recipe.
Steel-Cut Oats – Not Ideal for Cookies
- Steel-cut oats are the least processed form of oats, with a rough, dense texture.
- They take much longer to cook and don’t soften properly in cookie dough.
- If you use steel-cut oats without pre-soaking them, the cookies will turn out too hard and crunchy.
If you really want to use steel-cut oats, they should be soaked in milk or water for several hours before adding them to the dough. However, rolled oats are a far better choice.
3. How to Properly Use Oats in Cookie Dough
To get the best results, follow these tips when incorporating oats into your cookie dough:
✔ Measure correctly – Use a measuring cup to ensure the right ratio of oats to flour. Too many oats can make the cookies dry.
✔ Mix with dry ingredients first – Combine oats with flour, baking soda, and salt before adding to wet ingredients for even distribution.
✔ Don’t overmix – Overmixing can break down the oats, making the cookies dense instead of chewy. Mix just until combined.
✔ Adjust based on texture preference – For chunkier cookies, use more rolled oats. For softer cookies, use quick oats.
By properly handling oats, you can enhance both the texture and structure of your cookies while ensuring they bake perfectly every time.
4. Nutritional Benefits of Oats in Cookies
Oats aren’t just delicious—they also offer several health benefits, making these cookies a healthier alternative to traditional chocolate chip cookies.
- High in Fiber – Oats contain soluble fiber (beta-glucan), which helps with digestion, keeps you full longer, and supports heart health.
- Supports Energy Levels – Oats provide complex carbohydrates, giving you sustained energy without sugar crashes.
- Good Source of Protein – Unlike refined flour, oats contain a decent amount of protein, which helps with muscle repair and keeps you full.
- Rich in Essential Nutrients – Oats are high in B vitamins, iron, magnesium, and antioxidants, all of which contribute to overall health.
- Naturally Gluten-Free (But Check Labels!) – While oats are naturally gluten-free, cross-contamination can occur during processing, so buy certified gluten-free oats if needed.
By using oats in these cookies, you’re adding both flavor and nutrition, making them a snack that is not only delicious but also more wholesome than traditional cookies.
5. Can You Replace All the Flour with Oats?
If you want to make flourless oatmeal cookies, you can replace flour with finely ground oats (oat flour). However, this will change the cookie’s texture.
✔ For a chewier cookie – Use a mix of oats and oat flour instead of all-purpose flour.
✔ For a denser, heartier cookie – Use only oats, but expect a more rustic texture.
To keep the structure of the cookies intact, it’s usually best to keep some flour in the recipe while increasing the oats.
6. Adding Extra Flavor to Oatmeal Cookies
Want to take your oatmeal cookies to the next level? Try enhancing the oats with extra flavors:
- Toasted oats – Lightly toasting the oats before adding them to the dough gives them a deeper, nuttier flavor.
- Cinnamon and nutmeg – Warm spices complement the oats and enhance the cookie’s cozy flavor.
- Brown butter – Using browned butter instead of regular butter adds a rich, caramelized depth to the cookies.
- Mix-ins – Raisins, nuts, dried cranberries, or even a pinch of sea salt on top can elevate the flavors.
By experimenting with different ingredients, you can create a variety of oatmeal coconut chocolate chip cookies that suit your taste perfectly.
Final Thoughts: The Magic of Oats in Cookies
Oats are what make these Oatmeal Coconut Chocolate Chip Cookies stand out. They add chewiness, flavor, and a boost of nutrition while keeping the cookies soft and satisfying. Whether you prefer thick, chunky cookies or softer, smoother ones, the type of oats you choose will help you get the perfect texture.
By using high-quality rolled or quick oats, properly measuring and mixing them, and experimenting with different flavors, you can make a batch of cookies that is both delicious and wholesome. Now that you know everything about oats, let’s move on to the baking process and bring these amazing cookies to life!
Shredded Coconut: The Secret to Extra Chewy and Flavorful Cookies
Shredded coconut is what makes these Oatmeal Coconut Chocolate Chip Cookies truly special. It adds a rich, tropical flavor and a delightful chewy texture, making the cookies soft, moist, and irresistibly delicious. Whether you love the distinct taste of coconut or just want to enhance the texture of your cookies, shredded coconut is a key ingredient that takes this recipe to the next level.
But not all shredded coconut is the same! Let’s explore the different types, how they impact your cookies, and how to use them for the best results.
1. Types of Shredded Coconut: Which One to Use?
Shredded coconut comes in various forms, and the type you choose will affect both the sweetness and texture of your cookies.
A. Sweetened Shredded Coconut – For a More Moist and Sweet Cookie
- This is the most commonly used type in baking.
- Contains added sugar, making it naturally sweeter.
- Retains more moisture, giving cookies a softer, chewier texture.
- Works best if you want a more indulgent and dessert-like cookie.
If you prefer a cookie with a richer, more pronounced coconut flavor, sweetened shredded coconut is the best choice.
B. Unsweetened Shredded Coconut – For a More Natural, Less Sweet Cookie
- Contains no added sugar, making it a healthier option.
- Has a drier texture compared to sweetened coconut.
- Works well for those who prefer a balanced sweetness in their cookies.
- Can be used to slightly reduce the sugar content of the recipe without compromising flavor.
If you enjoy a more subtle coconut taste or want to control the sweetness of your cookies, unsweetened shredded coconut is a great alternative.
C. Desiccated Coconut – Fine and Dry for a More Subtle Texture
- Very finely shredded and dried coconut with little to no moisture.
- Results in a less chewy but more evenly mixed texture.
- Works well if you don’t want large coconut flakes in your cookies.
Desiccated coconut is a good choice for those who want the coconut flavor without noticeable flakes in every bite.
D. Toasted Coconut – For Extra Crunch and Deep Flavor
- Coconut that has been lightly toasted to bring out a nutty, caramelized flavor.
- Enhances the overall depth of flavor and adds a slight crunch.
- Can be made at home by spreading shredded coconut on a baking sheet and toasting at 325°F (163°C) for 5–7 minutes.
- Works well as a topping or mixed directly into the dough for an added layer of complexity.
Toasted coconut adds a more gourmet touch to the cookies and is perfect if you want to amplify the coconut flavor.
2. How Shredded Coconut Enhances the Texture of Cookies
Shredded coconut is not just about flavor—it plays a key role in the texture of these cookies:
✔ Adds Chewiness – Coconut absorbs moisture while baking, giving the cookies a soft, chewy consistency.
✔ Keeps Cookies Moist – Because shredded coconut retains moisture, it prevents cookies from becoming too dry.
✔ Balances the Crisp Edges – While the edges of the cookies get slightly crispy, the coconut keeps the center perfectly soft.
✔ Provides a Slight Crunch (If Toasted) – If you use toasted coconut, you get an additional crunchy texture that pairs beautifully with oats and chocolate chips.
No matter what type of coconut you use, it will enhance the structure of your cookies while adding a unique chewiness that makes them even more satisfying.
3. How to Properly Use Shredded Coconut in Cookies
To get the best results, follow these tips when using shredded coconut:
✔ Measure Accurately – Adding too much coconut can make the dough too dry, so stick to the recommended amount in the recipe.
✔ Mix Evenly – Stir the shredded coconut into the dough at the end, ensuring even distribution throughout the cookies.
✔ Choose Based on Sweetness Preference – If using sweetened coconut, consider slightly reducing the sugar in the recipe to avoid overpowering sweetness.
✔ For Toasted Coconut, Cool Before Adding – If toasting coconut, let it cool before mixing it into the dough to avoid melting the butter or chocolate chips.
By handling shredded coconut properly, you ensure that your cookies maintain the perfect balance of moisture, chewiness, and flavor.
4. Can You Substitute Coconut for Other Ingredients?
If you love the texture but don’t want to use coconut, here are some alternatives:
- Chopped Nuts (Almonds, Walnuts, Pecans) – Provide a similar chewiness with a nutty twist.
- Oat Bran or Extra Oats – Mimic the fiber and chew of coconut without the coconut flavor.
- White Chocolate Chips – Add sweetness and texture while complementing the chocolate chips.
- Dried Fruits (Raisins, Cranberries, Chopped Dates) – Offer a similar chewy texture with added natural sweetness.
While these substitutions won’t exactly replicate shredded coconut’s unique texture, they can work if you’re looking for a coconut-free version of these cookies.
5. How to Store Shredded Coconut for Maximum Freshness
If you don’t use shredded coconut often, it’s important to store it properly to keep it fresh.
✔ Room Temperature – If using frequently, keep it in an airtight container in a cool, dry place for up to 2 months.
✔ Refrigerator – Extends shelf life up to 6 months and helps maintain freshness.
✔ Freezer – For long-term storage, freeze shredded coconut in a sealed bag or container for up to a year.
If your coconut starts to smell stale or rancid, it’s time to replace it. Keeping it fresh ensures that your cookies always taste their best!
6. Elevating the Flavor of Coconut in Cookies
Want to enhance the coconut flavor even more? Try these ideas:
- Use Coconut Extract – A small amount (½ tsp) boosts the coconut taste without adding extra coconut.
- Coconut Oil Instead of Butter – Replacing some or all of the butter with coconut oil intensifies the coconut notes.
- Coconut Sugar Instead of Brown Sugar – Adds a caramel-like coconut sweetness to the cookies.
- Dip in Dark Chocolate – After baking, dip half of each cookie in melted dark chocolate and sprinkle with toasted coconut for an elegant touch.
These simple tweaks elevate the coconut experience and make these cookies even more irresistible!
Final Thoughts: Why Shredded Coconut is a Game-Changer
Shredded coconut is a small but powerful ingredient in Oatmeal Coconut Chocolate Chip Cookies. It not only enhances the chewiness and moisture of the cookies but also brings a unique tropical sweetness that pairs beautifully with oats and chocolate. Whether you use sweetened, unsweetened, or toasted coconut, this ingredient adds depth, texture, and flavor to every bite.
By experimenting with different types of coconut and flavor enhancements, you can create a cookie that’s perfectly tailored to your taste. Now that you know everything about shredded coconut, let’s move on to mixing up the dough and baking these delicious treats!
Chocolate Chips: The Indulgent Touch That Makes These Cookies Irresistible
No cookie is complete without chocolate chips, and in Oatmeal Coconut Chocolate Chip Cookies, they play a crucial role in both taste and texture. The rich, melty goodness of chocolate chips balances the chewy oats and coconut, creating a perfect harmony of flavors. Whether you love classic semi-sweet chocolate chips or want to experiment with different varieties, the right choice of chocolate can elevate these cookies to a whole new level.
Let’s dive into everything you need to know about chocolate chips, from selecting the best type to melting and pairing them perfectly with other ingredients.
1. Choosing the Right Type of Chocolate Chips
Chocolate chips come in various flavors and textures, and each type affects the sweetness, richness, and overall experience of the cookies.
A. Semi-Sweet Chocolate Chips – The Classic Choice
- The most common and versatile type used in cookies.
- Offers a perfect balance between sweetness and cocoa depth.
- Melts beautifully without overpowering the other ingredients.
- Pairs well with oats, coconut, and brown sugar for a rich, comforting cookie.
Semi-sweet chocolate chips are the go-to choice for a traditional yet indulgent cookie experience.
B. Dark Chocolate Chips – For an Intense Cocoa Flavor
- Contains a higher cocoa content (50%–85%), resulting in a rich and slightly bitter taste.
- Less sweet than semi-sweet chips, making them a great choice for balanced flavors.
- Pairs wonderfully with sweetened shredded coconut and brown sugar.
- Provides a gourmet touch for those who love deep, dark chocolate notes.
Dark chocolate chips are perfect for those who prefer a less sugary, more sophisticated cookie.
C. Milk Chocolate Chips – Extra Sweet and Creamy
- Sweeter and creamier than semi-sweet or dark chocolate.
- Contains more milk solids, giving a smooth and mild flavor.
- Pairs well with unsweetened shredded coconut to balance out the sweetness.
- Ideal for kids or those who love a classic, extra-sweet cookie.
Milk chocolate chips create a softer, creamier contrast to the chewy oats and coconut.
D. White Chocolate Chips – Sweet and Buttery
- Made from cocoa butter, sugar, and milk, but contains no cocoa solids.
- Adds vanilla-like creaminess instead of a chocolatey taste.
- Pairs well with toasted coconut and macadamia nuts for a tropical feel.
- Ideal for a sweeter, more dessert-like cookie.
White chocolate chips bring a unique, buttery sweetness to the cookies, making them extra special.
E. Cacao Nibs – A Healthier Alternative
- Small crushed pieces of dried cacao beans, offering a pure chocolate taste.
- Very low in sugar but rich in antioxidants and nutrients.
- Adds a slightly bitter crunch rather than a melty texture.
- Best paired with maple syrup or honey to balance the bitterness.
For a healthier cookie with deep cocoa flavor, cacao nibs are an excellent substitute.
2. How Chocolate Chips Affect Cookie Texture
Chocolate chips do more than just add flavor—they contribute to the overall texture of your cookies.
✔ Melty and Gooey Centers – Chocolate chips soften as they bake, creating melty chocolate pockets in every bite.
✔ Contrast to Chewy Oats – The smooth texture of chocolate complements the slight chewiness of oats.
✔ Balances Crisp and Soft Areas – When distributed evenly, chocolate chips help balance the crisp edges and soft center.
✔ Enhances Moisture Retention – The fats in chocolate keep cookies moist and tender, preventing them from drying out too quickly.
To maximize the meltiness, opt for larger chocolate chunks or chop up a chocolate bar instead of using standard chips.
3. How to Properly Add Chocolate Chips to Cookie Dough
For evenly distributed chocolate chips and perfect texture, follow these tips:
✔ Fold in chocolate chips at the end – After mixing the wet and dry ingredients, stir in the chips gently to avoid overmixing.
✔ Coat chocolate chips in flour (optional) – Lightly tossing them in a bit of flour prevents them from sinking to the bottom of the cookie dough.
✔ Chill the dough before baking – Chilling helps prevent chocolate chips from melting too quickly, keeping their shape inside the cookies.
✔ Press extra chocolate chips on top before baking – This makes cookies look extra tempting and bakery-style!
These simple steps enhance both the appearance and flavor of your cookies.
4. Can You Use Chocolate Chunks Instead of Chips?
Yes! Chopped chocolate bars (chocolate chunks) work just as well—sometimes even better.
Benefits of Using Chocolate Chunks:
✔ Larger melted pools of chocolate in each bite.
✔ More variety in texture (some small bits, some big melted areas).
✔ Allows mixing different chocolate types (dark, milk, or white).
For extra gourmet cookies, try using a mix of chocolate chunks and chips.
5. Best Chocolate and Coconut Pairings for Unique Flavors
Chocolate and coconut naturally complement each other, but you can take it even further with these pairings:
- Dark Chocolate + Sweetened Coconut + Sea Salt → A rich, salty-sweet contrast.
- Milk Chocolate + Toasted Coconut + Almonds → A creamy, nutty, tropical combination.
- White Chocolate + Unsweetened Coconut + Macadamia Nuts → A buttery, sweet pairing.
- Semi-Sweet Chocolate + Brown Butter + Coconut Sugar → A deep, caramel-like flavor.
Experimenting with different chocolate and coconut combinations allows you to create cookies that suit your personal taste.
6. Storing Chocolate Chips to Keep Them Fresh
If you don’t use chocolate chips frequently, proper storage is essential to maintain their quality.
✔ Room Temperature – Keep in an airtight container in a cool, dry place for up to 6 months.
✔ Refrigerator – If your kitchen is warm, storing them in the fridge helps prevent melting.
✔ Freezer – For long-term storage, freeze chocolate chips in a sealed bag for up to a year.
If chocolate chips develop a white, powdery coating, it’s called chocolate bloom (caused by fat or sugar crystallization). While it looks unappealing, bloomed chocolate is still safe to use in baking.
7. Adding a Final Touch: Chocolate Drizzle or Dipped Edges
Want to make your cookies extra indulgent? Try these finishing touches:
✔ Drizzle melted chocolate over cooled cookies for an elegant presentation.
✔ Dip half of each cookie in melted chocolate and sprinkle with toasted coconut.
✔ Mix in mini chocolate chips for even more chocolate in every bite.
These small details make your cookies look and taste like they came from a high-end bakery.
Final Thoughts: Why Chocolate Chips Are Essential in These Cookies
Chocolate chips are more than just a mix-in; they are a key ingredient that brings balance to the chewy oats and coconut. Whether you prefer semi-sweet, dark, milk, or white chocolate, choosing the right type enhances both flavor and texture.
By experimenting with different chocolates, adding chunks, or finishing with a drizzle, you can create a truly personalized and indulgent cookie. Now that you know all about chocolate chips, it’s time to put everything together and bake the perfect batch of Oatmeal Coconut Chocolate Chip Cookies!
Other Essentials: The Key Ingredients That Bind Everything Together
While oats, shredded coconut, and chocolate chips are the star ingredients in Oatmeal Coconut Chocolate Chip Cookies, there are several other essential ingredients that play a crucial role in ensuring the cookies rise, hold their shape, and taste absolutely delicious. These “supporting ingredients” might seem basic, but without them, the cookies wouldn’t have the perfect texture, structure, or flavor balance.
Let’s break down each of these must-have essentials, why they matter, and how to use them properly for the best results.
1. Flour – The Structure Builder
Flour is one of the most fundamental ingredients in baking, as it provides structure and stability to cookies. It helps the dough hold together, ensuring the cookies don’t spread too much or fall apart after baking.
Best Types of Flour for This Recipe:
✔ All-Purpose Flour – The most commonly used flour in cookies. It gives the perfect balance of chewiness and softness.
✔ Whole Wheat Flour – Adds extra fiber and a nutty taste but makes cookies a bit denser. If using whole wheat flour, replace only half of the all-purpose flour to maintain a soft texture.
✔ Gluten-Free Flour Blend – Works well for those with gluten sensitivities. A 1:1 gluten-free baking mix is the best substitute.
✔ Oat Flour – For an even more oat-forward cookie, oat flour can replace all-purpose flour, but this will make the cookies softer and slightly more fragile.
Pro Tip:
To prevent cookies from becoming too dense, measure flour correctly by spooning it into a measuring cup and leveling it off (instead of scooping directly from the bag, which packs too much flour).
2. Butter – The Key to Flavor and Texture
Butter plays multiple roles in cookies—it adds rich flavor, helps with spreading, and contributes to crisp edges and a tender center.
Best Butter Options for This Recipe:
✔ Unsalted Butter – The preferred choice because it allows you to control the salt level in the cookies.
✔ Salted Butter – Works fine, but reduce or omit any additional salt in the recipe.
✔ Melted Butter vs. Softened Butter – Melted butter creates a chewier cookie, while softened butter results in a more structured, slightly crispier cookie.
✔ Coconut Oil or Vegan Butter – If making a dairy-free version, coconut oil adds a light coconut aroma and keeps the cookies soft.
Pro Tip:
For an extra rich, nutty flavor, try using brown butter (butter that’s been melted and cooked until golden brown). It deepens the flavor and enhances the caramel notes in the cookies.
3. Brown Sugar – The Secret to Soft, Chewy Cookies
Sugar isn’t just for sweetness—it affects texture, moisture retention, and browning in cookies.
Why Brown Sugar Works Best:
✔ Adds moisture – Brown sugar contains molasses, which keeps cookies soft and chewy.
✔ Enhances caramel-like flavor – Complements the nuttiness of oats and coconut.
✔ Encourages browning – Helps create the golden, slightly crisp edges.
Alternatives to Brown Sugar:
✔ Coconut Sugar – A healthier alternative with a caramel-like taste.
✔ Honey or Maple Syrup – Can be used instead, but slightly reduces the crispness of the cookies.
✔ White Sugar – If you prefer a crispier cookie, you can replace part of the brown sugar with white sugar.
Pro Tip:
For chewier cookies, use more brown sugar than white sugar. The molasses in brown sugar helps retain moisture!
4. Eggs – The Binding Agent
Eggs are crucial in cookie recipes because they bind the ingredients together, provide moisture, and help the cookies rise slightly.
Why Eggs Matter:
✔ Hold the dough together – Prevents cookies from crumbling.
✔ Adds moisture – Keeps cookies soft instead of dry.
✔ Helps create a light, tender texture – Without eggs, cookies can become too dense.
Egg Substitutes (for Egg-Free or Vegan Cookies):
✔ Flax Egg (1 tbsp ground flaxseed + 3 tbsp water) – Mimics the binding power of eggs.
✔ Unsweetened Applesauce (¼ cup per egg) – Adds moisture and a slight sweetness.
✔ Mashed Banana (¼ cup per egg) – Works well, but gives a subtle banana flavor.
Pro Tip:
For a richer cookie texture, try using only egg yolks instead of whole eggs. This makes cookies denser and more decadent.
5. Baking Soda – The Leavening Agent
Baking soda is essential in this recipe because it helps the cookies rise and spread properly.
✔ Creates a light, slightly airy texture – Prevents cookies from becoming too dense.
✔ Balances the acidity of brown sugar – Reacts with the molasses in brown sugar to create the perfect chewiness.
✔ Helps with browning – Gives cookies their beautiful golden color.
Pro Tip:
Don’t overdo it with baking soda! Too much can cause cookies to spread too much and develop a metallic taste. Stick to the exact amount in the recipe.
6. Vanilla Extract – Enhancing the Flavor
Vanilla extract might seem like a small ingredient, but it plays a big role in enhancing the overall taste of cookies. It adds a warm, aromatic depth that makes chocolate, coconut, and oats taste even better.
Vanilla Alternatives for a Unique Flavor Twist:
✔ Almond Extract – Adds a nutty, slightly sweet aroma.
✔ Coconut Extract – Boosts the coconut flavor even more.
✔ Maple Extract – Gives a rich, caramel-like depth to the cookies.
Pro Tip:
For extra flavor, use pure vanilla extract instead of artificial vanilla. You can also double the amount for a more intense vanilla taste.
7. Salt – The Flavor Enhancer
A small pinch of salt balances the sweetness and enhances all the other flavors in the cookies. Without it, cookies can taste flat.
✔ Kosher Salt – Preferred for a mild, well-rounded saltiness.
✔ Sea Salt Flakes – Sprinkling a bit on top of baked cookies adds a gourmet touch.
✔ Regular Table Salt – Works fine, but use slightly less as it’s more concentrated.
Pro Tip:
If you love the sweet-salty contrast, try sprinkling flaky sea salt on top of the cookies right after baking.
8. Milk (Optional) – For Extra Moisture
Some cookie recipes use a splash of milk to adjust the dough consistency and add moisture. This is useful if the dough feels too dry, especially when using whole wheat flour or alternative sweeteners.
Best Milk Options:
✔ Regular Whole Milk – Adds richness.
✔ Almond, Oat, or Coconut Milk – Works for a dairy-free version.
Pro Tip:
Only add 1–2 teaspoons at a time if needed to keep the dough from becoming too wet.
Final Thoughts: The Importance of These Essential Ingredients
While oats, coconut, and chocolate chips are the stars of these cookies, the other essentials work behind the scenes to create the perfect texture, flavor, and structure. From the binding power of eggs to the chewiness from brown sugar and the richness of butter, each ingredient plays an important role.
By understanding and fine-tuning these elements, you can customize your cookies to be chewier, crispier, or even healthier, depending on your preferences. Now that you know what makes these cookies work, let’s move on to mixing the dough and baking them to perfection!
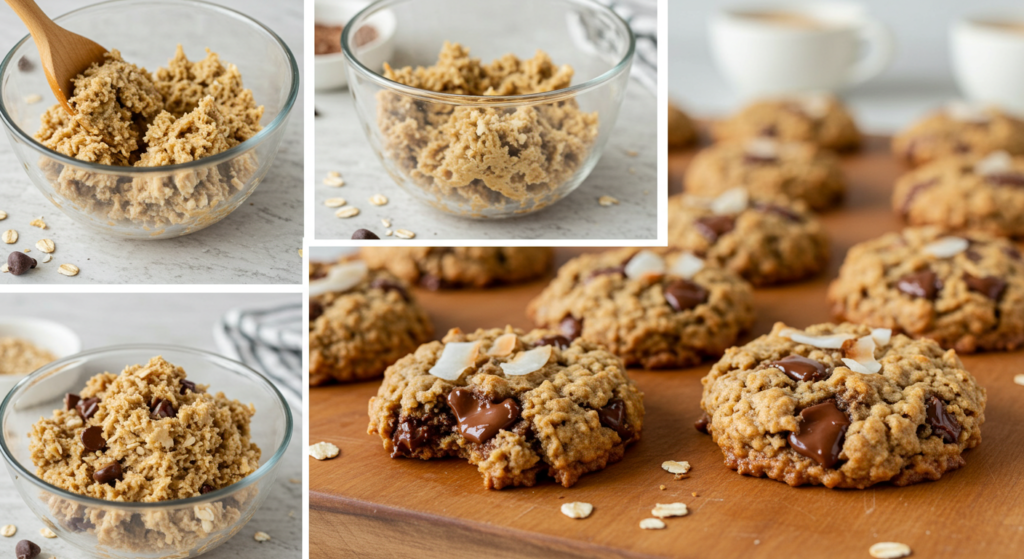
Prepare the Dough: The Foundation for Perfect Oatmeal Coconut Chocolate Chip Cookies
The process of preparing the dough is crucial to achieving the perfect texture, flavor, and consistency in your Oatmeal Coconut Chocolate Chip Cookies. A well-mixed dough ensures that every bite is balanced with chewy oats, sweet coconut, and melty chocolate chips while maintaining the right amount of moisture.
In this section, we’ll go step by step through the process of making the best cookie dough, from measuring ingredients properly to mixing techniques that enhance the flavor and texture of your cookies.
1. Gather and Measure Your Ingredients
Before starting, it’s important to measure all your ingredients accurately to avoid cookies that are too dry, too runny, or inconsistent in texture.
Measuring Tips for Perfect Dough:
✔ Flour – Spoon it into the measuring cup and level it off (don’t scoop directly from the bag, as it compacts too much flour).
✔ Butter – If using softened butter, let it sit at room temperature for about 30 minutes before mixing. If using melted butter, let it cool slightly before adding.
✔ Brown Sugar – Pack it firmly into the measuring cup for the correct amount.
✔ Oats – Use a measuring cup to ensure the right ratio for a chewy vs. soft texture.
✔ Chocolate Chips & Coconut – Measure these generously for cookies loaded with rich flavor and texture.
Having everything measured and ready makes the process smooth and stress-free.
2. Creaming Butter and Sugar – The Secret to Soft and Chewy Cookies
The first step in preparing the dough is to cream the butter and sugar together. This process helps create a cookie that is light, chewy, and flavorful.
How to Cream Butter and Sugar:
✔ Use a hand mixer or stand mixer – Beat the butter and sugar together on medium speed for about 2–3 minutes until light and fluffy.
✔ Why It Matters – Creaming incorporates air into the dough, making the cookies softer and helping them rise properly.
✔ Alternative – If using melted butter, mix it just until combined with the sugar to prevent over-aeration (which can lead to excessive spreading).
Pro Tip:
Using brown butter (melted butter that has been lightly browned) instead of regular butter deepens the flavor and adds a slightly caramelized, nutty taste to the cookies.
3. Add the Eggs and Vanilla Extract – Enhancing the Dough’s Flavor and Texture
Once the butter and sugar are well mixed, add eggs and vanilla extract, which serve as binding agents and help develop the cookie’s flavor.
Best Practices for Adding Eggs:
✔ Use room-temperature eggs – They mix more evenly into the dough than cold eggs.
✔ Add eggs one at a time – Mix after each egg to ensure proper incorporation.
✔ For richer cookies, use only egg yolks instead of whole eggs. This creates a denser, more indulgent texture.
Vanilla Extract – The Flavor Booster
Vanilla extract enhances the sweetness and depth of flavor in cookies.
✔ Use pure vanilla extract for the best taste.
✔ If you love a stronger vanilla flavor, add a little extra (½ teaspoon more).
Pro Tip:
For a twist on flavor, try adding almond extract (¼ teaspoon) or coconut extract to bring out the coconut notes.
4. Combine the Dry Ingredients – The Balance of Structure and Texture
The dry ingredients help create the cookie’s foundation. This includes:
✔ Flour – Provides structure.
✔ Baking Soda – Acts as a leavening agent, helping the cookies spread properly.
✔ Salt – Balances the sweetness and enhances flavor.
✔ Cinnamon (Optional) – Adds warmth and complements the oats and coconut.
How to Mix Dry Ingredients Properly:
✔ Whisk together the flour, baking soda, salt, and cinnamon (if using) in a separate bowl. This ensures that the leavening agents are evenly distributed.
✔ Gradually add the dry ingredients to the wet mixture, mixing on low speed to prevent overworking the dough (which can make cookies tough).
Pro Tip:
For a more complex flavor, substitute ¼ cup of the all-purpose flour with oat flour or whole wheat flour to add a heartier taste and extra fiber.
5. Fold in the Key Ingredients – Oats, Coconut, and Chocolate Chips
Now it’s time to gently fold in the ingredients that give these cookies their signature texture and taste:
✔ Oats – Add chewiness and structure.
✔ Shredded Coconut – Provides natural sweetness and moisture.
✔ Chocolate Chips – Brings melty, indulgent richness.
Folding Tips:
✔ Use a spatula or wooden spoon to mix instead of a mixer to avoid overmixing.
✔ Stir just until combined – Overmixing can make the dough too dense.
✔ For even distribution, add half the oats and coconut first, mix, then add the rest.
Pro Tip:
For a bakery-style touch, reserve a handful of chocolate chips and coconut flakes to press onto the tops of the cookies before baking.
6. Optional: Chill the Dough for Better Texture and Flavor
While you can bake the cookies immediately, chilling the dough improves texture, flavor, and shape.
Why Chill the Dough?
✔ Prevents excessive spreading – Chilled dough holds its shape better while baking.
✔ Enhances flavor – The ingredients have time to meld together, making the cookies taste even better.
✔ Creates a chewier texture – Resting allows the flour and oats to absorb moisture, leading to thicker, chewier cookies.
How Long to Chill:
✔ Quick Chill: 30 minutes – Helps prevent spreading.
✔ Deep Flavor Chill: 2–12 hours – Develops a richer, caramel-like flavor.
✔ Overnight Chill: Can be stored in the fridge for up to 2 days before baking.
Pro Tip:
If chilling for more than an hour, let the dough sit at room temperature for 10 minutes before scooping to make it easier to work with.
Final Thoughts: The Secret to a Perfect Cookie Dough
The dough is the foundation of your cookies, and taking the time to mix, fold, and (optionally) chill it correctly ensures the perfect balance of chewy, soft, and crispy textures.
By following these key steps—creaming the butter and sugar properly, using the right mix of dry and wet ingredients, folding in oats, coconut, and chocolate chips gently, and chilling the dough when needed—you set yourself up for a batch of cookies that are not only delicious but also perfectly textured.
Now that your dough is ready, it’s time for the most exciting part—scooping and baking these irresistible Oatmeal Coconut Chocolate Chip Cookies!
Add the Key Ingredients: Bringing Flavor and Texture to Life
Once the wet and dry ingredients are properly combined, it’s time to add the key ingredients that make these cookies truly special—oats, shredded coconut, and chocolate chips. These ingredients bring texture, flavor, and richness to the dough, creating the perfect balance of chewiness, sweetness, and depth.
Adding them at the right stage and mixing them properly ensures even distribution and a perfect bite in every cookie. Let’s go through each ingredient and how to incorporate them correctly into your dough.
1. Adding Oats – The Chewy and Hearty Base
Oats are the heart of Oatmeal Coconut Chocolate Chip Cookies. They provide a chewy, rustic texture and enhance the cookie’s structure while adding fiber and nutrients.
Which Type of Oats to Use?
✔ Rolled Oats (Old-Fashioned Oats) – Best for a chewy and textured cookie.
✔ Quick Oats – Create a softer, smoother cookie with less chewiness.
✔ Steel-Cut Oats – Not recommended unless pre-soaked, as they are too hard for standard cookie dough.
How to Properly Add Oats to Cookie Dough:
✔ Fold them in gradually instead of dumping them all at once.
✔ Use a spatula or wooden spoon rather than a mixer to avoid crushing them.
✔ Ensure even distribution so that every cookie gets the perfect chewiness.
Pro Tip:
For a slightly toasted flavor, you can toast the oats in a dry skillet for 2-3 minutes before adding them to the dough.
2. Adding Shredded Coconut – The Sweet, Chewy Twist
Shredded coconut is what makes these cookies unique and extra chewy. It enhances the flavor, texture, and moisture of the cookies while adding a subtle tropical sweetness.
Choosing the Right Type of Coconut:
✔ Sweetened Shredded Coconut – Adds extra moisture and a natural sweetness to the cookies.
✔ Unsweetened Shredded Coconut – Allows for better control of sweetness, ideal if you want a slightly less sugary cookie.
✔ Toasted Coconut – Adds a nutty depth of flavor and a bit of crunch.
How to Add Coconut to the Dough:
✔ Sprinkle it in gradually to avoid clumping.
✔ Mix with a spatula or by hand to evenly distribute it in the dough.
✔ For a stronger coconut flavor, lightly toast the coconut before adding it.
Pro Tip:
If using unsweetened coconut, you can increase the brown sugar slightly to maintain the perfect sweetness balance.
3. Adding Chocolate Chips – The Indulgent Finishing Touch
Chocolate chips add melty, rich pockets of chocolate to the cookies, creating a delightful contrast to the oats and coconut.
Best Types of Chocolate Chips for This Recipe:
✔ Semi-Sweet Chocolate Chips – Classic choice, not too sweet, not too bitter.
✔ Dark Chocolate Chips – Ideal if you prefer less sweetness and more intense cocoa flavor.
✔ Milk Chocolate Chips – Adds extra sweetness and creaminess.
✔ White Chocolate Chips – Brings a buttery vanilla twist that pairs well with coconut.
✔ Cacao Nibs – A healthier alternative with an intense chocolate taste and light crunch.
How to Incorporate Chocolate Chips:
✔ Gently fold them into the dough using a spatula or wooden spoon.
✔ Reserve some chips to press on top of each cookie before baking for a bakery-style look.
✔ Distribute them evenly to ensure every cookie gets chocolate in every bite.
Pro Tip:
If you love extra gooey cookies, use chopped chocolate bars instead of chips. Chocolate bars melt more than chips, creating pools of chocolate throughout the cookie.
4. Mixing Everything Together Without Overmixing
Now that the oats, shredded coconut, and chocolate chips are in the dough, it’s time to combine everything properly without overworking the mixture. Overmixing can lead to dense cookies, while undermixing can result in uneven distribution of ingredients.
Best Practices for Mixing the Key Ingredients:
✔ Use a spatula or wooden spoon instead of an electric mixer to prevent crushing the oats and chocolate chips.
✔ Fold the ingredients in gently rather than stirring vigorously.
✔ Mix just until everything is evenly incorporated—don’t overdo it!
Pro Tip:
If the dough feels too sticky or loose, refrigerate it for 30 minutes before shaping the cookies. Chilling helps firm up the dough and improves texture.
5. Optional: Enhancing the Dough with Extra Mix-Ins
Want to take your cookies to the next level? Try adding some extra ingredients for even more flavor and texture.
Great Mix-In Ideas:
✔ Chopped Nuts (Almonds, Walnuts, Pecans) – Adds crunch and a nutty depth.
✔ Dried Fruits (Cranberries, Raisins, Chopped Dates) – Complements the coconut and chocolate with natural sweetness.
✔ Flaky Sea Salt – A light sprinkle on top before baking enhances the chocolate flavor.
✔ Spices (Cinnamon, Nutmeg, Cardamom) – Adds warmth and enhances the overall taste.
Pro Tip:
If using nuts, toast them lightly before adding them to enhance their flavor and crunch.
Final Thoughts: Creating the Perfect Dough with Key Ingredients
By properly incorporating oats, shredded coconut, and chocolate chips, you create a well-balanced cookie dough that results in chewy, soft, and flavor-packed cookies. Taking the time to mix the ingredients carefully ensures that every bite has a perfect combination of textures and flavors.
Now that your dough is fully prepared, it’s time for the next exciting step—chilling, shaping, and baking these irresistible Oatmeal Coconut Chocolate Chip Cookies!
Chill the Dough (Optional): Why It Makes a Difference
While chilling the dough isn’t always required, it can make a huge difference in texture, flavor, and overall cookie quality. Letting the dough rest in the refrigerator before baking gives the ingredients time to meld together, resulting in cookies that are thicker, chewier, and more flavorful.
If you’ve ever wondered why bakery cookies have that perfect chewy center with crispy edges, chilling the dough is one of the secrets! Below, we’ll explore why chilling the dough matters, how long to chill it, and how to handle chilled dough for the best results.
1. Why Should You Chill Cookie Dough?
Chilling the dough improves cookies in several key ways:
✔ Prevents Excessive Spreading – Chilled dough holds its shape better, resulting in thicker cookies.
✔ Enhances Flavor – Resting the dough allows the flavors to develop, giving a richer taste.
✔ Creates a Chewier Texture – The oats and flour absorb moisture, making cookies softer and chewier.
✔ Gives More Even Baking – Cold dough bakes more evenly, preventing over-spreading and uneven textures.
✔ Improves Cookie Structure – Chilled dough is firmer, making it easier to scoop and shape into even portions.
Pro Tip:
If you struggle with cookies spreading too much, chilling the dough for even 30 minutes can make a noticeable difference.
2. How Long Should You Chill the Dough?
The chilling time depends on how much time you have and how thick you want your cookies. Here’s a guide:
⏳ Quick Chill (30 Minutes – 1 Hour) – Helps firm up the dough and reduces spreading.
⏳ Deep Flavor Chill (2 – 4 Hours) – Allows the ingredients to meld together for a more developed taste.
⏳ Overnight Chill (8 – 12 Hours) – Maximizes flavor, thickness, and chewiness.
⏳ Long-Term Storage (Up to 2 Days) – Great for prepping ahead; just let the dough sit at room temperature for 10 minutes before scooping.
Pro Tip:
For the best flavor and texture, chilling the dough for at least 2 hours is ideal. If you have time, overnight chilling yields even better cookies.
3. The Science Behind Chilling Cookie Dough
When you chill cookie dough, several scientific changes happen that improve your cookies:
✔ Butter Firms Up – Cold butter melts slower in the oven, preventing cookies from spreading too thin.
✔ Flour and Oats Absorb Moisture – This leads to a chewier, more cohesive texture.
✔ Sugar Crystallizes Slightly – This helps create crispy edges while keeping the centers soft.
✔ Flavors Intensify – Ingredients have more time to blend together, resulting in deeper, richer flavors.
Pro Tip:
Cookies baked from chilled dough often have a more pronounced caramelized flavor, thanks to the slower sugar breakdown in the oven.
4. How to Properly Chill Cookie Dough
✔ Step 1: Once all ingredients are mixed, cover the dough with plastic wrap or transfer it to an airtight container.
✔ Step 2: Place it in the refrigerator for your preferred chilling time.
✔ Step 3: If the dough becomes too hard to scoop after chilling, let it sit at room temperature for 10-15 minutes before baking.
Pro Tip:
For even portioning, scoop the dough into balls before chilling. This way, you can bake them straight from the fridge without needing to soften the dough.
5. Can You Freeze Cookie Dough Instead?
Yes! Freezing the dough is a great make-ahead option that allows you to bake fresh cookies anytime.
✔ Step 1: Scoop the cookie dough into individual balls.
✔ Step 2: Place them on a baking sheet and freeze for 30 minutes until firm.
✔ Step 3: Transfer the frozen dough balls to a ziplock bag or airtight container.
✔ Step 4: Store in the freezer for up to 3 months.
✔ Step 5: When ready to bake, place frozen dough balls directly on a baking sheet and bake—just add 2-3 extra minutes to the baking time.
Pro Tip:
Label the bag with the date and baking temperature so you don’t have to check the recipe each time you bake!
6. What Happens If You Skip Chilling the Dough?
If you choose to bake the cookies immediately without chilling, here’s what to expect:
❌ Cookies may spread more – Warmer dough melts faster in the oven.
❌ Texture might be softer and less chewy – The oats and flour won’t have as much time to absorb moisture.
❌ Flavor won’t be as developed – The butter and sugars won’t have enough time to blend deeply.
While they will still taste delicious, chilling enhances the overall quality of the cookies.
Pro Tip:
If you’re short on time but want some of the benefits of chilling, pop the dough in the freezer for 20 minutes for a quick chill.
Final Thoughts: Why Chilling Dough is Worth It
Chilling the dough might be an optional step, but it’s one of the easiest ways to elevate the texture, structure, and flavor of your Oatmeal Coconut Chocolate Chip Cookies. By allowing the ingredients to rest, you create thicker, chewier, and more flavorful cookies with perfectly balanced sweetness and crisp edges.
So, if you have the time, chilling the dough is highly recommended. Whether you refrigerate it for a few hours, overnight, or freeze for later, your patience will be rewarded with bakery-style, homemade cookies that taste even better.
Now that your dough is chilled and ready, it’s time for the most exciting part—baking these delicious cookies to perfection!
Bake to Perfection: The Final Step to Irresistible Cookies
Now that the dough is prepped, chilled (if you opted to), and ready to go, it’s time for the most crucial step—baking your Oatmeal Coconut Chocolate Chip Cookies to perfection. The way you bake them determines their texture, flavor, and overall quality. By following the right techniques, you can achieve crispy edges, a chewy center, and gooey chocolate in every bite.
Below, we’ll go through the optimal baking temperature, baking time, positioning, and techniques to ensure your cookies come out golden brown and absolutely delicious.
1. Preheat Your Oven: Setting the Right Temperature
Before placing your cookies in the oven, it’s essential to preheat properly to ensure even baking.
✔ Best Temperature: 350°F (175°C) – This is the ideal baking temperature for achieving a chewy interior and golden-brown edges.
✔ Why Not Higher? Higher temperatures (375°F–400°F) bake cookies faster, but they may brown too quickly and become dry.
✔ Why Not Lower? Lower temperatures (325°F) work, but the cookies spread more and take longer to bake.
Pro Tip:
Always preheat your oven for at least 10-15 minutes before baking. An improperly heated oven can lead to uneven cookies.
2. Preparing the Baking Sheet: Prevent Sticking & Even Baking
The right surface ensures your cookies don’t stick, spread too much, or burn on the bottom.
✔ Use Parchment Paper or a Silicone Baking Mat – These prevent sticking and promote even heat distribution.
✔ Avoid Greasing the Baking Sheet – Too much oil or butter on the sheet can cause excessive spreading.
✔ For Crispier Cookies, Use a Bare Baking Sheet – This helps cookies develop a crisper bottom.
Pro Tip:
If reusing a baking sheet for multiple batches, let it cool completely between uses to prevent the dough from spreading too much.
3. Portioning the Dough: Ensuring Evenly Sized Cookies
The way you scoop and space your cookies directly impacts how they bake.
✔ Use a Cookie Scoop – A medium-sized (1.5 tbsp) scoop ensures uniform cookies.
✔ Leave Enough Space – Place dough balls 2 inches apart to allow for spreading.
✔ Shape for Bakery-Style Cookies – Roll dough into balls, then slightly flatten them with your palm for even baking.
Pro Tip:
For thicker cookies, don’t flatten the dough balls too much—they will naturally spread as they bake.
4. Bake Time: Achieving the Perfect Texture
✔ Standard Baking Time: 10-12 minutes for soft and chewy cookies.
✔ For Crispier Cookies: Bake 13-15 minutes until the edges are golden brown.
✔ For Softer Cookies: Remove at 9-10 minutes when they still look slightly underbaked.
✔ For Thicker Cookies: Let chilled dough sit at room temperature for 5-10 minutes before baking.
Pro Tip:
Cookies continue to bake on the hot tray even after being removed from the oven. If they look slightly underdone in the center, that’s okay—they will firm up as they cool.
5. Checking for Doneness: The Visual Cues
Since every oven bakes differently, it’s important to check your cookies visually to know when they are done.
✔ Edges Should Be Light Golden Brown – Crisp but not overly dark.
✔ Centers Should Look Slightly Soft – They will firm up while cooling.
✔ Touch Test – Gently press the edge of a cookie; if it feels set but the center is soft, they’re done.
Pro Tip:
For extra chewy cookies, remove them from the oven 1 minute before they look fully done—they’ll finish baking on the sheet.
6. Letting Cookies Cool: The Secret to Perfect Texture
Cooling is just as important as baking! If you move cookies too soon, they may fall apart or become too soft.
✔ Let Cookies Rest on the Baking Sheet for 5 Minutes – This allows them to firm up before moving.
✔ Transfer to a Wire Rack to Cool Completely – This prevents sogginess by allowing airflow underneath.
✔ Enjoy Warm or Store for Later – If eating warm, let them sit for at least 10 minutes so the chocolate doesn’t burn your mouth.
Pro Tip:
For extra gooey chocolate chips, press a few extra chocolate chips onto the cookies right after baking.
7. Adjusting Baking Time for Different Cookie Preferences
Want to tweak your cookies to be softer, chewier, or crispier? Adjust your baking time:
✔ Extra Soft & Chewy: Bake for 9-10 minutes and remove when centers are still slightly underdone.
✔ Crispy & Golden: Bake for 13-15 minutes until edges are deep golden brown.
✔ Thick & Puffy: Chill the dough longer (2+ hours) and bake for 11-12 minutes.
Pro Tip:
For slightly crispy edges with a chewy center, aim for 10-12 minutes at 350°F and let them cool for 5 minutes before transferring.
8. Storing Cookies: Keeping Them Fresh
If you’re not eating all your cookies right away (though we wouldn’t blame you if you did!), proper storage keeps them soft, chewy, and fresh.
✔ Room Temperature: Store in an airtight container for up to 5 days.
✔ Refrigerator: Keeps cookies fresh for up to 2 weeks but may slightly harden them.
✔ Freezer: Freeze baked cookies for up to 3 months; thaw at room temperature before eating.
Pro Tip:
To keep cookies soft, place a slice of bread in the storage container—it helps retain moisture!
9. Reviving Cookies: Making Them Soft Again
If your cookies become too hard, here’s how to soften them back up:
✔ Microwave Trick: Wrap in a damp paper towel and microwave for 10 seconds.
✔ Oven Trick: Warm at 300°F for 5 minutes for a freshly baked feel.
✔ Bread Method: Store with a slice of bread in an airtight container for 24 hours to restore moisture.
Final Thoughts: Mastering the Baking Process
Baking your Oatmeal Coconut Chocolate Chip Cookies to perfection is all about temperature, timing, and technique. By following these steps, you’ll get thick, chewy, flavorful cookies with perfectly balanced textures and flavors.
Now that your cookies are baked to golden perfection, it’s time to enjoy them with a glass of milk, share them with friends, or store them for a later treat!
Use Melted vs. Softened Butter: How It Affects Your Cookies
One of the most important choices when baking Oatmeal Coconut Chocolate Chip Cookies is whether to use melted or softened butter. This decision significantly impacts the texture, spread, and chewiness of your cookies. Understanding how butter behaves in cookie dough will help you control the final result—whether you want thick and chewy, soft and cakey, or thin and crispy cookies.
Let’s dive into how melted vs. softened butter affects your cookies and when to use each type based on your desired cookie texture.
1. Melted Butter – For Chewy, Dense, and Rich Cookies
✔ Creates chewier cookies – Since melted butter incorporates differently into the dough, it leads to a more compact, chewy texture.
✔ Encourages spreading – Melted butter results in a thinner, slightly flatter cookie because the fat is already liquefied.
✔ Enhances a rich, buttery flavor – The fully melted fat coats flour more evenly, leading to a smoother, more indulgent bite.
✔ Great for soft cookies with slightly crisp edges – These cookies have moist, chewy centers with lightly crisp edges.
How to Use Melted Butter Properly in Cookies:
✔ Let it cool slightly before mixing it into the dough to avoid overheating eggs.
✔ Mix melted butter with sugar thoroughly – This helps achieve a smooth consistency and prevents separation.
✔ Chill the dough before baking – Since melted butter makes dough more fluid, refrigerating the dough for at least 30 minutes helps prevent excessive spreading.
Pro Tip:
For even richer flavor, try using brown butter (butter that’s melted and lightly browned in a pan). It adds a deep, caramel-like nuttiness to cookies!
2. Softened Butter – For Thicker, Lighter, and More Structured Cookies
✔ Creates thicker, fluffier cookies – Since softened butter traps air when mixed with sugar, it gives cookies more lift and volume.
✔ Reduces spreading – Cookies stay thicker and hold their shape instead of spreading out too much.
✔ Gives a tender, slightly cakey texture – Perfect for those who prefer a more structured, soft cookie rather than a dense and chewy one.
✔ Helps develop light, crispy edges – The balance of air incorporation and fat solidification creates a lighter texture with subtle crispiness.
How to Use Softened Butter Properly in Cookies:
✔ Make sure it’s soft, but not melted – The butter should be soft enough to press with a finger but still hold its shape.
✔ Cream it well with sugar – This process incorporates tiny air pockets, making cookies lighter and fluffier.
✔ Room temperature butter is best – If butter is too warm, it can lead to too much spreading, similar to melted butter.
Pro Tip:
For perfectly softened butter, leave it out at room temperature for 30-45 minutes before using. If you need to soften it quickly, microwave for 5-10 seconds, but be careful not to melt it.
3. Comparing Melted vs. Softened Butter – Which Should You Use?
| Butter Type | Texture of Cookies | Spreading Behavior | Best For |
|---|---|---|---|
| Melted Butter | Chewy, dense, soft | More spreading, thinner cookies | Soft and chewy cookies with crisp edges |
| Softened Butter | Thick, tender, slightly cakey | Less spreading, thicker cookies | Classic chocolate chip cookies, structured cookies |
Pro Tip:
If you want a balance between the two, try using part melted butter and part softened butter. This creates a chewy yet slightly thicker cookie.
4. Can You Use Cold Butter?
Using cold butter is not recommended for drop cookies like these because it doesn’t mix well into the dough. Cold butter is mainly used in pastries, pie crusts, and shortbread cookies where a flaky texture is desired.
✔ If you use cold butter, your dough may be harder to mix and your cookies may turn out too dense and not spread properly.
Pro Tip:
If your butter is too cold, cut it into small cubes and let it soften for about 15 minutes before using.
5. How to Adjust the Recipe Based on Butter Choice
If you decide to use melted butter instead of softened butter (or vice versa), here’s how you can adjust the recipe to maintain the right texture:
✔ Using Melted Butter? Chill the dough for 30 minutes to prevent excessive spreading.
✔ Using Softened Butter? Make sure to cream the butter and sugar well to incorporate air and get a fluffier texture.
✔ Want a balance of chewiness and structure? Use ½ melted butter and ½ softened butter for a chewy, slightly thick cookie.
6. Which Butter Choice is Best for You?
✔ If you love soft, chewy, slightly flatter cookies → Use melted butter.
✔ If you prefer thick, structured, and fluffier cookies → Use softened butter.
✔ If you want the best of both worlds → Use a combination of both.
Pro Tip:
No matter which butter you use, measure accurately and mix properly to get the best possible cookies!
Final Thoughts: The Power of Butter in Cookies
Choosing melted vs. softened butter is one of the easiest ways to customize your cookies to your preferred texture. By understanding how butter affects the structure and spread of the cookies, you can control the outcome and get the exact type of cookie you love—whether that’s chewy and rich or thick and soft.
Now that you know how to use butter to your advantage, it’s time to move on to the next step—baking your cookies to golden perfection!
Chilling the Dough: The Secret to Perfect Cookies
Chilling the dough is one of the best-kept secrets in baking when it comes to Oatmeal Coconut Chocolate Chip Cookies. While it might be tempting to bake the cookies immediately, taking the extra time to chill the dough significantly enhances texture, flavor, and overall cookie quality.
In this section, we’ll explore why chilling is important, how long you should chill the dough, how to store it, and how chilling impacts the final cookie texture.
1. Why Should You Chill the Dough?
Chilling the dough isn’t just an extra step—it’s a key technique that makes a huge difference in the spread, texture, and flavor of your cookies.
✔ Prevents Excessive Spreading – Cold dough holds its shape better in the oven, leading to thicker cookies instead of thin, flat ones.
✔ Enhances Flavor Development – Letting the ingredients rest allows the butter, sugar, and vanilla to fully blend, resulting in richer, deeper flavors.
✔ Creates a Chewier Texture – Chilled dough absorbs moisture from the flour and oats, making the cookies chewier and more tender.
✔ Improves Dough Consistency – Chilling firms up the butter, making the dough easier to scoop and shape before baking.
✔ Prevents Over-Spreading in the Oven – Warm dough melts too quickly when baked, leading to cookies that spread too thin.
Pro Tip:
If your cookies tend to spread too much, chilling the dough for at least 30 minutes before baking will help them maintain their shape.
2. How Long Should You Chill Cookie Dough?
The longer you chill the dough, the more the flavors develop and the texture improves.
| Chill Time | Effect on Cookies |
|---|---|
| 30 minutes | Prevents spreading; slightly firmer dough. |
| 1 hour | Allows the ingredients to blend, creating a chewier texture. |
| 2-4 hours | Enhances flavor; cookies bake more evenly. |
| Overnight (8-12 hours) | Maximizes chewiness and deepens flavor. |
| Up to 2 days | Best for making ahead; produces the richest taste. |
Pro Tip:
If chilling overnight or longer, let the dough sit at room temperature for 10-15 minutes before scooping to make it easier to work with.
3. How Chilling the Dough Affects the Final Texture
If you compare cookies baked with freshly mixed dough vs. chilled dough, the difference is noticeable.
✔ Chilled Dough → Thick, Chewy Cookies
✔ Unchilled Dough → Flatter, Softer Cookies
What Happens When You Chill the Dough?
- Butter Firms Up → Slows down melting in the oven, leading to thicker cookies.
- Flour and Oats Absorb Moisture → Creates a more cohesive, chewy texture.
- Sugar Crystals Dissolve Slowly → Produces a richer, caramelized flavor.
- Ingredients Blend Together → Enhances the taste and depth of flavors.
Pro Tip:
If you want thicker cookies, chilling the dough for at least 2 hours is the best option.
4. How to Properly Chill Cookie Dough
To ensure even chilling and the best results, follow these steps:
✔ Step 1: Once your dough is mixed, cover it tightly with plastic wrap or transfer it to an airtight container.
✔ Step 2: Place it in the refrigerator and let it chill for your preferred time (at least 30 minutes recommended).
✔ Step 3: When ready to bake, allow the dough to sit at room temperature for 5-10 minutes if it has been chilled for more than 2 hours—this makes it easier to scoop.
✔ Step 4: Shape the dough into balls before baking.
Pro Tip:
For even easier baking, pre-scoop the dough into cookie-sized balls before chilling. That way, you can just place them directly onto the baking sheet when ready to bake.
5. Can You Freeze Cookie Dough Instead?
Yes! Freezing cookie dough is a great make-ahead option that allows you to bake fresh cookies anytime.
✔ Step 1: Scoop the cookie dough into individual balls.
✔ Step 2: Place them on a baking sheet and freeze for 30 minutes until firm.
✔ Step 3: Transfer the frozen dough balls to a ziplock bag or airtight container.
✔ Step 4: Label with the date and store in the freezer for up to 3 months.
✔ Step 5: When ready to bake, place frozen dough balls directly on a baking sheet and bake—just add 2-3 extra minutes to the baking time.
Pro Tip:
For fresher-tasting cookies, freeze dough instead of baked cookies. This allows you to bake on demand while maintaining the best texture and flavor.
6. What If You Skip Chilling the Dough?
If you bake cookies immediately without chilling, here’s what might happen:
❌ Cookies spread too much – Warm dough melts too quickly, leading to thin, flat cookies.
❌ Less chewy texture – The flour and oats don’t have enough time to absorb moisture.
❌ Less intense flavor – The butter and sugar don’t have time to fully develop a rich taste.
While the cookies will still be delicious, they won’t have the same depth of flavor or ideal texture that chilled dough provides.
Pro Tip:
If you’re short on time, pop the dough in the freezer for 20 minutes for a quick chill that still improves the texture.
Final Thoughts: Why Chilling Dough is Worth It
Even though chilling the dough requires extra time, it’s one of the easiest ways to improve the texture, shape, and flavor of your cookies. Whether you chill for 30 minutes, overnight, or freeze for later, your patience will be rewarded with thicker, chewier, and richer-tasting cookies.
If you’re serious about making the best possible Oatmeal Coconut Chocolate Chip Cookies, chilling the dough is a step you shouldn’t skip!
Now that your dough is perfectly chilled, it’s time for the most exciting step—baking your cookies to golden perfection!
Choosing the Right Chocolate: Elevate Your Cookies with the Perfect Chocolate Choice
Chocolate is one of the most essential ingredients in Oatmeal Coconut Chocolate Chip Cookies. The type of chocolate you choose will directly impact the flavor, texture, and sweetness of your cookies. Whether you prefer gooey pockets of melty chocolate, a deep cocoa richness, or a creamy, sweet contrast, choosing the right chocolate makes all the difference.
In this section, we’ll explore the different types of chocolate, how they affect the cookies, and how to mix and match for the best results.
1. Understanding the Different Types of Chocolate
There are several varieties of chocolate, each with a unique taste and texture that can enhance your cookies in different ways.
| Type of Chocolate | Flavor Profile | Best For |
|---|---|---|
| Semi-Sweet Chocolate Chips | Slightly sweet, well-balanced cocoa flavor | Classic cookies with a familiar chocolate taste |
| Dark Chocolate (60-85%) | Rich, intense cocoa, slightly bitter | Cookies with a deep chocolate flavor |
| Milk Chocolate | Creamy, sweet, smooth | A sweeter, softer chocolate experience |
| White Chocolate | Buttery, vanilla-like sweetness | Pairs well with coconut for a tropical twist |
| Cacao Nibs | Strong, bitter, earthy | Healthier option for deep cocoa flavor without added sugar |
| Chocolate Chunks (Chopped Chocolate Bar) | Bigger, gooey pools of melted chocolate | Bakery-style, luxurious cookies |
Pro Tip:
For the best cookie experience, try using a combination of two different chocolates (e.g., semi-sweet + dark chocolate or milk chocolate + white chocolate).
2. Semi-Sweet Chocolate: The Classic Cookie Choice
Semi-sweet chocolate is the most commonly used chocolate in cookies for a reason—it provides the perfect balance of sweetness and cocoa richness.
✔ Not too sweet, not too bitter – Works well in almost any cookie.
✔ Pairs perfectly with oats and coconut – Enhances their natural flavors without overpowering them.
✔ Melts just enough while holding its shape – Gives you soft chocolate pockets in every bite.
Best for:
✔ A classic chocolate chip cookie flavor.
✔ Balancing sweetness in cookies with naturally sweet ingredients like coconut.
✔ Great for all ages—kids and adults love it!
3. Dark Chocolate: For a More Intense, Less Sweet Cookie
If you love a bold, rich cocoa flavor, dark chocolate is the way to go. With a higher cocoa percentage (60-85%), it has a slightly bitter edge that contrasts beautifully with the sweetness of brown sugar and coconut.
✔ Less sugar, more cocoa – Perfect for those who don’t like overly sweet cookies.
✔ Creates a more gourmet, sophisticated taste.
✔ Pairs well with sea salt – A sprinkle of flaky salt enhances the depth of flavor.
Best for:
✔ Grown-up, decadent cookies.
✔ Pairing with toasted coconut or nuts for an extra-rich bite.
✔ Mixing with semi-sweet chocolate for balance.
Pro Tip:
If using extra-dark chocolate (75%+ cocoa), consider adding a bit more brown sugar to balance the bitterness.
4. Milk Chocolate: A Sweeter, Creamier Option
Milk chocolate has a higher milk and sugar content, making it much sweeter and creamier than dark or semi-sweet chocolate.
✔ Creamy and smooth texture – Melts beautifully into the cookies.
✔ Adds extra sweetness – Great for those who love a sweeter cookie.
✔ Pairs well with oats and coconut – Especially if using unsweetened coconut.
Best for:
✔ Sweeter, more dessert-like cookies.
✔ Pairing with white chocolate for a contrast of flavors.
✔ Cookies that feel extra indulgent and rich.
Pro Tip:
If using milk chocolate chips, consider reducing the sugar slightly in the dough to avoid an overly sweet cookie.
5. White Chocolate: A Unique, Buttery Sweetness
Even though white chocolate doesn’t contain cocoa solids, it still adds a buttery, vanilla-like richness to cookies.
✔ Sweet and creamy – A unique contrast to the hearty oats.
✔ Pairs beautifully with coconut – Creates a tropical, buttery cookie.
✔ Adds variety – Breaks up the chocolate experience by offering a different kind of richness.
Best for:
✔ Mixing with dark or semi-sweet chocolate for contrast.
✔ Creating a coconut-forward cookie with a creamy bite.
✔ People who love sweet, smooth chocolate flavors.
Pro Tip:
White chocolate melts faster than regular chocolate, so avoid overbaking to prevent it from caramelizing too much.
6. Cacao Nibs: A Healthier Alternative
If you want a natural chocolate flavor with less sugar, cacao nibs are an excellent choice.
✔ Pure, unprocessed chocolate – No added sugar or dairy.
✔ Crunchy and slightly bitter – Adds texture without melting too much.
✔ Packed with antioxidants and nutrients – A healthier way to enjoy chocolate.
Best for:
✔ Healthier cookies with less sugar.
✔ Adding crunch and depth without extra sweetness.
✔ Pairing with honey, maple syrup, or coconut sugar for a balanced flavor.
Pro Tip:
Cacao nibs don’t melt like regular chocolate, so mix them with chocolate chips if you still want some gooey, melted chocolate pockets.
7. Chocolate Chunks vs. Chocolate Chips: Which One to Use?
If you want a gourmet, bakery-style cookie, consider using chocolate chunks instead of standard chips.
✔ Chocolate Chunks (Chopped from a Chocolate Bar) –
✔ Melt more than chips, creating big pools of rich, melted chocolate.
✔ Give a rustic, handmade look to the cookies.
✔ Let you mix different chocolate varieties in one batch.
✔ Chocolate Chips –
✔ Hold their shape better due to stabilizers in store-bought chips.
✔ Provide consistent chocolate distribution.
✔ Easier to mix into dough evenly.
Pro Tip:
For the best of both worlds, use a mix of chocolate chips and chunks—chips for structure, and chunks for melt-in-your-mouth pools of chocolate.
8. Mixing Different Chocolates for the Best Flavor
One of the best ways to make your cookies stand out is to use a combination of chocolates. Here are some delicious pairings:
✔ Semi-Sweet + Dark Chocolate → Deep, rich chocolate flavor with a balance of sweetness.
✔ Milk Chocolate + Dark Chocolate → A creamy yet bold combination.
✔ White Chocolate + Dark Chocolate → Sweet vanilla notes with intense cocoa depth.
✔ Milk Chocolate + Semi-Sweet Chocolate + Cacao Nibs → A triple chocolate experience with crunch.
Pro Tip:
For an extra luxurious touch, sprinkle some flaky sea salt on the cookies right after baking—this enhances the chocolate flavor even more!
Final Thoughts: Choosing the Best Chocolate for Your Cookies
The right chocolate can transform your cookies from good to extraordinary. Whether you go with classic semi-sweet, bold dark chocolate, creamy milk chocolate, or a mix of several types, choosing high-quality chocolate will always result in better cookies.
Now that you’ve selected your perfect chocolate combination, it’s time to mix everything together and bake the ultimate Oatmeal Coconut Chocolate Chip Cookies!
Storage Tips: How to Keep Your Oatmeal Coconut Chocolate Chip Cookies Fresh
Once you’ve baked your Oatmeal Coconut Chocolate Chip Cookies to perfection, the next step is ensuring they stay fresh, chewy, and flavorful for as long as possible. Proper storage helps maintain the ideal texture, prevents staleness, and preserves the chocolate’s rich taste.
In this section, we’ll cover how to store your cookies at room temperature, refrigerate or freeze them, and revive cookies if they become stale.
1. Storing Cookies at Room Temperature
If you plan to eat your cookies within a few days, storing them at room temperature is the easiest option.
✔ Use an Airtight Container – Prevents cookies from drying out and keeps them soft.
✔ Layer with Parchment Paper – If stacking cookies, separate layers with parchment paper to prevent sticking.
✔ Keep at Room Temperature – Store in a cool, dry place away from direct sunlight.
✔ Best Storage Time: Up to 5 days for peak freshness.
Pro Tip:
Place a slice of bread in the container with the cookies. The bread helps maintain moisture, keeping cookies soft and chewy longer.
2. Refrigerating Cookies (Short-Term Storage)
If you need to store cookies for more than a few days, refrigeration can help extend their freshness.
✔ Use an Airtight Container – Prevents cookies from absorbing fridge odors.
✔ Best Storage Time: Up to 2 weeks in the fridge.
✔ Allow to Come to Room Temperature Before Eating – Cold cookies can feel too firm; let them sit out for 10-15 minutes before enjoying.
Pro Tip:
To restore their fresh-baked texture, warm refrigerated cookies in the microwave for 10-15 seconds before eating.
3. Freezing Cookies (Long-Term Storage)
Freezing is the best way to keep cookies fresh for months. This method locks in flavor and texture so you can enjoy homemade cookies anytime.
How to Freeze Baked Cookies:
✔ Step 1: Let cookies cool completely to avoid freezer burn.
✔ Step 2: Arrange cookies in a single layer on a baking sheet and freeze for 1 hour (this prevents them from sticking together).
✔ Step 3: Transfer frozen cookies to a ziplock bag or airtight container.
✔ Step 4: Label with the date and type of cookies.
✔ Step 5: Store for up to 3 months.
How to Reheat Frozen Cookies:
✔ Microwave: Warm a frozen cookie for 15-20 seconds for a soft, gooey texture.
✔ Oven: Bake at 300°F (150°C) for 5-7 minutes to refresh the crisp edges.
✔ Room Temperature: Let cookies sit out for 30 minutes to thaw naturally.
Pro Tip:
If freezing multiple layers, separate them with parchment paper to prevent sticking.
4. Freezing Cookie Dough for Future Baking
Want fresh-baked cookies without making a new batch of dough every time? Freezing cookie dough is a game-changer!
How to Freeze Cookie Dough Balls:
✔ Step 1: Scoop cookie dough into individual balls.
✔ Step 2: Place dough balls on a baking sheet and freeze for 1 hour until firm.
✔ Step 3: Transfer frozen dough balls to a ziplock bag or airtight container.
✔ Step 4: Label with the baking temperature and time for easy reference.
✔ Step 5: Store for up to 3 months.
How to Bake Frozen Cookie Dough:
✔ No Need to Thaw! Bake straight from the freezer.
✔ Add 2-3 Minutes to Baking Time to account for the cold dough.
✔ Preheat Oven Properly – Baking frozen dough in a preheated oven ensures even cooking.
Pro Tip:
For evenly shaped cookies, roll dough into uniform balls before freezing.
5. Preventing Stale or Hard Cookies
If your cookies start to feel stale or hard, don’t worry—there are ways to bring them back to life!
✔ Use the Bread Trick – Place cookies in an airtight container with a slice of fresh bread. The cookies will absorb moisture from the bread, making them soft again.
✔ Microwave with a Damp Paper Towel – Wrap a cookie in a damp paper towel and microwave for 10-15 seconds to rehydrate it.
✔ Bake for a Few Minutes – Place cookies in a 300°F (150°C) oven for 5 minutes to refresh their texture.
Pro Tip:
For extra gooey cookies, warm them up slightly before serving—just enough to melt the chocolate chips!
6. Storing Cookies with Different Textures
If you’re storing different types of cookies (chewy and crispy) together, keep in mind:
❌ Don’t store soft and crunchy cookies in the same container – The moisture from soft cookies will make the crispy ones go stale faster.
✔ Store crisp cookies separately – Keep them in a ventilated container so they maintain their crunch.
7. Best Containers for Cookie Storage
To maintain freshness, texture, and flavor, choosing the right container is key.
✔ Airtight Containers – Best for soft, chewy cookies.
✔ Metal Cookie Tins – Great for keeping cookies crisp.
✔ Glass Jars with Lids – Aesthetic and practical, but ensure they seal tightly.
✔ Ziplock Bags – Ideal for freezing cookies and saving space.
Pro Tip:
If storing cookies for more than a few days, avoid paper bags—they allow air exposure, making cookies dry out faster.
8. How Long Do Cookies Stay Fresh?
| Storage Method | How Long Cookies Stay Fresh |
|---|---|
| Room Temperature (Airtight Container) | 4-5 Days |
| Refrigerated (Airtight Container) | Up to 2 Weeks |
| Frozen (Baked Cookies) | Up to 3 Months |
| Frozen (Cookie Dough Balls) | Up to 3 Months |
Final Thoughts: Mastering Cookie Storage for Ultimate Freshness
Proper storage ensures that your Oatmeal Coconut Chocolate Chip Cookies stay delicious, soft, and fresh for as long as possible. Whether you store them at room temperature, in the fridge, or in the freezer, following the right techniques will help you enjoy homemade cookies anytime.
Now that you know the best storage tricks, it’s time to enjoy your cookies now—or save them for later!
Gluten-Free Version: How to Make Oatmeal Coconut Chocolate Chip Cookies Without Gluten
If you love Oatmeal Coconut Chocolate Chip Cookies but need to avoid gluten, don’t worry—you can still enjoy these delicious treats! Making a gluten-free version is easier than you think. By choosing the right flour substitutes, oats, and baking techniques, you can create cookies that are just as chewy, flavorful, and satisfying as the traditional version.
In this section, we’ll cover gluten-free flour options, ingredient swaps, baking tips, and how to ensure your cookies turn out perfect every time.
1. What is Gluten and Why Does It Matter in Cookies?
Gluten is a protein found in wheat, barley, and rye that gives baked goods structure and chewiness. In traditional cookies, gluten helps hold the dough together, creating a balanced texture.
When making cookies without gluten, you need alternative flours and binding agents to maintain the soft and chewy texture.
✔ The goal of a gluten-free cookie: Keep it moist, chewy, and structurally sound without relying on wheat flour.
2. Choosing the Right Gluten-Free Flour Substitute
Gluten-free baking works best when using the right flour blend. Some flours work well on their own, while others need to be mixed for the best results.
Best Gluten-Free Flour Options for Cookies
| Gluten-Free Flour | Texture & Best Uses |
|---|---|
| Gluten-Free 1:1 Baking Flour (Store-Bought Blend) | Easiest option; designed to replace all-purpose flour with no adjustments. |
| Almond Flour | Adds moisture and a slightly nutty flavor but needs a binder. |
| Oat Flour | Naturally gluten-free (if certified GF); enhances the oat flavor. |
| Coconut Flour | Absorbs a lot of liquid; best when mixed with other flours. |
| Rice Flour (Brown or White) | Mild flavor; works well in combination with other flours. |
| Cassava Flour | Has a neutral taste and works well in cookie recipes. |
Pro Tip:
✔ For easy gluten-free cookies, use a 1:1 gluten-free flour blend—these blends are specifically formulated to mimic regular flour in baking.
✔ If using almond flour or oat flour, combine them with a binding ingredient like xanthan gum or an extra egg to prevent crumbly cookies.
3. Are Oats Gluten-Free? Choosing Safe Oats for Baking
Oats are naturally gluten-free, but they are often processed in facilities that handle wheat, leading to cross-contamination.
✔ To ensure your cookies are completely gluten-free, always use Certified Gluten-Free Oats.
✔ Rolled oats are best for a chewy texture, while quick oats create a softer cookie.
✔ Avoid steel-cut oats, as they don’t soften properly in cookies.
Pro Tip:
Even if you aren’t highly sensitive to gluten, using certified gluten-free oats guarantees that your cookies are safe for anyone with gluten intolerance.
4. How to Bind Gluten-Free Cookie Dough Properly
Since gluten is what helps traditional cookies hold their shape, gluten-free dough needs a little extra help to stay together.
✔ Xanthan Gum (¼ tsp per cup of flour) – Helps mimic gluten’s elasticity.
✔ Eggs – Help bind the ingredients together and add structure.
✔ Ground Flaxseed (1 tbsp flax + 3 tbsp water = 1 egg substitute) – A great binding agent for vegan cookies.
✔ Chilling the Dough – Letting the dough rest in the fridge for 30 minutes to 1 hour firms up the texture and prevents spreading.
Pro Tip:
If your dough feels too crumbly, add an extra tablespoon of melted butter or milk to help it hold together.
5. Adjusting the Recipe for a Gluten-Free Version
Here’s how to modify the traditional recipe to make it fully gluten-free:
✔ Replace all-purpose flour with 1:1 gluten-free baking flour or a mix of oat and almond flour.
✔ Use certified gluten-free oats to avoid cross-contamination.
✔ Add a binder (xanthan gum or an extra egg) to maintain texture.
✔ Chill the dough for at least 30 minutes before baking to prevent spreading.
Example Gluten-Free Flour Mix for Cookies (DIY Blend)
If you don’t have a store-bought gluten-free flour mix, try this homemade blend:
✔ 1 cup oat flour
✔ ½ cup almond flour
✔ ¼ cup tapioca flour or cornstarch
✔ ½ teaspoon xanthan gum
Pro Tip:
This blend mimics the structure of wheat flour while keeping cookies moist and chewy.
6. Baking Tips for Gluten-Free Cookies
Gluten-free cookie dough behaves differently than regular dough, so follow these tips for perfect results:
✔ Chill the dough before baking – Helps hold its shape.
✔ Bake at 350°F (175°C) – This temperature prevents overbrowning while ensuring the cookies cook through.
✔ Slightly underbake the cookies – Gluten-free cookies dry out faster, so take them out when the centers look slightly underdone—they’ll firm up while cooling.
✔ Let them cool completely – They need extra time to set before moving them off the tray.
Pro Tip:
If your cookies seem too dry, add 1-2 tablespoons of milk or coconut milk to the dough before baking.
7. Storing Gluten-Free Cookies
Since gluten-free cookies can dry out faster, proper storage is key to keeping them fresh.
✔ Room Temperature: Store in an airtight container for 3-4 days.
✔ Refrigeration: Keeps cookies fresh for up to 1 week, but may slightly firm them up.
✔ Freezing: Freeze in a ziplock bag for up to 3 months. Let them thaw at room temperature or warm them in the oven for 5 minutes at 300°F.
Pro Tip:
To keep cookies soft, store them with a slice of bread in the container—it helps retain moisture!
8. Can You Make These Cookies Vegan and Gluten-Free?
Yes! Here’s how to make a vegan AND gluten-free version:
✔ Use a flax egg instead of eggs – (1 tbsp flaxseed meal + 3 tbsp water = 1 egg).
✔ Replace butter with coconut oil – For dairy-free richness.
✔ Use a gluten-free flour blend + xanthan gum – To replace wheat flour.
✔ Opt for dairy-free chocolate chips – Ensure they are labeled vegan and gluten-free.
Pro Tip:
For extra chewiness, increase brown sugar slightly and use a splash of almond milk in the dough.
Final Thoughts: Making Delicious Gluten-Free Oatmeal Coconut Chocolate Chip Cookies
Going gluten-free doesn’t mean sacrificing texture or flavor. By choosing the right flour mix, using gluten-free oats, adding a binder, and following proper baking techniques, you can make cookies that are just as soft, chewy, and delicious as the original.
Now that you have all the tips for a gluten-free version, it’s time to bake a batch of cookies that everyone can enjoy—whether they eat gluten or not!
Dairy-Free Option: How to Make Oatmeal Coconut Chocolate Chip Cookies Without Dairy
If you’re lactose intolerant, vegan, or simply avoiding dairy, you can still enjoy Oatmeal Coconut Chocolate Chip Cookies with a few simple substitutions. Removing dairy from the recipe won’t compromise the texture, chewiness, or flavor—in fact, some dairy-free alternatives can enhance the overall taste and add extra depth to your cookies.
In this section, we’ll go over dairy-free butter substitutes, milk alternatives, chocolate choices, and essential baking tips to ensure your cookies turn out just as delicious as the traditional version.
1. Why Replace Dairy in Cookies?
Dairy ingredients like butter, milk, and traditional chocolate chips contribute to the richness, tenderness, and structure of cookies. When removing dairy, it’s important to replace those fats and liquids with plant-based alternatives that provide a similar moisture content and texture.
✔ The goal: Maintain a chewy, soft, and flavorful cookie without any dairy-based ingredients.
2. Dairy-Free Butter Substitutes
Butter plays a crucial role in cookies by adding richness, controlling spread, and creating crisp edges with a soft center. Here are the best dairy-free butter alternatives:
| Butter Substitute | Texture & Flavor Profile | Ratio (to replace butter) |
|---|---|---|
| Vegan Butter (Plant-Based Butter Sticks) | Most similar to regular butter; works 1:1 in baking | 1:1 |
| Coconut Oil (Refined or Unrefined) | Adds mild coconut flavor (unless refined); makes cookies soft and slightly chewy | 1:1 |
| Avocado Oil | Neutral flavor; creates a slightly crispier texture | ¾ cup oil for 1 cup butter |
| Applesauce | Adds moisture but reduces crispness; best for softer cookies | ½ cup applesauce for 1 cup butter + reduce sugar slightly |
Best Choice:
✔ Vegan butter sticks are the best direct replacement because they mimic the fat and structure of dairy butter.
✔ Coconut oil works great if you enjoy a slight coconut flavor in your cookies.
Pro Tip:
If using liquid oils like avocado or olive oil, the dough may be slightly looser. Chill the dough for 30 minutes before baking to prevent excessive spreading.
3. Dairy-Free Milk Substitutes
If your cookie recipe calls for a splash of milk to adjust the dough’s consistency, use any of these plant-based milk alternatives:
| Milk Substitute | Flavor & Best Use | Ratio (to replace milk) |
|---|---|---|
| Almond Milk | Light and neutral flavor; great all-purpose substitute | 1:1 |
| Coconut Milk (Full-Fat or Lite) | Rich, creamy texture; enhances coconut flavor | 1:1 |
| Oat Milk | Naturally sweet and thick; good for chewy cookies | 1:1 |
| Soy Milk | Higher protein content; similar to dairy milk | 1:1 |
| Cashew Milk | Mild flavor; slightly thicker than almond milk | 1:1 |
Best Choice:
✔ Almond or oat milk are the easiest substitutes because they have a neutral taste and a consistency similar to regular milk.
✔ Full-fat coconut milk adds extra richness and a stronger coconut flavor.
Pro Tip:
If your dough feels too dry after swapping out dairy, add 1-2 extra tablespoons of dairy-free milk to adjust consistency.
4. Choosing Dairy-Free Chocolate Chips
Most traditional chocolate chips contain milk solids or dairy ingredients, so it’s important to choose dairy-free or vegan-friendly chocolate chips.
Best Dairy-Free Chocolate Options:
✔ Vegan Dark Chocolate Chips – Many brands offer semi-sweet or dark chocolate without dairy.
✔ Cacao Nibs – A healthier, unprocessed chocolate option with an intense cocoa flavor.
✔ Carob Chips – Naturally dairy-free with a slightly sweet, caramel-like taste.
✔ Chopped Dark Chocolate Bars – Many 85% or higher cocoa chocolate bars are dairy-free.
Best Choice:
✔ Enjoy Life, Hu Kitchen, and Lily’s all make dairy-free and vegan chocolate chips that work great in cookies.
Pro Tip:
Always check the ingredient list, as some chocolate brands contain traces of dairy from cross-contamination. Look for labels like “dairy-free” or “vegan-certified”.
5. Adjusting the Cookie Dough for a Dairy-Free Version
When making dairy-free Oatmeal Coconut Chocolate Chip Cookies, follow these steps:
✔ Swap out the butter – Use vegan butter or coconut oil for a similar texture.
✔ Replace dairy-based milk (if needed) – Use almond, oat, or coconut milk.
✔ Use dairy-free chocolate chips – Choose brands that are certified dairy-free.
✔ Chill the dough – If using coconut oil, chill for 30 minutes to prevent over-spreading.
Here’s a simple dairy-free ingredient swap list:
| Ingredient (Traditional) | Dairy-Free Substitute |
|---|---|
| Butter | Vegan butter sticks, coconut oil, avocado oil |
| Milk | Almond milk, oat milk, coconut milk |
| Chocolate Chips | Vegan chocolate chips, dark chocolate chunks, cacao nibs |
Pro Tip:
Dairy-free cookie dough tends to be slightly softer, so don’t skip chilling the dough if using coconut oil.
6. Baking Tips for Dairy-Free Cookies
Dairy-free cookies bake slightly differently, so keep these tips in mind:
✔ Bake at 350°F (175°C) – The standard cookie temperature works best.
✔ Watch for browning – Some dairy-free butters brown faster, so check cookies at 9-10 minutes.
✔ Let them cool on the baking sheet for 5-10 minutes – This helps dairy-free cookies firm up properly.
✔ Add a sprinkle of sea salt – Enhances the chocolate flavor in dairy-free cookies.
Pro Tip:
For extra chewiness, add 1-2 teaspoons of cornstarch or arrowroot powder to the dough—it mimics the structure that dairy butter provides.
7. Storing Dairy-Free Cookies
Dairy-free cookies store just like traditional cookies but may dry out slightly faster.
✔ Room Temperature: Store in an airtight container for 4-5 days.
✔ Refrigeration: Keeps cookies fresh for up to 2 weeks.
✔ Freezing: Freeze in a ziplock bag for up to 3 months.
Pro Tip:
To keep cookies soft and chewy, store them with a slice of bread in the container—it prevents drying out.
8. Can You Make These Cookies Vegan and Dairy-Free?
Yes! If you want a completely vegan version, follow these additional swaps:
✔ Use a flax egg instead of eggs → (1 tbsp flaxseed meal + 3 tbsp water = 1 egg).
✔ Choose dairy-free chocolate chips → Look for brands labeled vegan.
✔ Ensure your sugar is vegan-friendly → Some brands use bone char in processing—organic sugar is a safe choice.
Pro Tip:
For a vegan and dairy-free extra gooey cookie, increase brown sugar slightly and use a bit more coconut oil or almond milk for moisture.
Final Thoughts: Making Delicious Dairy-Free Oatmeal Coconut Chocolate Chip Cookies
Skipping dairy doesn’t mean sacrificing flavor or texture. By using vegan butter, coconut oil, or plant-based milk, and choosing dairy-free chocolate chips, you can create chewy, rich, and delicious cookies that everyone can enjoy.
Now that you know the best dairy-free baking tips, it’s time to bake a batch of completely dairy-free Oatmeal Coconut Chocolate Chip Cookies and enjoy every bite!
Nutty Twist: Adding Crunch and Depth to Your Oatmeal Coconut Chocolate Chip Cookies
If you love a bit of crunch and extra richness in your cookies, adding nuts is the perfect way to elevate your Oatmeal Coconut Chocolate Chip Cookies. Nuts not only enhance the texture but also bring a nutty depth of flavor that pairs beautifully with oats, coconut, and chocolate.
In this section, we’ll explore the best nuts to use, how they change the texture, ways to prepare them for baking, and some unique nut combinations to take your cookies to the next level.
1. Why Add Nuts to Cookies?
Nuts provide a balance of crunch and creaminess, making cookies even more delicious. Here’s why they’re a great addition:
✔ Adds a crunchy contrast – Balances the chewy oats and soft chocolate chips.
✔ Enhances flavor complexity – Nutty undertones complement the sweetness of the chocolate and coconut.
✔ Boosts nutrition – Nuts add healthy fats, protein, and fiber, making cookies slightly more filling.
✔ Pairs well with chocolate – Nuts and chocolate have a classic sweet-salty combination.
Pro Tip:
For the best texture, chop nuts into small, bite-sized pieces before adding them to the dough. This ensures even distribution in every bite!
2. Best Nuts to Use in These Cookies
Not all nuts have the same flavor and texture, so it’s important to choose the right type based on your preference. Here are some of the best nuts for this recipe:
| Nut Type | Flavor & Texture | Best Uses |
|---|---|---|
| Walnuts | Buttery, earthy, slightly bitter | Adds a soft crunch and enhances chocolate flavor |
| Almonds | Mild, slightly sweet, firm crunch | Perfect for a crisp texture and nutty flavor |
| Pecans | Rich, sweet, and soft | Works well for a softer, caramelized nutty twist |
| Macadamia Nuts | Buttery, creamy, mild | Complements coconut and white chocolate |
| Hazelnuts | Toasty, slightly bitter, firm texture | Great for a deeper, roasted flavor |
| Cashews | Creamy, mild, slightly sweet | Adds a smooth nutty element without overpowering flavors |
| Pistachios | Slightly sweet, earthy, bright green | Adds color and a unique flavor contrast |
Best Choice:
✔ Walnuts and pecans are the most classic and popular choices, offering a soft crunch and deep, nutty flavor.
✔ Almonds and hazelnuts work well if you love extra crunch and a slightly firmer texture.
✔ Macadamia nuts or cashews are great for a milder, buttery flavor that pairs well with coconut.
3. How to Prepare Nuts for Baking
To get the best flavor and texture from nuts in your cookies, follow these steps:
✔ Chop nuts into small, even pieces – Large chunks can overwhelm the cookie structure.
✔ Toast nuts before adding them – Enhances the richness and depth of flavor.
✔ Coat nuts in flour before mixing – Prevents them from sinking to the bottom of the cookies.
✔ Mix gently into the dough – Overmixing can crush the nuts and affect texture.
How to Toast Nuts for Cookies
✔ Oven Method: Spread nuts on a baking sheet and toast at 350°F (175°C) for 5-7 minutes until lightly golden and fragrant.
✔ Stovetop Method: Heat a dry skillet over medium heat, add nuts, and stir for 3-5 minutes until toasted.
✔ Microwave Method: Place nuts in a microwave-safe dish and heat in 30-second bursts, stirring between each burst until fragrant.
Pro Tip:
Toasting walnuts, pecans, and almonds brings out their natural oils and enhances their nuttiness—a simple step that makes a big difference!
4. How to Incorporate Nuts Into the Dough
Once your nuts are chopped and toasted (if desired), it’s time to mix them into your cookie dough:
✔ Fold nuts in at the end – Add them after the oats, coconut, and chocolate chips to ensure they are evenly distributed.
✔ Use about ½ to 1 cup of nuts – Enough to add crunch without overpowering the other ingredients.
✔ Press extra nuts on top before baking – This makes the cookies look extra appetizing and bakery-style.
Pro Tip:
If using a mix of nuts and chocolate chips, reduce the chocolate chips slightly so the dough isn’t overloaded.
5. Delicious Nut Combinations to Try
Want to take your cookies up a notch? Try these nutty combinations that complement the chocolate and coconut flavors:
✔ Walnuts + Dark Chocolate + Coconut → A rich, classic combination with deep flavors.
✔ Almonds + White Chocolate + Coconut → A crunchy, tropical twist.
✔ Pecans + Semi-Sweet Chocolate + Cinnamon → A warm, buttery, spiced cookie.
✔ Macadamia Nuts + White Chocolate + Toasted Coconut → A buttery, soft, and creamy delight.
✔ Hazelnuts + Dark Chocolate + Sea Salt → A gourmet, Nutella-inspired combination.
✔ Pistachios + Dark Chocolate + Cranberries → A colorful, festive, and slightly tart flavor mix.
Pro Tip:
For a sweet-salty contrast, sprinkle flaky sea salt over cookies before baking—it enhances the nutty and chocolatey flavors.
6. Nut-Free Alternatives
If you or someone you’re baking for has a nut allergy, you can still get a similar crunchy texture with these alternatives:
✔ Sunflower Seeds – Mild, nutty, and crunchy.
✔ Pumpkin Seeds (Pepitas) – Slightly sweet and earthy, pairs well with chocolate.
✔ Crispy Rice Cereal – Adds a delicate crunch.
✔ Toasted Coconut Flakes – Mimics the crispiness of nuts.
Pro Tip:
Use toasted sunflower seeds or pumpkin seeds for a nutty crunch without the allergens.
7. Storing Cookies with Nuts
Because nuts contain natural oils, they can become rancid over time, so proper storage is important:
✔ Room Temperature: Store in an airtight container for up to 5 days.
✔ Refrigeration: Keeps cookies fresh for up to 2 weeks.
✔ Freezing: Freeze for up to 3 months—just let them thaw at room temperature before eating.
Pro Tip:
If freezing, store nuts separately and mix them into the dough fresh before baking to preserve their crunch.
Final Thoughts: Adding a Nutty Twist to Your Cookies
Adding nuts to your Oatmeal Coconut Chocolate Chip Cookies creates a delightful crunch, enhances the flavor, and makes the cookies even more satisfying. Whether you prefer buttery pecans, crunchy almonds, or rich walnuts, there’s a nut option that will take your cookies to the next level.
Now that you know how to incorporate nuts, it’s time to bake a batch of nutty, chewy, chocolate-filled cookies that everyone will love!
Sugar Alternatives: Healthier Sweeteners for Oatmeal Coconut Chocolate Chip Cookies
If you’re looking to reduce refined sugar in your Oatmeal Coconut Chocolate Chip Cookies, there are plenty of natural and low-glycemic alternatives that will still give you a deliciously sweet and chewy cookie. Whether you’re cutting back on sugar for health reasons, following a low-carb diet, or simply experimenting with different flavors, there are many sugar substitutes that can work well in this recipe.
In this section, we’ll explore the best sugar alternatives, how they affect texture, and tips for swapping them successfully in your cookie dough.
1. Why Use Sugar Alternatives in Cookies?
✔ Lower Glycemic Index – Helps prevent blood sugar spikes.
✔ Fewer Calories – Some natural sweeteners contain fewer calories than refined sugar.
✔ More Nutrients – Options like honey and maple syrup provide vitamins, minerals, and antioxidants.
✔ Different Flavor Profiles – Some alternatives add caramel-like, nutty, or fruity notes.
✔ Supports Special Diets – Ideal for keto, paleo, and low-sugar lifestyles.
Pro Tip:
Different sugar alternatives affect moisture, texture, and spread, so choosing the right one is important to maintain the perfect balance of chewiness and crispiness.
2. Best Sugar Substitutes for Baking Cookies
Here’s a comparison of some of the best sugar alternatives and how they work in cookies:
| Sugar Alternative | Sweetness Level vs. Sugar | Best For | Conversion Ratio |
|---|---|---|---|
| Coconut Sugar | Slightly less sweet | Soft, chewy cookies with a caramel-like flavor | 1:1 |
| Maple Syrup | Slightly sweeter | Moist cookies with a mild maple taste | ¾ cup for 1 cup sugar |
| Honey | Sweeter than sugar | Adds chewiness, but makes cookies softer | ¾ cup for 1 cup sugar |
| Agave Nectar | Sweeter than sugar | Soft cookies with a mild sweetness | ¾ cup for 1 cup sugar |
| Monk Fruit Sweetener | 1:1 with sugar | Low-carb & keto-friendly cookies | 1:1 |
| Stevia (Granulated Blend) | 200x sweeter | Best for low-calorie cookies (use blend, not pure stevia) | ½ cup for 1 cup sugar |
| Date Sugar | Similar to brown sugar | Rich flavor, slightly drier cookies | 1:1 |
| Erythritol (Granulated or Powdered) | 70% as sweet | Low-carb, keto-friendly | 1:1 (adjust for sweetness) |
| Xylitol | Similar to sugar | Keto-friendly, helps retain moisture | 1:1 |
Best Choice for Natural Sweetness:
✔ Coconut sugar or maple syrup for a natural caramel-like taste.
✔ Honey or agave nectar for extra moisture and a chewy texture.
✔ Date sugar for a slight molasses-like depth.
Best Choice for Low-Carb Cookies:
✔ Monk fruit, erythritol, or xylitol for a keto-friendly alternative with no sugar spikes.
Pro Tip:
If using liquid sweeteners (maple syrup, honey, or agave), reduce the amount of other liquids (milk or butter) in the recipe to avoid making the dough too wet.
3. How Sugar Substitutes Affect Texture and Baking
Because sugar plays a key role in cookie structure, swapping it out can change the way your cookies bake. Here’s what to expect with different sugar alternatives:
✔ Coconut Sugar & Date Sugar → Keeps cookies chewy, slightly darker in color.
✔ Honey & Maple Syrup → Makes cookies softer and more moist. Reduce liquids to avoid overly wet dough.
✔ Erythritol & Monk Fruit → Creates a lighter texture but may not caramelize as well as regular sugar.
✔ Stevia → Too much can create a slightly bitter aftertaste, so use a stevia baking blend instead of pure stevia.
Pro Tip:
For chewier cookies, use a mix of half coconut sugar and half honey to balance moisture and structure.
4. Best Sugar-Free Combinations for the Perfect Cookie
To get the best texture and taste, consider using a blend of sugar alternatives instead of relying on just one.
✔ For a Classic Cookie Feel → Use half coconut sugar + half maple syrup for a chewy but structured cookie.
✔ For a Paleo-Friendly Cookie → Use coconut sugar + honey and swap butter for coconut oil.
✔ For a Low-Carb Cookie → Use monk fruit + erythritol blend to mimic sugar’s texture.
✔ For a No-Added Sugar Cookie → Use stevia blend + mashed bananas for natural sweetness.
Pro Tip:
If using monk fruit or erythritol, let cookies cool completely before eating—these sweeteners firm up as they cool, giving the cookies a better texture.
5. Adjusting the Recipe for Sugar Alternatives
Since different sugar substitutes behave differently, here are some adjustments to make your cookies turn out great:
✔ For Liquid Sweeteners (Maple Syrup, Honey, Agave):
- Reduce liquid ingredients (milk, butter, or eggs) by 1-2 tablespoons.
- Lower the oven temperature by 10-15°F to prevent over-browning.
- Add 1-2 tablespoons of flour to maintain structure.
✔ For Sugar Alcohols (Erythritol, Xylitol, Monk Fruit):
- Use a 1:1 sugar replacement blend for best results.
- Increase baking soda slightly to help with spread.
- Let cookies cool before handling—sugar alcohols set after cooling.
✔ For Coconut Sugar & Date Sugar:
- Works as a direct replacement for regular sugar.
- Produces a chewier texture with a deep caramel taste.
- Cookies may bake slightly darker due to natural molasses content.
6. Storing Cookies Made with Sugar Alternatives
Since cookies made with honey, maple syrup, or erythritol tend to absorb moisture differently, proper storage keeps them fresh longer.
✔ Room Temperature (Airtight Container) → Lasts 3-4 days (best for coconut sugar cookies).
✔ Refrigeration → Keeps moist cookies fresher for up to 2 weeks (good for honey-based cookies).
✔ Freezing → Works well for sugar-free cookies (erythritol, monk fruit). Store for up to 3 months.
Pro Tip:
If cookies become too soft after storage, bake them at 300°F for 3-5 minutes to refresh their texture.
Final Thoughts: Enjoying Naturally Sweetened Cookies
Using sugar alternatives in Oatmeal Coconut Chocolate Chip Cookies allows you to customize the sweetness while keeping the texture and flavor delicious. Whether you go for coconut sugar for a caramel touch, honey for chewiness, or monk fruit for a low-carb treat, there are plenty of ways to enjoy these cookies with less refined sugar.
Now that you know how to swap and mix sweeteners, it’s time to bake a batch of naturally sweetened cookies that fit your taste and lifestyle!